Hurricane Prep Update

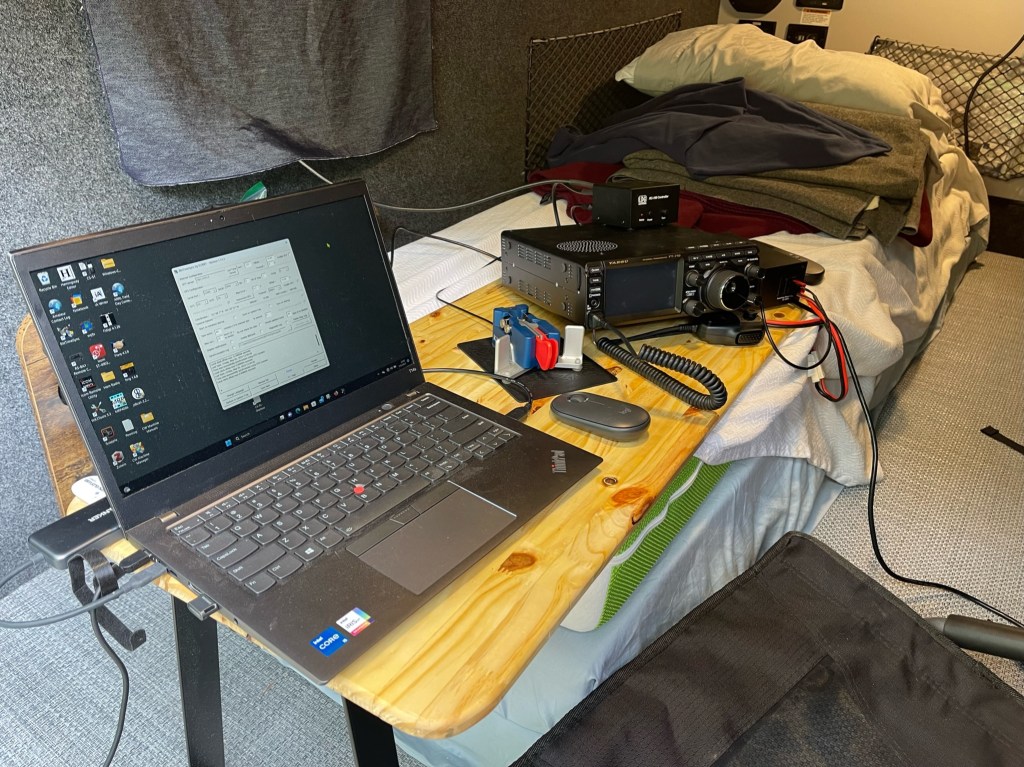
Update. I got the cupholder for the desk. It’s important to have because I often use tall coffee cups or soda bottles in the field. They can tip over easily and make a mess. The cup holder prevents that. Here is a view of the table and chair inside the truck bed.

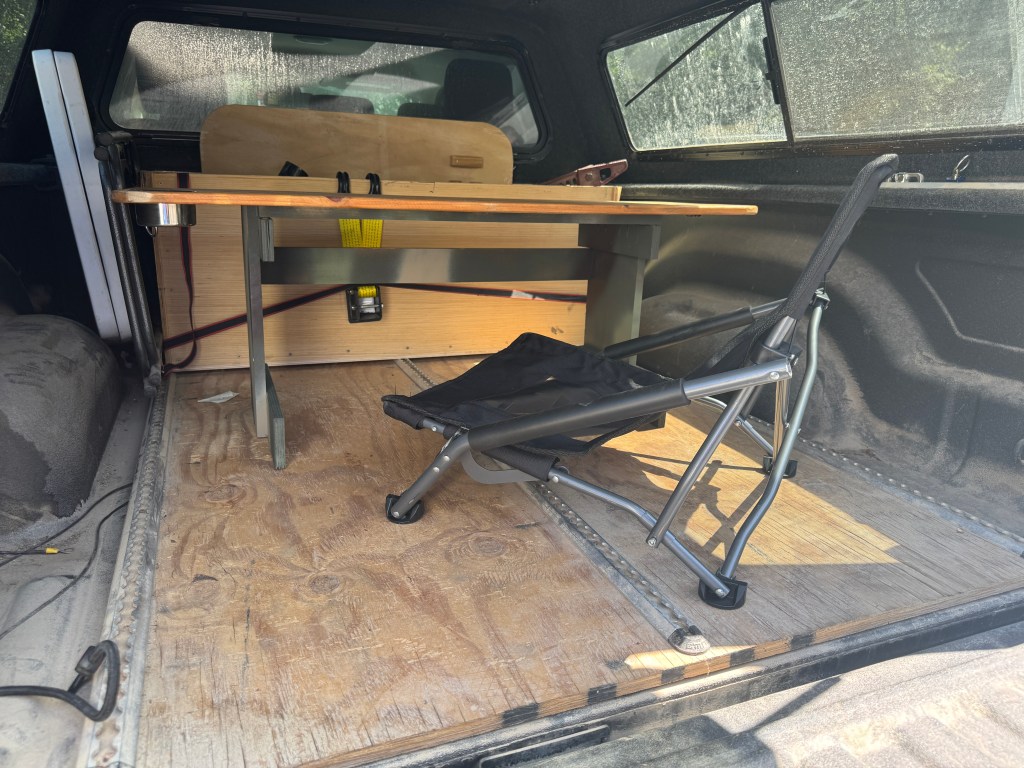
I have a couple of L-track cargo straps on order that will tie the desk to the bed floor. This is a pretty comfortable setup when I am not in the camper.

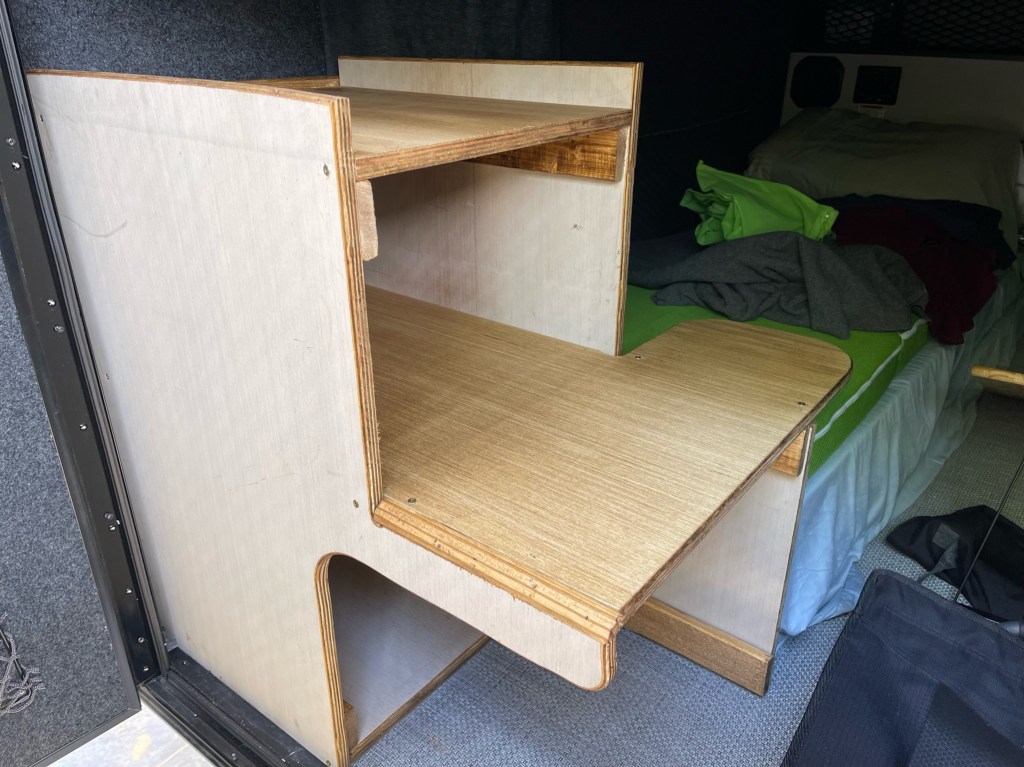
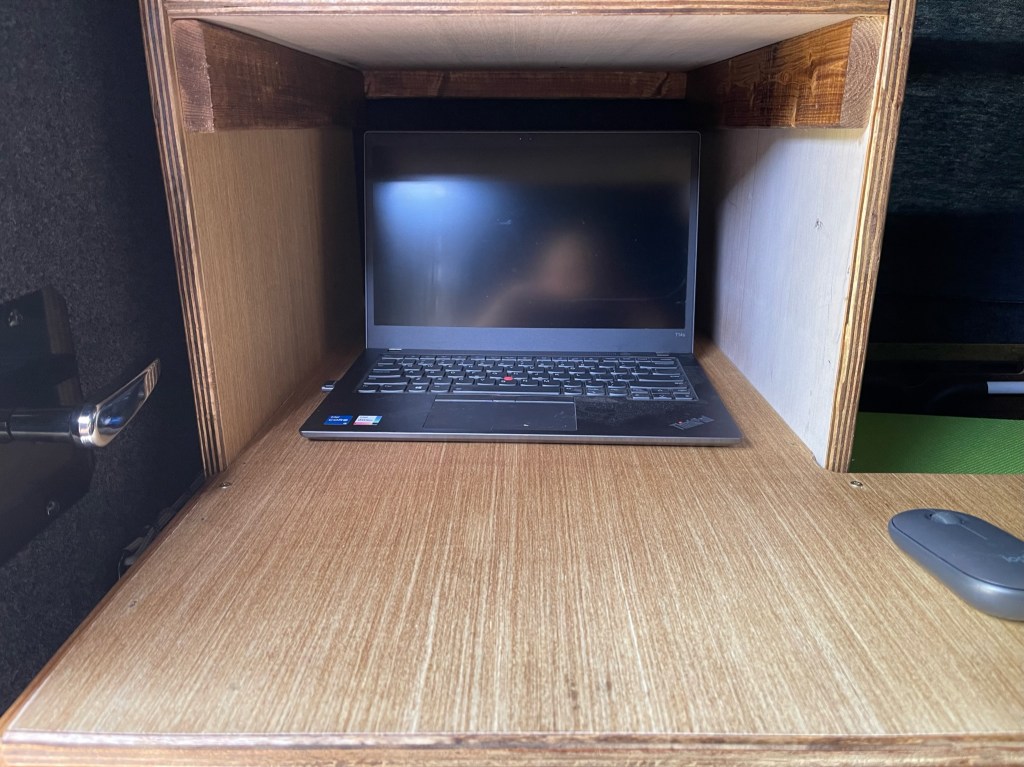
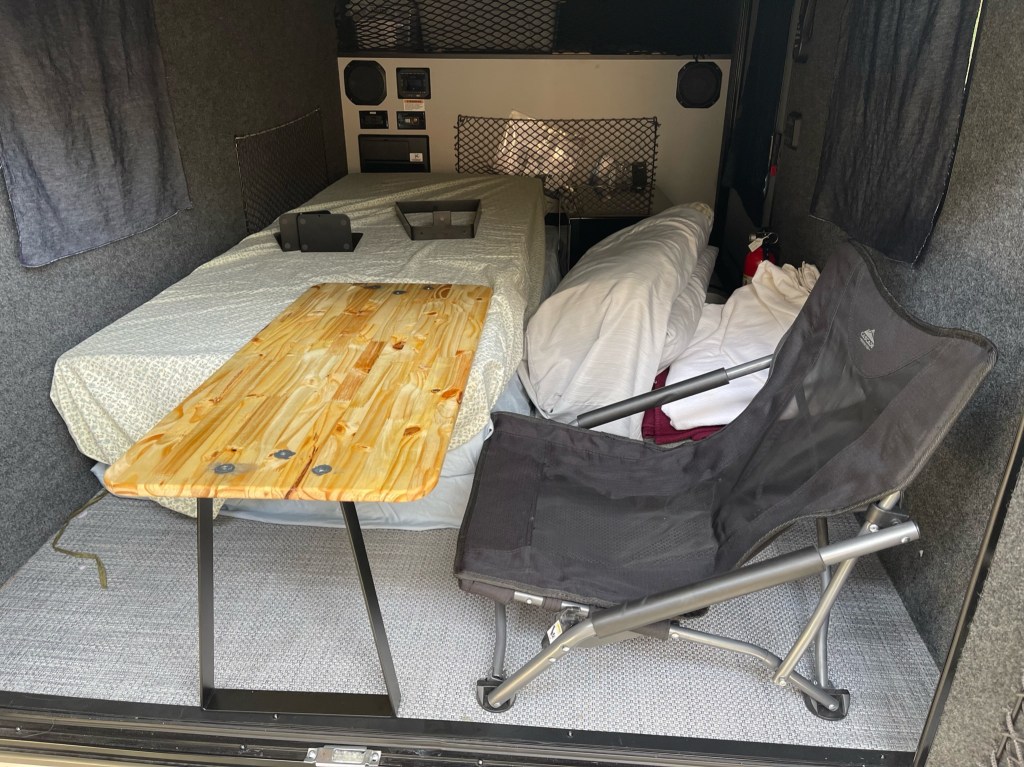
Speaking of the camper, the table fits nicely in there too. I will be taking the folding table I was using out and replacing it with this. The other table was too large. You will see the table in action on my next camping trip.

I received all of the pieces for the Chameleon TDL (Tactical Delta Loop). I plan on using it my next trip. What is nice about the TDL is it has a lower vertical height and will be safe to use around power lines.

Here in Georgia it can get pretty warm. At the time of this writing Fall is approaching and temperatures are moderating. I added a battery operated fan to my kit. I recently discovered Harbor Freight Hercules brand battery power tools. I needed a small trim router and decided to try Hercules. The router was $69 vs $219 (Dewalt at Home Depot). Since I no longer work out of a tool box, I felt the Hercules brand would have me covered. I really like that little router. I decided to try their fan at $25.

It runs off of 120 VAC and 20V Hercules batteries.

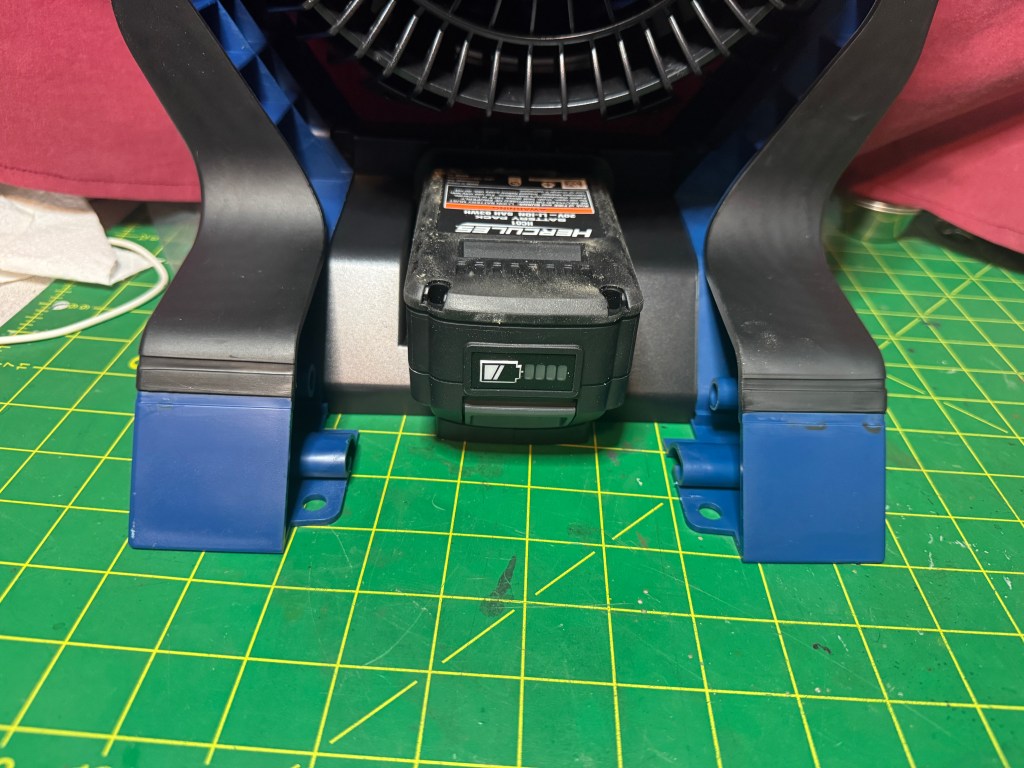
The Dewalt version runs about $125. I can buy 5 of these for one of Dewalt. The fan comes with a 5 year warranty and the batteries – 3 year. From what the folks at the store tell me, it’s no questions asked, any Harbor Freight Store, anywhere. I turned the fan on and it moves air pretty good. Certainly enough for inside the camper or the truck bed.

So far this year, the hurricane season has been quiet and we have only had glancing blows. I check my gear on a regular basis. I have been doing this enough that my annual improvements are incremental. I use my camping trips to check gear and my skill set. I feel that if a call came, I could be ready to go in about 4 hrs give or take.

For those that practice FunComm, good on you and for those that practice Fun, have more of it. Let’s hope for a quiet remainder of the season and that FunComm was only for fun this year. 73 de Scott

EmComm and FunComm

As I have said earlier, I practice EmComm to prepare for natural or man-made disasters when normal means of communication fail. FunComm is pretty self-explanatory, it’s things I do for fun. Fun things may include POTA, Field Days (winter and summer), supporting bike rides, and other club activities. I always like it when I can blend the two together. When I participate in POTA either for a weekend camp-out or a day activation, isn’t it kind of a practice run for an EmComm event? I use the same antennas and most of the time the same radios. My equipment gets a good exercise and I learn more about how they operate under different conditions.

Recently, I bought a new camper, the old one wasn’t working well for the things I like to do. The new camper is so much better but not without its growing pains. I had to find a better way to use the radios inside the camper. To save words, here is a picture of what I have been using. It works okay but because it uses part of the bed, it made sleeping uncomfortable. After this last camp out when I woke up all sore and twisted feeling, I decided it was time to find a better way.

The new desk stacks the radio and power supply above the computer. This reduces the overhang on the mattress. The desk area for the paddle does overhang a little but sliding the desk to the right when not in use alleviates that.

The other thing I did was make a cut-out on the door side to make it easier to get my legs out. This works really well and does not impair the stability of the desk.

The last thing is the main desk is 30″ deep and the shelf is 20″ deep. This leaves plenty of room for the radios and enough room to slide the computer under the shelf if I need the desk space for something else.

Sitting behind the desk, the radio controls were easy to get to.

The desk is made from one sheet of 3/4″ plywood with (2) 1×3″x8″ boards. The stain was a can of Minwax I had laying around, I think it was Golden Oak.

Construction was simple, using hand tools found in most garages. It is not a piece of art, I don’t have the time. My philosophy is that “Perfection is the enemy of good enough”. The desk is glued, screwed, and nailed without any fancy joinery. If I waited until I had time to do a better job, the wood would still be at Lowe s.

I tried it out in the driveway and everything works and feels good. The radio is easy to get to and the computer is a little high but not uncomfortable. With the cut-out, it is easy to get in and out of the camper. The next test will be at the end of the month during my next camping trip. Hope to hear you out there. 73 – Scott

Hints and Kinks for the New Camper

The Radio Flyer is an excellent camper for me. I love the compactness as well as the space utilization. One of my jobs in the U.S. Army was as a crew chief on a Blackhawk Helicopter. It has a similar vibe. the other thing I like about it, is I only lose 0.5 to 1.5 miles per gallon when I tow it.

The first weekend in it was great. I learned a lot about the camper and worked on how best to use the space. Winter is upon us so operating the radios outside may not always be doable. Years of abuse working in the trades have left me with arthritis in my hands, making CW difficult when it is cold. In my last post, I tried a couple of different ways to operate inside the camper. while none were perfect, I got a couple of good ideas. This is what I ended up with.

I can sit comfortably in that chair for hours and there is enough room for my legs. The table is 16″ wide and 3′ long. It can easily hold my laptop, CW key, and full-sized radio. Not shown, but on the right, just behind the chair are 2-120v outlets. If I need to get up, I slide the table over to the wall on the left. I believe I can also sleep with it there.

Construction was simple. I have about $50 invested, $30 was for the legs. The table-top was a project panel from Lowes that cost less than $11. Everything else I had on hand. I cut a radius on the corners and routed the edges for comfort. To secure the legs to the table I used some Tee-nuts left over from a prior project.

The panel is only 5/8″ thick. The tees are about 1/2″ tall so the recess was rather shallow. After I put them in, I secured them with JB Weld. Not pretty, but adequate for the job and good enough for proof of concept. If I decide to redo this, I would use a thicker board and a Forstner Bit for the recess. That would have upped the cost, more than I thought appropriate for a first go.

I did both ends as I have two legs. that way I can also set it up as a table proper. I sanded it a little, put on a coat of stain, and a spray-on polyurethane clear coat. Nothing fancy. To store the table when I am not using it I put it between the bed and the camper wall.

The other kink has to do with my microwave. It sits nicely on the shelf; however, during the first tow, I went over some fair-sized bumps, which launched the microwave onto the floor. The netting that came with the camper did not hold it well enough. My cure was simple, I did two things. First I turned the hook that holds the net around to where the hook faces the microwave. This should increase the holding power. The second thing I did was I bought some metal bookends and slipped them under the microwave and behind the hooks. The height of the bookends and the weight of the microwave should keep it on the shelf.

The next flight of the Radio Flyer will be in a couple of weeks. Hopefully, everything will work as advertised. 73 — Scott