This weekend I went back up to Black Rock Mtn State park to finish my kilo. My last trip was cut short by a power outage on the mountain. This time I brought a battery which fortunately, I didn’t need. During this trip, I brought some new items with me. A new radio, a new antenna and a new fan.
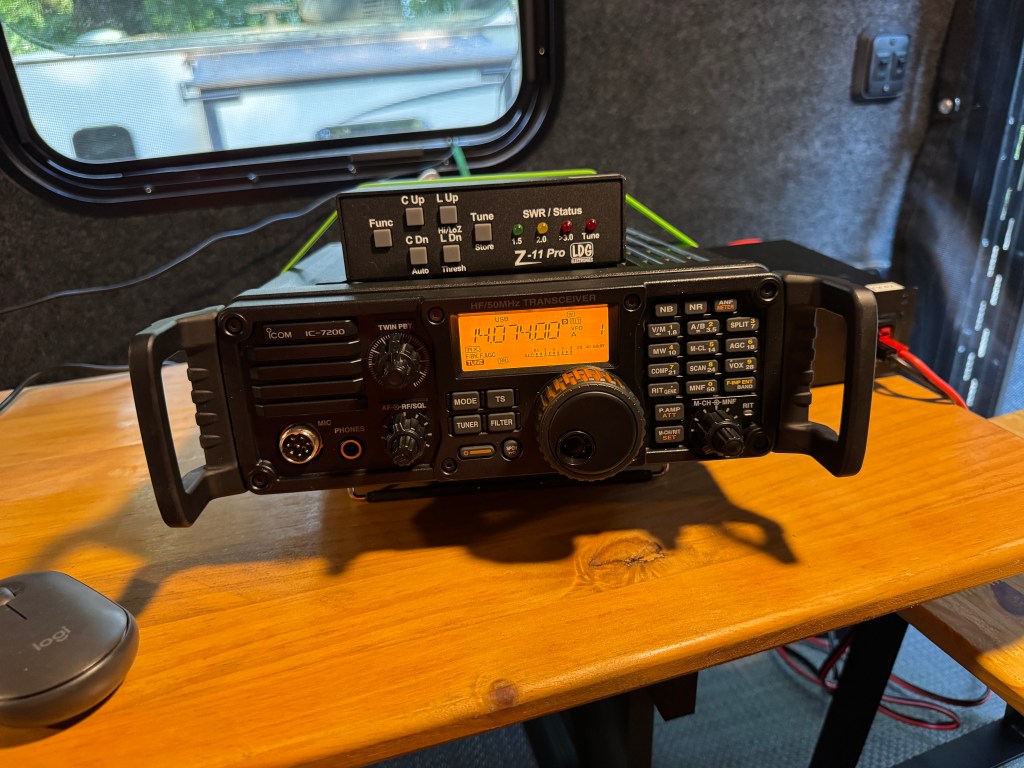
The radio. I did some trading and ended up with an IC-7200. I always wanted one of these. I am a Veteran and I like its military vibe. The radio worked well.
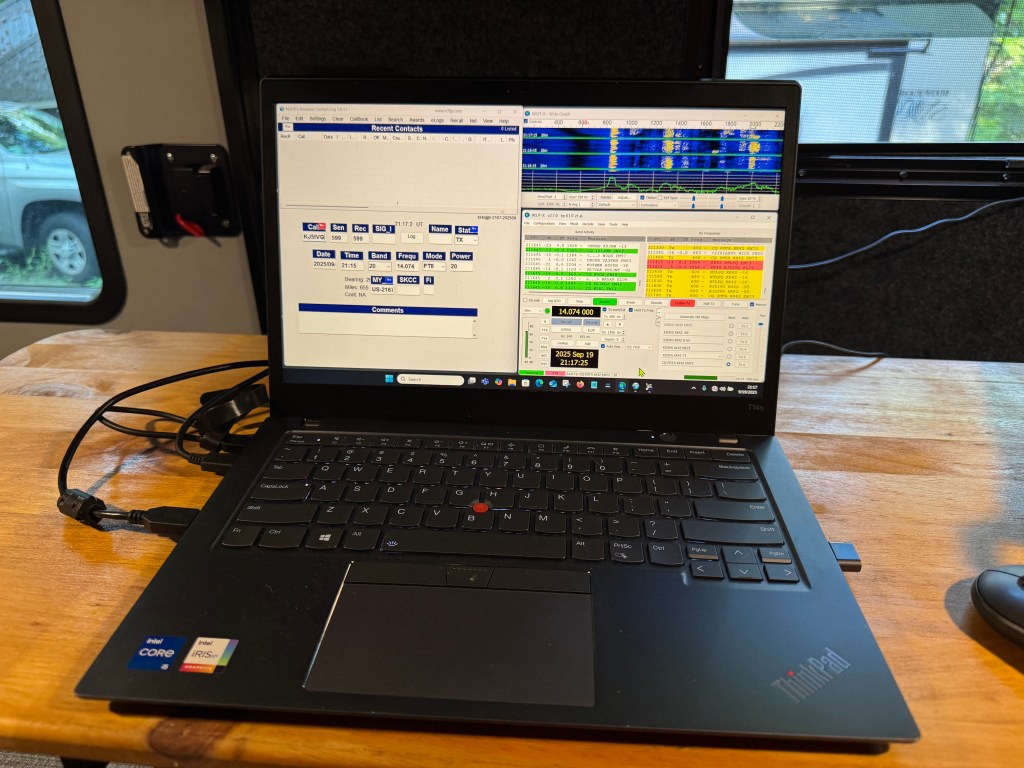
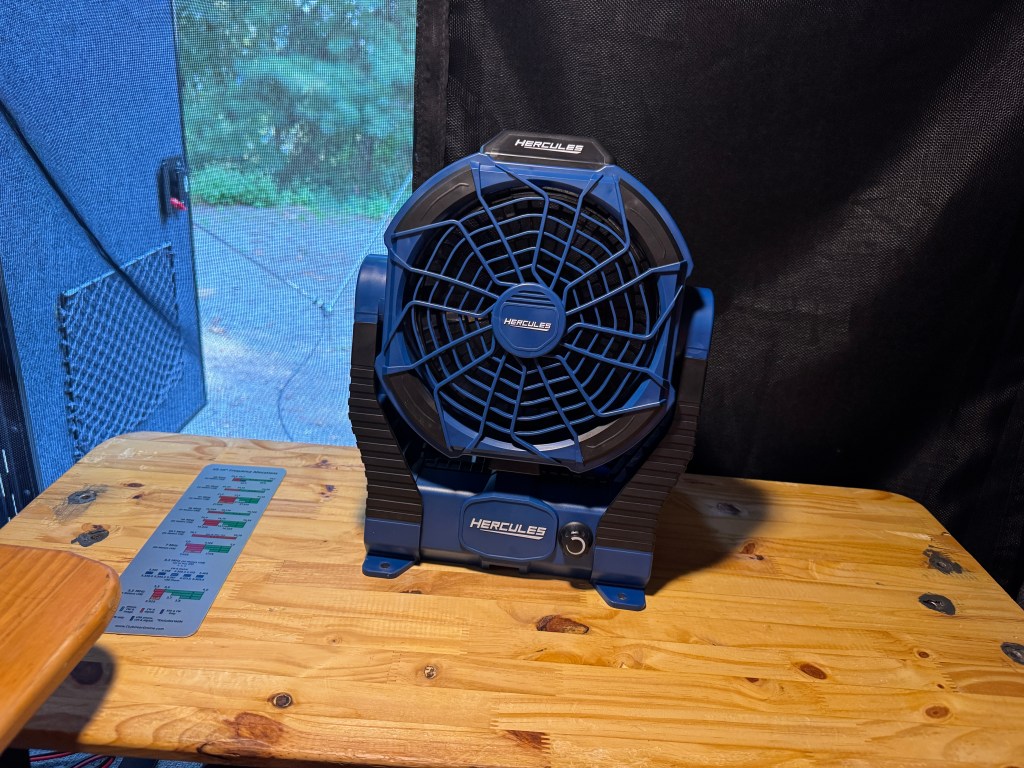
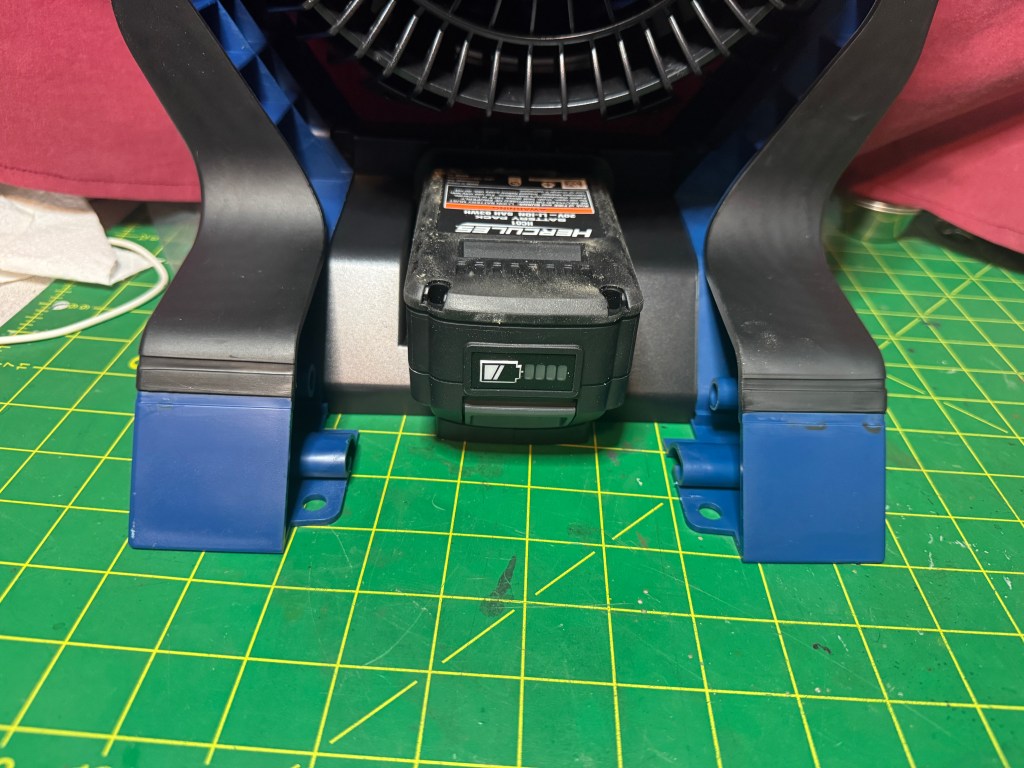
The weekend was an FT8 weekend as the bands were not in good shape. I did notice that the radio got warn running FT8 at 20 watts. It felt about the same as an IC-7000 did back in the day. The radio performed well and no hiccups were noted. Also new was my battery powered Hercules fan.
I used it to cool the camper without running the A/C and it had plenty of volume. I turned it slightly toward the IC-7200 to help keep it cool. It ran for over 8 hours on the 5 amp/hr battery and would probably go much longer.
My antenna for this trip was a Chameleon TDL (tactical delta loop). I had some of the pieces already and only had to add another whip, a hub, and wire that goes between the whips. I used the ground spike to to secure the antenna to the ground. It made it easily to turn the antenna. Above 10 MHz the antenna is slightly directional and I found this to be true. Pointing the antenna east-northeast got me further into Europe than I normally get with my verticals. In the evening I pointed the antenna slightly northwest and you can see in the QSOMap, the antenna shows a little directivity. All in all, I was pleased with the antenna. I sets up really fast and there are no wires in the trees. My campsite had power lines nearby and the loop was well below them. Putting up and taking down the antenna was done by extending and retracting the whips so there was no danger in contacting the overhead wires. Through the whole activation, I only ran 20 watts and I felt the antenna helped in that success.
I made 200 contacts which covered 33 States and 10 countries. Furthest State being California and the furthest country being New Macedonia. Considering the band conditions, I was pleased with the results.
It was a nice trip. the weather was great, I did not have to run the A/C or the heater. I finished up Kilo #7 but I will return to this park as it is one of my favorites. This may be one of my last campouts of the season, I have a lot of work to do around the home and property. 73 de Scott
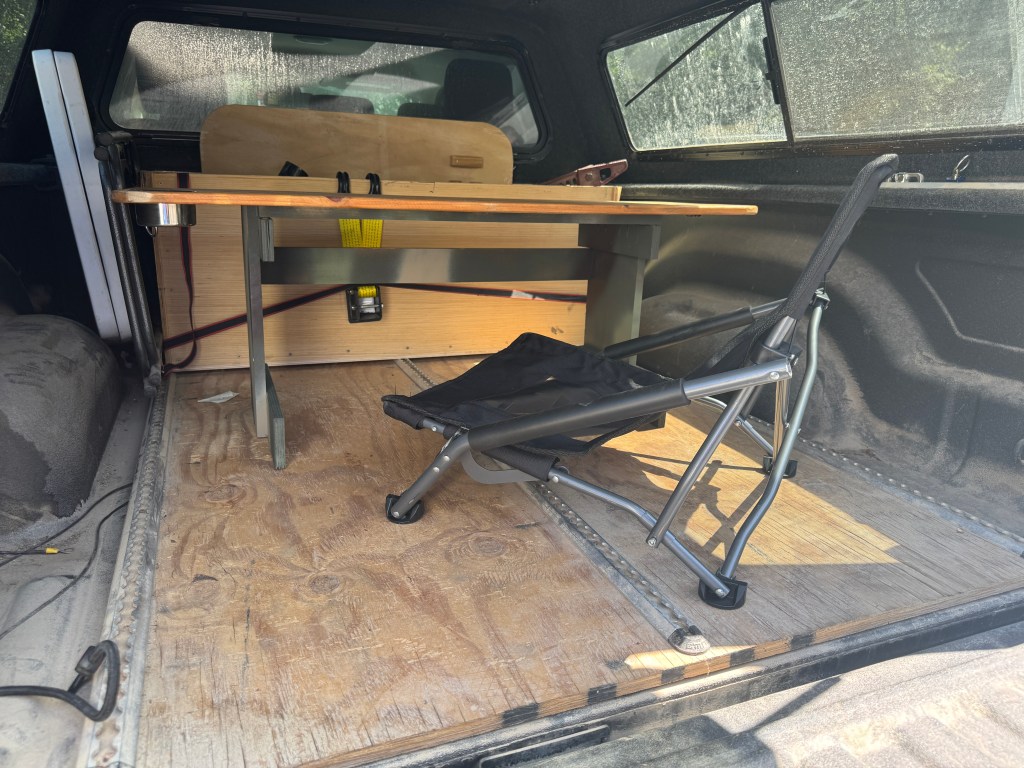
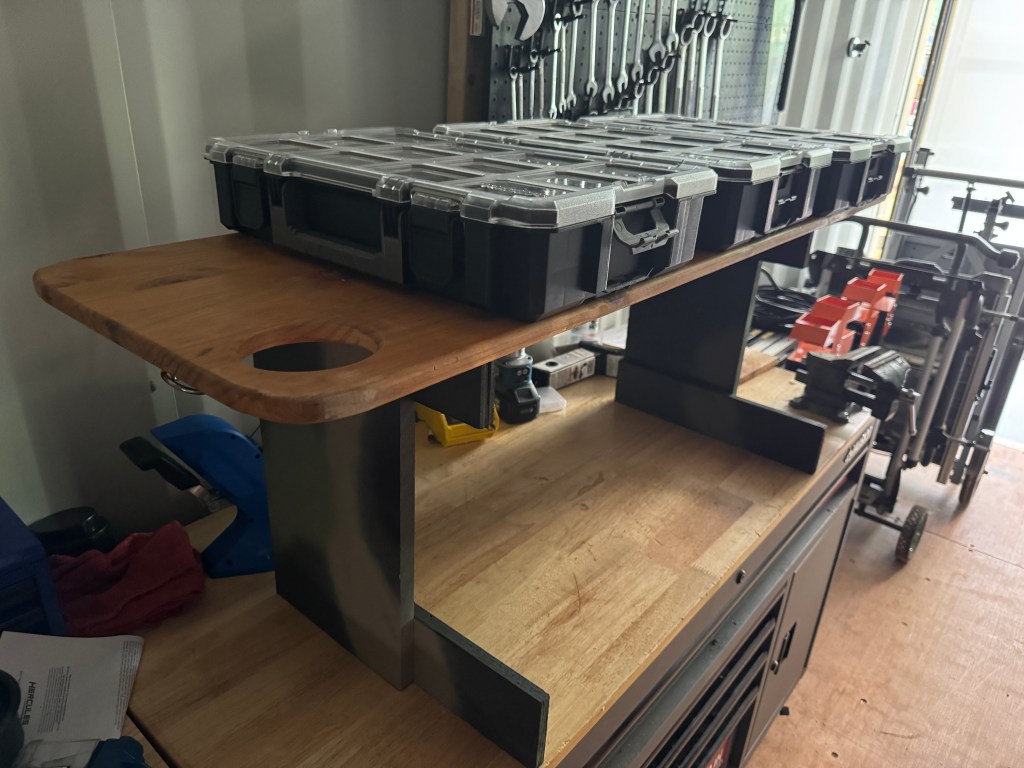
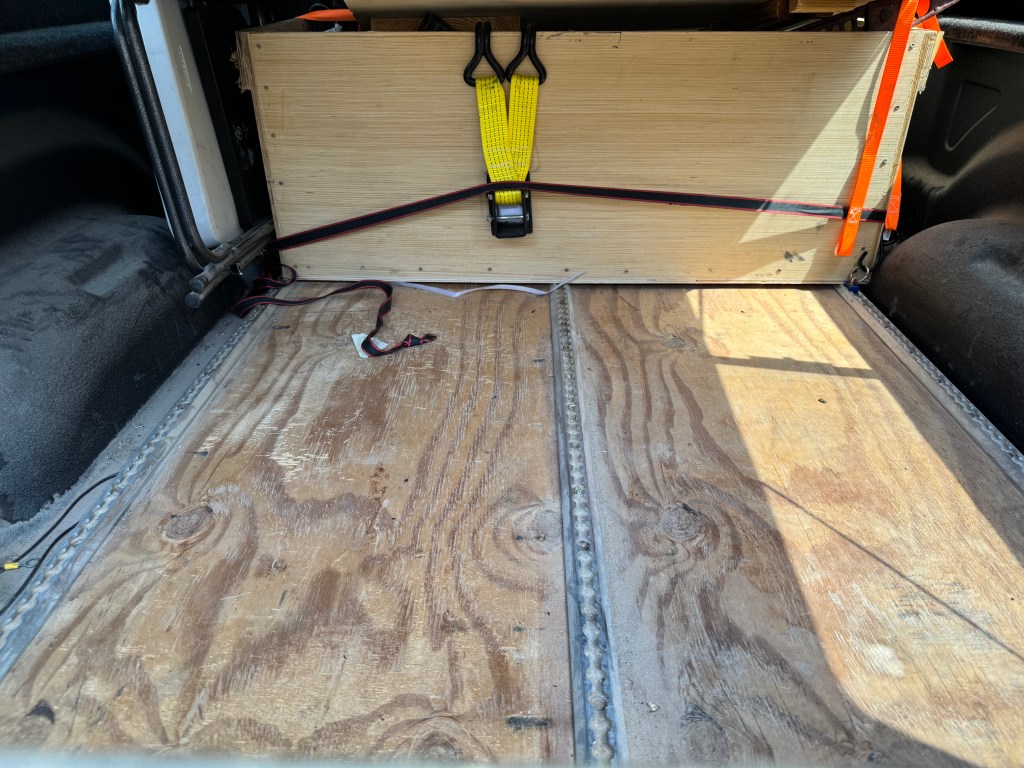
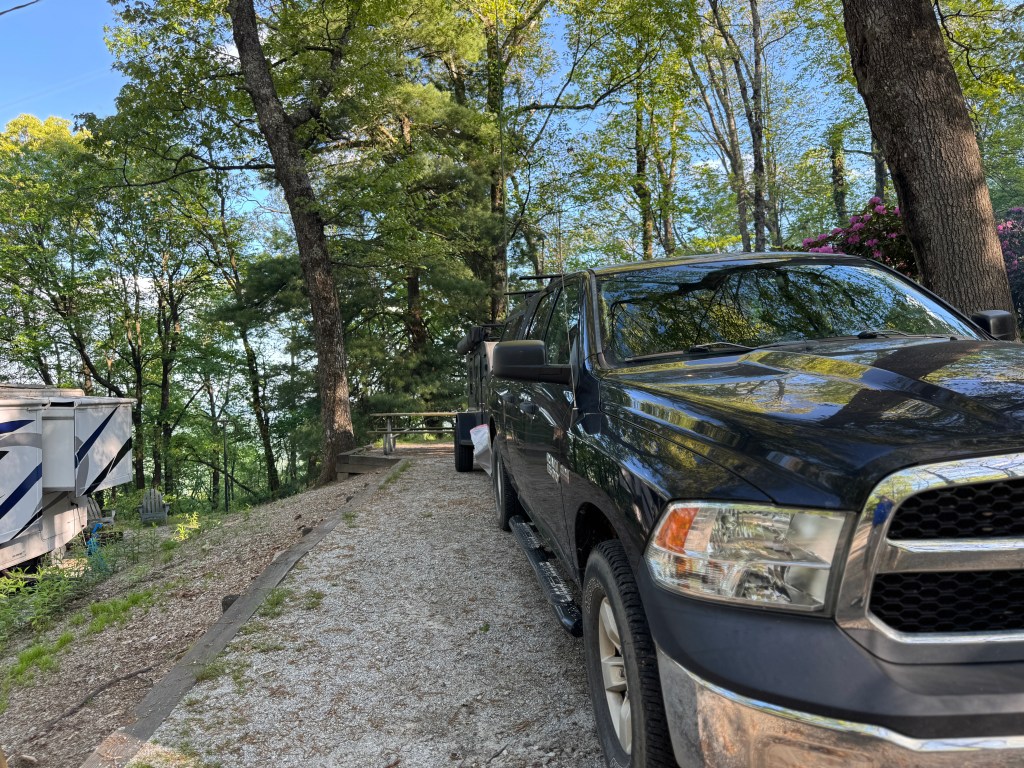
Update. I got the cupholder for the desk. It’s important to have because I often use tall coffee cups or soda bottles in the field. They can tip over easily and make a mess. The cup holder prevents that. Here is a view of the table and chair inside the truck bed.
I have a couple of L-track cargo straps on order that will tie the desk to the bed floor. This is a pretty comfortable setup when I am not in the camper.
Speaking of the camper, the table fits nicely in there too. I will be taking the folding table I was using out and replacing it with this. The other table was too large. You will see the table in action on my next camping trip.
I received all of the pieces for the Chameleon TDL (Tactical Delta Loop). I plan on using it my next trip. What is nice about the TDL is it has a lower vertical height and will be safe to use around power lines.
Here in Georgia it can get pretty warm. At the time of this writing Fall is approaching and temperatures are moderating. I added a battery operated fan to my kit. I recently discovered Harbor Freight Hercules brand battery power tools. I needed a small trim router and decided to try Hercules. The router was $69 vs $219 (Dewalt at Home Depot). Since I no longer work out of a tool box, I felt the Hercules brand would have me covered. I really like that little router. I decided to try their fan at $25.
It runs off of 120 VAC and 20V Hercules batteries.
The Dewalt version runs about $125. I can buy 5 of these for one of Dewalt. The fan comes with a 5 year warranty and the batteries – 3 year. From what the folks at the store tell me, it’s no questions asked, any Harbor Freight Store, anywhere. I turned the fan on and it moves air pretty good. Certainly enough for inside the camper or the truck bed.
So far this year, the hurricane season has been quiet and we have only had glancing blows. I check my gear on a regular basis. I have been doing this enough that my annual improvements are incremental. I use my camping trips to check gear and my skill set. I feel that if a call came, I could be ready to go in about 4 hrs give or take.
For those that practice FunComm, good on you and for those that practice Fun, have more of it. Let’s hope for a quiet remainder of the season and that FunComm was only for fun this year. 73 de Scott
About this time of year, I get a little antsy. This is the peak of the hurricane season. At this time, I tend to go over my gear and see of I can improve it. I practice Kaizen. It is the Japanese process of small continuous improvement. I learned this from my days in manufacturing. Each year I look at my gear and see what I can do to make it better.
My first improvement is with antennas. I have been a Chameleon Antenna user for years and I have been collecting bits and bobs as needed to make the antennas I think will do me the most good. This year I built their Tactical Delta Loop (CHA TDL). I already had their Micro Transformer and 1 – 17′ Stainless Steel Whip. All I needed was another 17′ Stainless Steel Whip and their Hub Kit. Sometimes when you deploy or even do a POTA activation, there my not be enough clearance (horizontal or vertical) to put the best antenna. The TDL gives me a good sized, free standing antenna that does not take up a lot of space. It is slightly directional giving me a little gain when operating at low power.
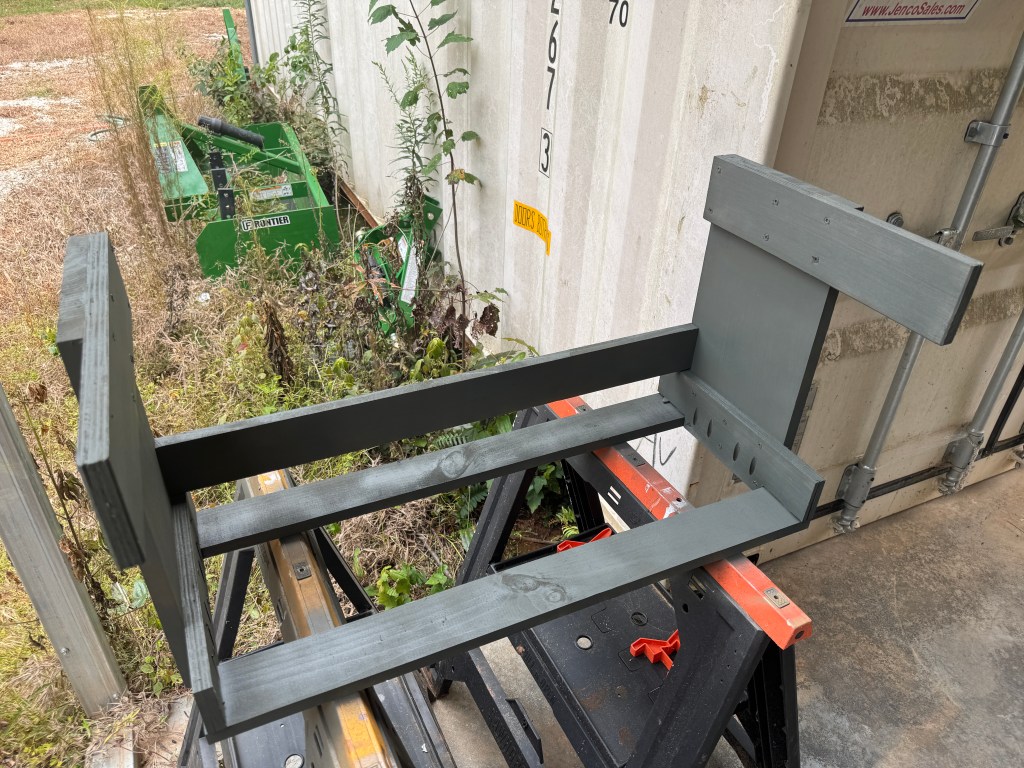
My next project was building a desk to fit in the back of my truck. I often activate parks for POTA alone and when nature calls, I do not like to leave my expensive radios on a park bench. I sketched a plan on a piece of paper and went to the shed to see what wood I had. I had enough scraps to build what I wanted to include a desktop I used in the cab of the truck. Part of the project was to try a new to me technology – pocket hole joinery. I stopped at my local Home Depot and picked up a Kreg jig. My first step was to cut the pieces to length and then assemble it.
I let it sit for a couple of hours and then took it out for the paint job. Bcause of the dissimilar woods I went with paint instead of stain.
I got creative and decided to camouflage it a little. After I let the paint dry I attached the top.
The hole in the foreground is for a coffee cup holder. I didn’t like the plastic ones I had so a quick look on Amazon netted me a stainless steel one. When operating portable it is very easy to knock over your drink onto your log, computer, or radio. Ask me how I know.
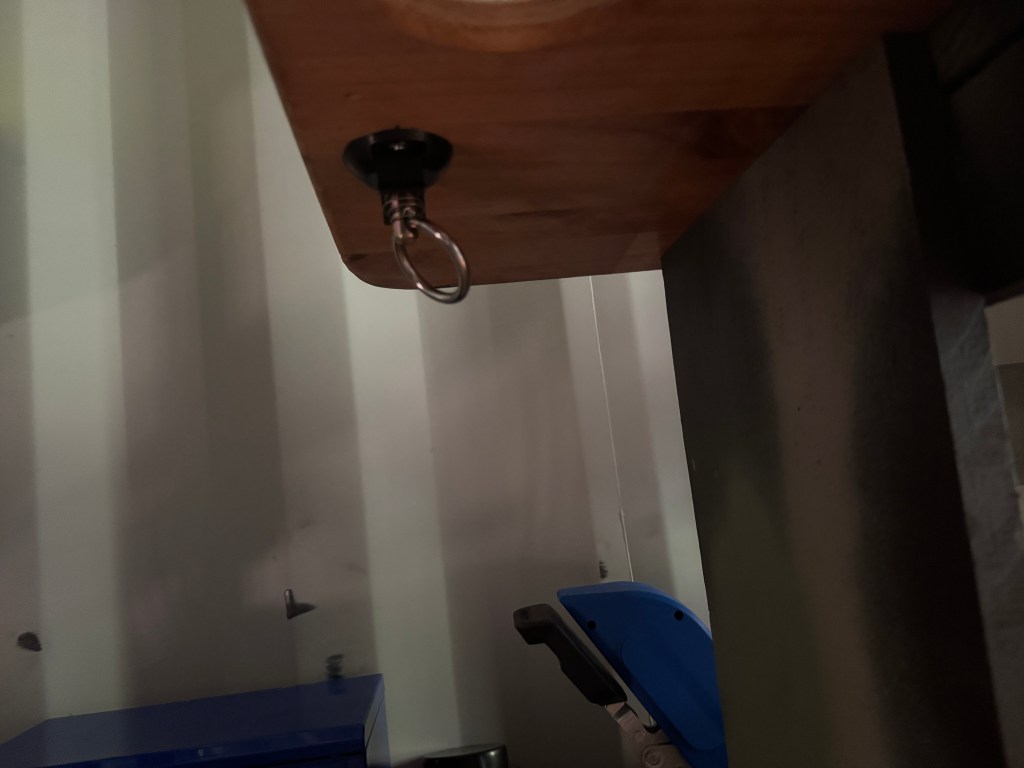
One last little bit is I added L-track connectors to the bottom of the desktop on each end.
I have L-track on my truck bed and using cargo straps with L-track connectors, it is easy for me to cinch the desk down to keep it from moving in the bed.
I have a low camping seat that easily allows me to slide under the table. The bottom of the desk top is approx. 17″ off of the ground. There is plenty of room for my legs. Now I can go to a park and all I need to do to secure my radios is flip up the tailgate and lock the camper top. The windows on the top slide open and have bug screens. I just have to add a small fan for the hot days, but for now, fall is approaching and cooler days are ahead. 73- de Scott
My Ic-7100 rides with me in the truck. I have it hooked up to an AH-730 and a 102″ whip. I also have a 60′ wire with insulators and an alligator clip on one end. I can attach this to the whip and make a very effective NVIS/medium range antenna.
I really like the 7100 except that I was having RFI problems. I read where the cable between the control head and the radio was not shielded well so I tried some CAT8 ethernet cable. It worked great once and I couldn’t get it to work again. so I switched to plan B. I added some ferrite cores to both ends of the cable and that solved it up to 75 watts. I still get a little RFI interference at 100 watts but I rarely operate above 50 watts mobile/portable so I am good to go.
The other thing I wanted to do was make the radio easier to detach from its tray. I have some desks that I can put over the center console for laptops, notebooks, etc, but they cover up the radio. So off to TSC for some hardware. This is what I came up with.
The knob fits under the tray and makes it easier to unscrew the control head from the tray. I have about 5′ of cable to move the head around, enough for what I want to do. Installed, it looks like this.
I am glad I got the RFI problem sorted and made the head easier to remove. I also have another cable so I can now get the control head outside of the truck and on a folding table if that’s what I want to do.
Marching to the beat of a different drummer.
I know I do a few things differently. Many POTA activators use small QRP radios or compact radios like the FT-891 when they activate. That’s not me. I have always had a foot in the EmComm world and I enjoy working weak signals. There’s an art to catching the weak ones and it takes a good ear. It also takes skill in operating your radio. I like to have the controls I use most easy to get at like I find on radios like the IC-7300, and TS-590sg. I also like to operate low power, not QRP. I mostly find myself in the 20-35 watt range. Even at home, I am usually at 50 watts. Low power gives me enough oomph to make the contact and still makes it a challenge. Through most of my amateur radio career, I have been involved in EmComm. I use FunComm events like POTA to keep my EmComm skills sharp and my radios and antennas in good working order. Not using your EmComm gear until the “Big One” hits often brings unwelcome surprises. I know I am getting a little long in the tooth for some EmComm but old habits die hard. 73 de Scott
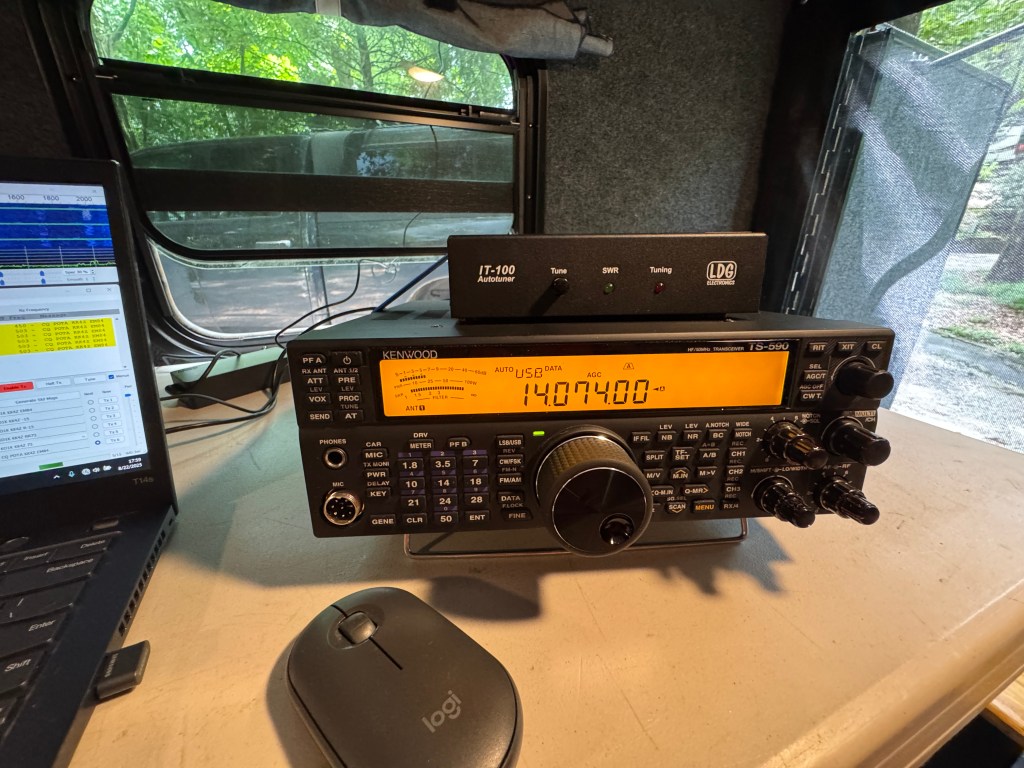
Last weekend I finished up a 3-day, 1,800 mile, 7-state POTA Rove that included a radio trade. Out with the FTX1 and in with a TS-590sg. After setting up the 590, I brought it with me to Black Rock Mountain State Park to try some FT8 and if the band conditions permit, a little CW.
I arrived at the Park Friday afternoon. I have done this enough times that I am setup and ready to go within 30 minutes. This campsite had some challenges.It was the smallest campsite I ever used. I had space for the trailer and I had to park my truck in the picnic area. I also had overhead power lines so I had to use a shorter antenna. The weather was cool for a change and I didn’t have to run my A/C.
Setup was a Chameleon Micro Hybrid transformer with a 12’ whip and about a 20’ counterpoise. The radio was my new-to-me Kenwood TS-590sg. This was the radio’s maiden voyage and I really liked it. It performed well. One of the main reasons I like running big radios at low power is more of the controls are readily available. Most everything in the TS-590sg is either a push button or a twist of a knob away. Having a high performance receiver isn’t any good if you can’t get to the controls.
Band conditions were poor. The first night I only made 88 FT-8 contacts and they were a struggle. At times the band would “white-out”, high noise and only white snow on the waterfall. At the better times QSB or fading was a constant up and down. I would watch S7-9 signals drop to nothing during a QSO. Saturday afternoon brought a power failure at the park. Yep, right during mid QSO. The power was still out at 1800 hrs, so I had a decision to make – should I stay, or should I go. As you get older one of the things that goes, is your night vision. If I was going to leave it had to be soon, so I could still do most of my driving during daylight/evening hours. I decided to go. Since I have a lot of practice setting up and tearing down. I was packed up in less than 30 minutes. As I was pulling out of the park, the power returned. Better safe than sorry.
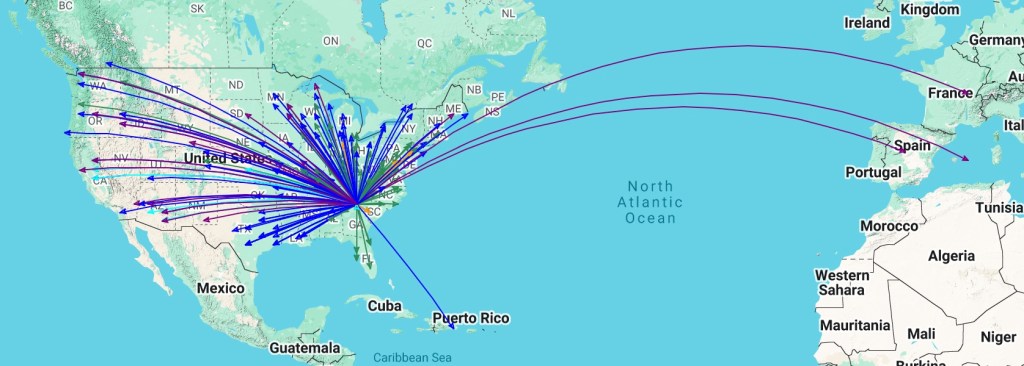
I ended up with 233 contacts, 88 short of my kilo for that park. I will plan another trip in the fall to finish. I am real happy with the TS-590sg. I opened it up and found the MARS mod already done and the TXCO installed. The radio performed well and I ran it mostly at 20 watts. As you can see in the QSO map, Most of my contacts were CONUS. Kenwoods and Icoms have the best ergonomics. I feel the layouts were designed by people who use their radios; that ergonomics were a primary concern and not an afterthought.
Screenshot
I also decided to trade off the FT-710 and ended up with a pristine IC-7200. I always wanted one but the stars never aligned — until now. I no longer have any Yaesu radios in the stable and probably won’t have any more. Why? A couple of reasons. I prefer the ergonomics of the Icoms and the Kenwoods. Everything I need is right there on the front panel. Easy, to see — Easy to use. I have owned a FTDX10, FT-710, and a FTX1, along with an Icom IC-7610, IC-7300, and a Kenwood TS-890s. I can tell you that whatever I hear on one radio, I can hear on the other. There’s two reasons for this. One is knowing where the controls are and two is knowing how to use them. There is a third factor the CSP unit, that’s Cerebral Signal Processing Unit. Half of the battle is using the CSP to process faint signals. After 30 years, mine is pretty good.
The Yaesu radios, are not bad radios, they are not my cup of tea. I can squeeze more horsepower out of the Icoms and the Kenwoods. I am sure there are those who can say the same about Yaesus. I at least crossed the fence and tried them but in the end my preference is not Yaesu. YMMV.
Other happenings. I rearranged my Go Box. My TS-590sg will not fit in it like my other radios so I got an Apache case for it from Harbor Freight and moved some antenna stuff into the Go Box. So now all my radios travel in a separate case and my Go Box has become universal. Everything I need to run any of my field radios is in the Go Box. These days I do more FunComm than EmComm, but I am always prepared to do either. I load the same stuff and off I go. I’ve had a busy summer and the honey-do list is growing, there is lots to do around the ranch so this may be one of the last trips for a while. I do most of my outdoor work from Fall to Spring to avoid working in the southeast hot, humid summers and the accompanying chiggers and ticks. That’s all for now, take care and 73 de Scott
Road Trip! I love the sound of that. I am taking an impromptu road trip north and turning it into a POTA Rove. I put my FTX1 up for trade on QTH.com and very quickly got a good trade offer for a Kenwood TS-590sg. I have always wanted one of those. A nice simple radio that is robust and easy to operate. I am going to add it to my field radio collection.
Some of you know I have a penchant for operating big radios at low power. I don’t have to worry about overheating and I like that the controls I use most are easy to get to. Most of the time my field work is either in my micro camper or at a nearby park picnic table. Weight is not an issue. I normally operate at about 20 watts. Sometimes as high as 30-35 depending on band conditions. I don’t need more than that.
My adventure starts Friday afternoon as I head towards Indiana. I’ll stop somewhere for the night around dark and then pick it up the next day. I plan on stopping at a park in Ohio and then a park in Indiana to add those two to my activation list. Michigan, another needed State is nearby and I hope to add that one to the list. From there I will generally head east and see what mischief I can get into.
Gear for the trip was my IC-7300 and LDG tuner. The antenna was a Chameleon 17’ stainless steel whip and a Chameleon CHA Hybrid Micro Balun sitting on top of a carbon fiber tripod. Counterpoise was a Chameleon wire with about 20-22’ used. Since this was a shoot and scoot trip I used FT8 with my Lenovo T14 Thinkpad. I brought a 100 amp/hr LiPo battery for the radio with a Bioenno BPP-160 for the laptop. I ran the radio from the backseat and the laptop on the center console from the drivers seat. Setup and teardown only took a few minutes. I collapsed the antenna and stuck it in the back seat when I was done. Slam, Bam, Thankyou Ma’am.
Friday night I stopped in Lexington KY, for the night and I was on the road by 6 AM the next morning. My fist stop was Lake Laramie State Park in Minster, OH. The GPS put me at the back of the park and I had a nice clearing by the lake to myself. It took a while to get my 15 contacts ( I always get spares). Band conditions were up and down like a roller coaster. After working out a few kinks to my setup, I packed up and headed toward Indiana. The trip was mostly county roads and highways. The scenery was beautiful passed through farmland with corn as far as the eye can see. I also passed through some Amish communities and was treated to traditional horse and buggies on the road.
My next Park was Ouabache State Park in Bluffton, IN. I found a little spot in a picnic area and set up shop. Again, the band conditions were not that good and I was glad I was running FT8. After completing my contacts, I packed up and headed for New Haven, IN were my trade was to take place. I arrived on time and after chatting with my trading partner we were both satisfied with the trade and once again I was on the road heading toward Michigan.
Coldwater State Park is a hunting preserve. When I got there, there was no infrastructure. Just a parking area and bulletin board. I was alone and in about an hour I was on the road again.
This was leg of the trip was a long one. I spent the night in Zanesville, OH and the next morning found me heading for southwestern Pennsylvania. The park I chose was Ryerson Station State Park. This park was nestled in the Allegheny Mountains with twisty-turney, uppy-downy roads both into and out of the area. There was no cell service for miles. It took me a little longer to get my contacts but I succeeded. From there is was a short hop to Picketts Fort State Park in Fairmont, West Virginia. This was a nice park and I found a shaded spot in a picnic area. This was a hot weekend and at some of the parks, I operated with the A/C running. At Picketts, I rolled down the windows.
Leaving Picketts, it was a long haul to Hungry Mother State Park in Marion Virginia. This park while still being in the mountains was more open and the contacts came easier. From there I drove to Statesville, North Carolina and spent the night. The next morning I was up early and drove 8 miles to Lake Norman State Park, my shortest hop. I found a spot down by the lake and made my contacts fairly quickly. Back on the road for the last 5 hour drive back to the home QTH.
I now have activated 17 States. I was a fast and fun trip but while my mind was willing, the body not so much. At 68 it’s probably time to start slowing down a bit. I am at the point where to activate a new state it is a one to two day drive just to get there.
So why is the FTX1 leaving? To start off with, it is not a bad radio. I have two other small radios, an IC-705 and a KX2. Between the FTX1 and IC-705, my preference is for the 705. It is more in line with the way I operate. Plus, as I have said earlier, I mostly use big radios so having 3 small radios is a bit superfluous. The FTX1 is off to a new home and I get another big radio for the field.
When I got home, I did hook the TS-590sg up and played around for a few minutes. The radio is easy to use and on CW the relays are super quiet. The controls are fairly intuitive and easy to use. I am going to bring this radio on my next outing. Over the next couple of days, I will go over it and set it up to my liking. Don’t forget to check out my video, and thanks for stopping by. 73 de Scott
The other day in the early evening I suddenly got a 10 over S9 signal on my radios. Depending on the frequency I am on, commercial/government stations will test their radios by running a carrier for a couple of hours. That is what I thought it was. However, in the morning, it was still there and I began to think it was powerline line interference instead. It was a steady signal and was approx. 60 Hz. I decided to see if I could find the cause and report it to the power company.
I first tried going out with my handie-talkie, but it wasn’t accurate enough. The meter didn’t have enough range to really pinpoint the source. One of the problems with powerline QRM is it is transmitted through the powerlines and it can seem like it is coming from different poles/transformers.
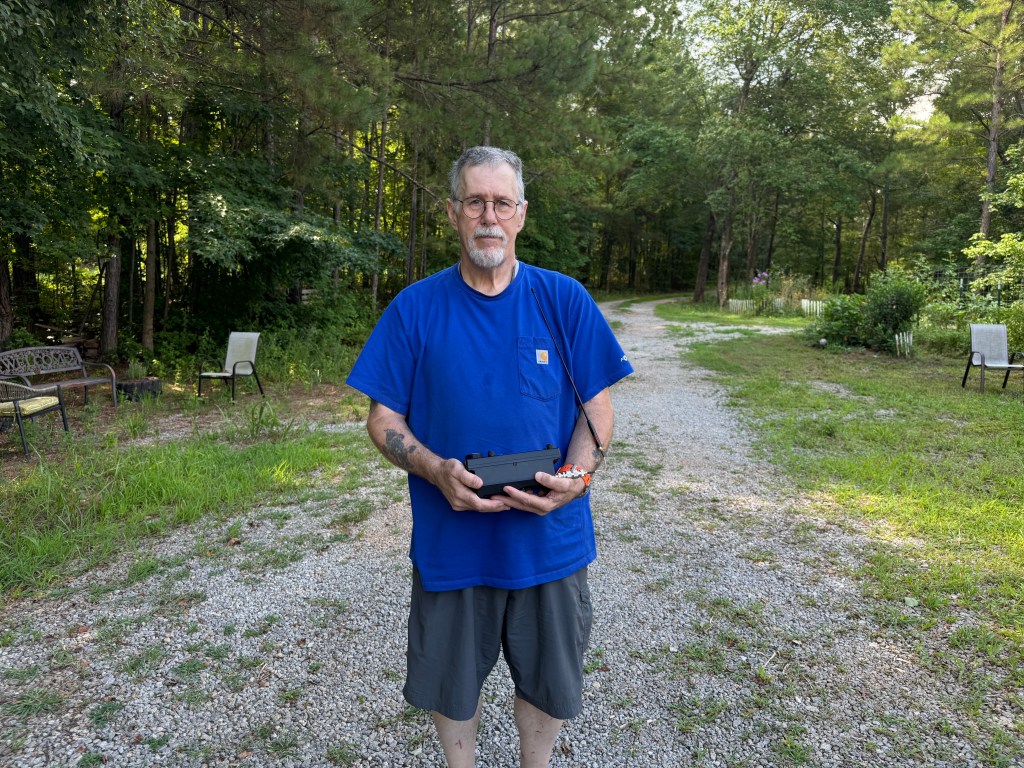
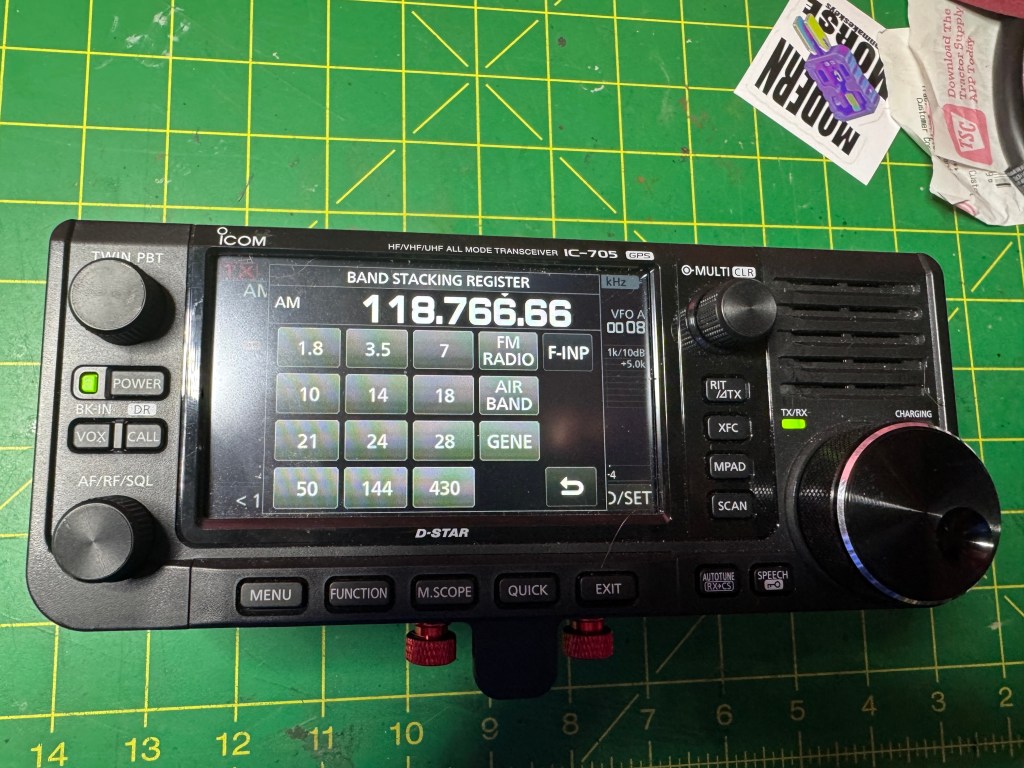
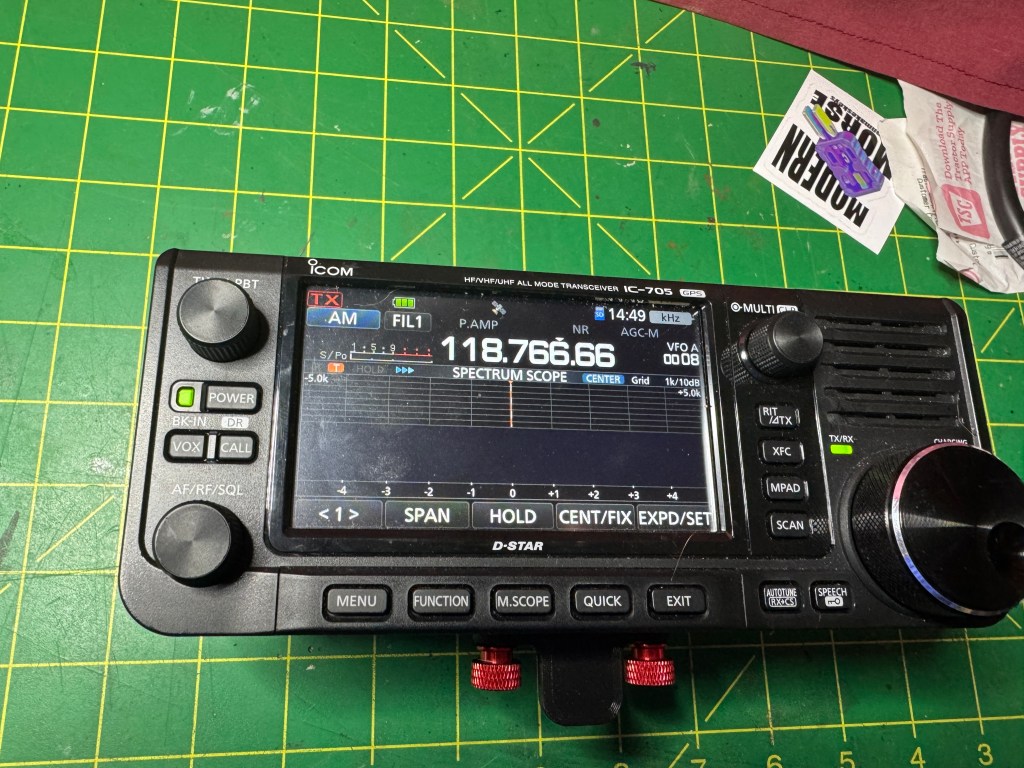
My next setup used my IC-705 with my handie-talkie antenna. I set the IC-705 to airband (AM) and went walking down the street. I used my body as a shield to find the nulls. This worked fairly well and helped me to narrow down the location of the source but it was still too sensitive. In the photo below the HT antenna is on my left side near the shirt pocket.
My third attempt was to use an old Fox Hunting Yagi antenna. This did the trick. I walked up and down the street a couple of times holding the 705 in one hand and the Yagi in the other. The Yagi gave me enough side to side rejection to locate the source. I used the Yagi in the vertical orientation and for more attenuation, I turned it horizontal.
The problem was coming from my neighbors transformer. I called the power company and in about 30 minutes, I had a repairman at the house. Fifteen minutes later and the noise was gone. The power company in my county has excellent service. Even though we live outside of city limits, they have always been quick to get our power restored. 73 de Scott
Over the past couple of years, I have spent a lot of time taking what I call big radios to the field. These are 100 watt radios that I run at reduced power usually between 20 and 35 watts. I can run digital modes all day long on a big radio at this power and it won’t even get warm. I usually take them out for a weekend camping trip.
That has gotten a little stale, I feel I have a good understanding of how those radios and antennas work and I have made 1000’s of contacts all over the world. It’s time to do something different. I have 2 wonderful QRP radios, a KX2 and an IC-705, that haven’t seen a lot of use. I have also let my CW skills slip a little. Change is in the wind. I am planning some trips using my little (QRP) radios. in addition, I may spend a few nights in a motel rather than camp. Each day I am out, I can mini rove and do a couple of parks instead of just one. I feel the change will be refreshing, kind of going back to my POTA roots.
This fall, I am planning another multi-state rove. This will be a multi-day rove hitting a park in a state and moving on. It will be a nice drive and a lot of fun. I want to try my hand at quick set-ups and tear downs. The beauty of amateur radio is the diversity of things you can do. Sometimes, you gotta due a few things for fun. 73 de Scott
NOAA has released their 2025 hurricane season (01 June to 30 November) prediction. they are calling for an above average season with 13-19 named storms and 6-10 to reach hurricane strength. Of those hurricanes, 3-5 are predicted to become major hurricanes.
As we learned last year, coastal states are not the only ones vulnerable to the havoc a hurricane can bring. Now might be a good time to break out the portable gear and give it a shakedown. Turn on those go-boxes and feed those portable antennas. Make sure everything is in working order. Take your gear out and go at least 20 miles from home. Why 20 miles? It’s a distance that is too far to go back home and retrieve a forgotten part or replace a broken piece of kit. Field Day (winter and summer) are good events to try your gear. Only if you use the same gear you would bring for EmComm and use the same power levels. The lesson here is don’t wait to get ready, get ready now. I try to keep myself prepared to deploy in 4 hours or less.
You can’t plan for everything that may go wrong. You can however, minimize the chance of failure by ensuring your gear is in the best possible condition. Remember Proper Planing and Preparation Prevents Piss Poor Performance (7P’s). Be THE guy, not THAT guy. 73 de Scott
This month I ended up at Black Rock Mountain State Park. It is one of my favorite parks. I like it because it is located on the top of Black Rock Mountain. The views are fantastic and you couldn’t find a better park to operate a radio. This was a weekday trip. For the past couple of months I tried operating during the week instead of in the weekend. It was okay, I think I like the weekends better.
The weather was beautiful mostly cool with a spot of rain on the first night. I was surprised to see Slate Colored Juncos on the mountain. My mother called them snowbirds because they often proceeded a cold front and sometimes snow. I was near a comfort station and right next tot he camp host. No issues when I put up my 28.5′ random wire vertical.
Radio du jour was my FT-710. I also brought with me my IC-705 thinking I would switch over to QRP and CW on the second day. More about that later. I started out on FT8 and 25 watts. I went QRV on 20 meters around 1900 Z. The band was wide open! I stayed on 20 until about 0200 Z. The first day, I made over 200 QSO’s. Wednesday morning things started out well and then fizzled. In the end I made 453 QSO’s covering 46 states and 16 DX entities. The states I missed were AL, HI, ND, and WV. For DX I got as far north and west as Alaska, as far south as Uruguay, as far east as European Russia. I was hoping the band would stretch far enough west to pick up Hawaii, but it didn’t quite make it. A hop too far.
By Wednesday afternoon the bands were dead and I decided to head back to the house. It was a good run while it lasted and a lot of fun. The only issue I had were people asking for dupes. I only need to work you once and the way band conditions were many stations I needed were a one shot deal. Heard them once and then they were gone. I lost some of those because of people asking for dupes. That means two of us lost. Most logging software will show you if you worked a station before. It’s what I use. As an activator, I try to get as many stations as I can in the log.
Once the bands died and I realized that QRP and CW were not viable, I decided to pack it up and head home. I left the park early Wednesday evening and was home before dark. All in all a nice trip. Here is a QSO map of the activation.
End of an Era. This will be my last year on WordPress. It cost me between $100-$200 a year to maintain and being retired I need to cut a few corners. What will happen, is I will move back to Blogger which is free. I own the domain name and I will bring that with me. My WordPress subscription, ends March of next year and in the mean time, I will move some of my posts over to Blogger. Mainly the technical stuff. I will also be taking fewer overnight trips and combining some trips with the wife doing more than amateur radio.
Retirement is grand, I wouldn’t trade it anything. With it comes a little more responsibility. If I think I want something on the pricey side, I ask myself if I am willing to go back to work for it. So far the answer is no. Stay safe and 73 de Scott