POTA Activation K-2174 Florence Marina State Park

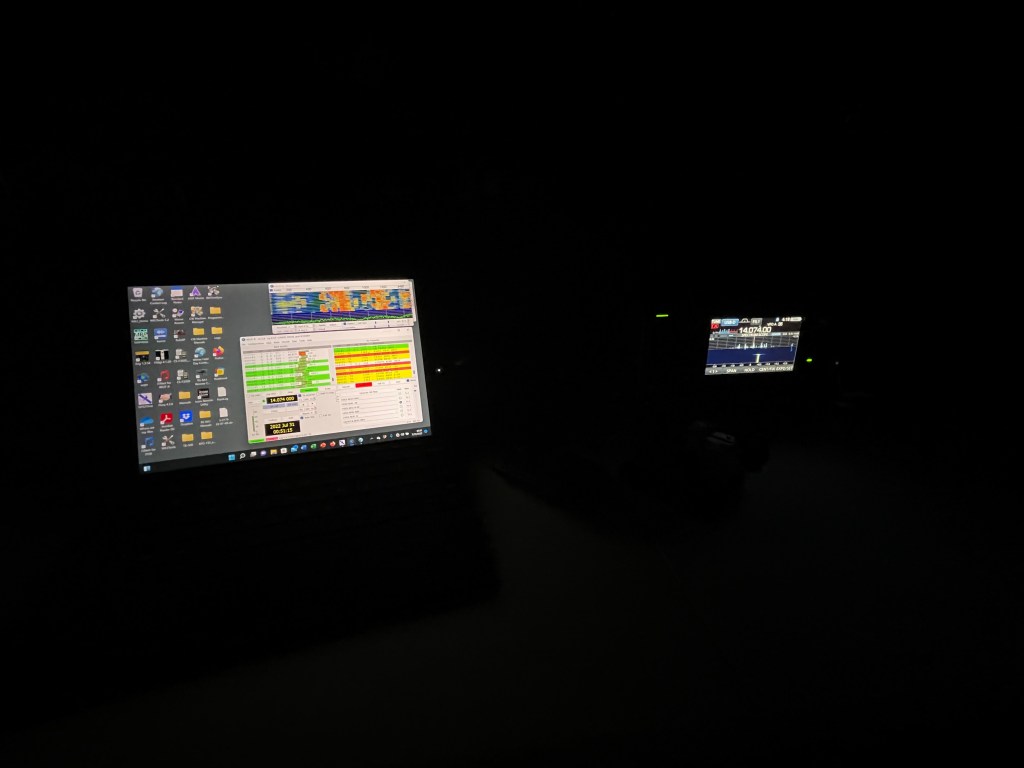
Wow! What a weekend. 438 QSO’s successfully uploaded to POTA. What a blast it was. I had a great time, got little sleep, and tried some new gear. Thanks to all who worked me and thank you for your patience as I worked through some of the pileups. Mode this weekend was FT8. I was going to try some CW but FT8 was running non-stop. Much of the time my WSJT software looked like this.

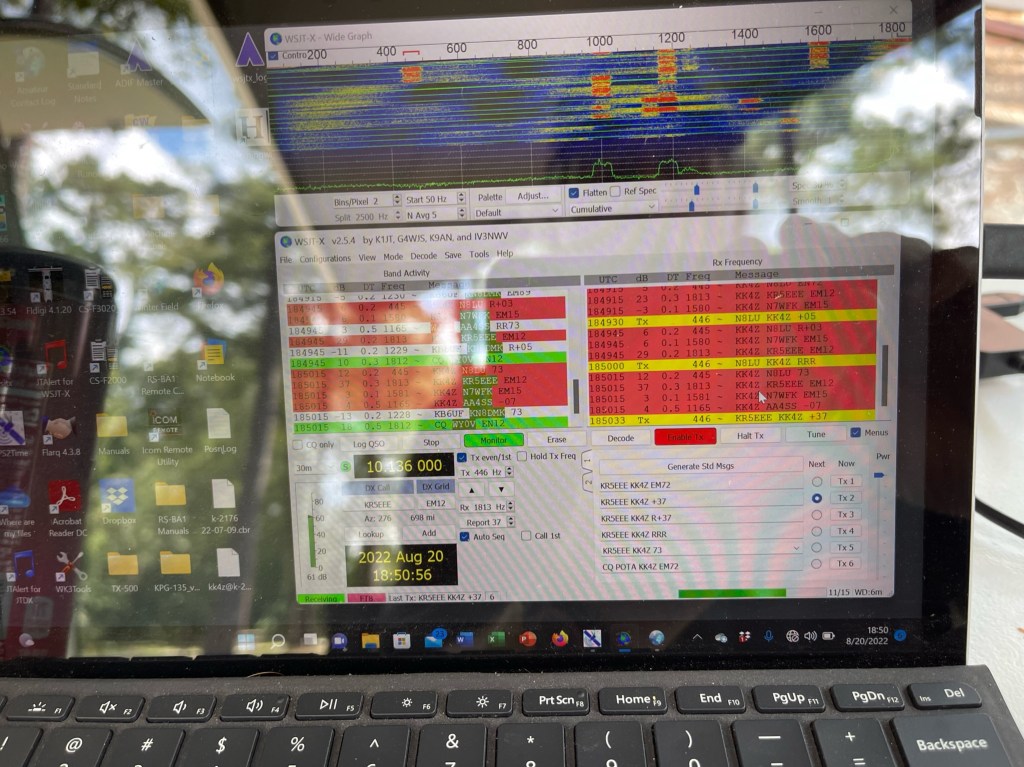
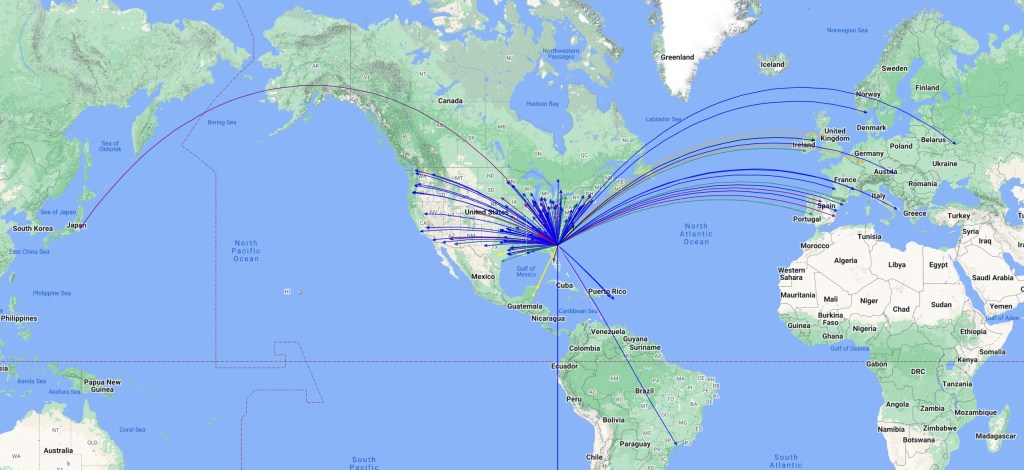
I was QRV from Friday 1800 hrs Zulu until Sunday 0500 hrs Zulu. Band conditions were good. I didn’t see as much DX as I have in the past, but I still managed to work quite a few. This time I got about 98% of my contacts by activating, that is calling CQ. I did hunt a few, mainly P2P and a few call signs that interested me. So, you don’t have to hunt to get the Q’s. The secret is picking a frequency and holding it. There were times I held a frequency for hours.

GEAR
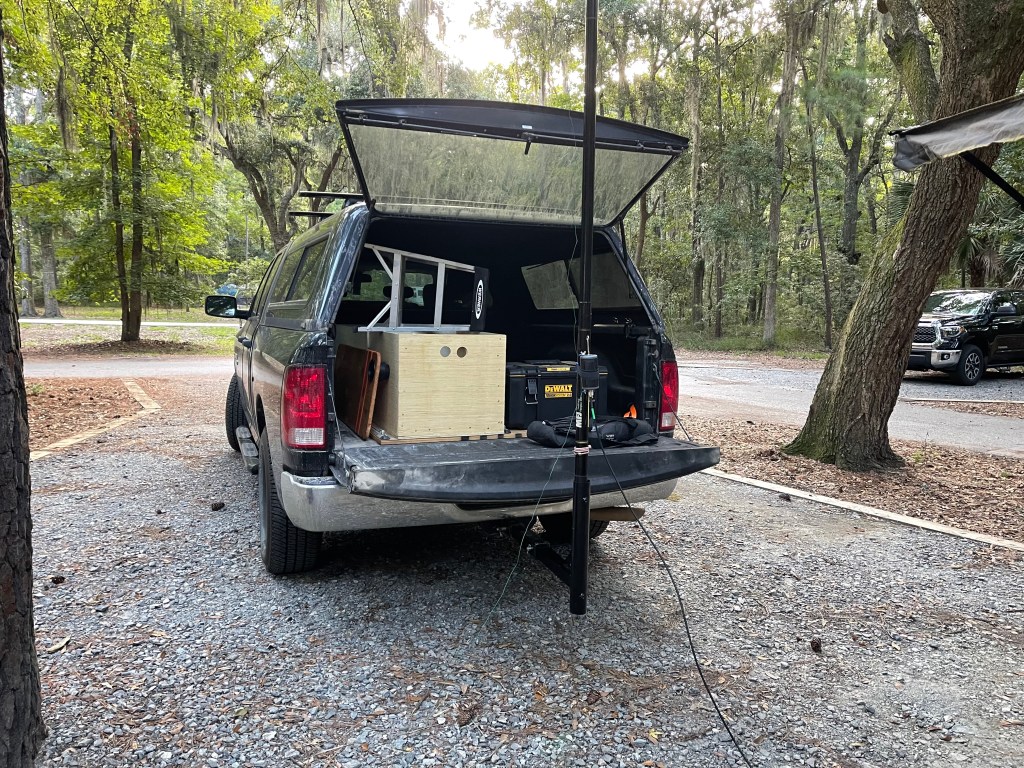
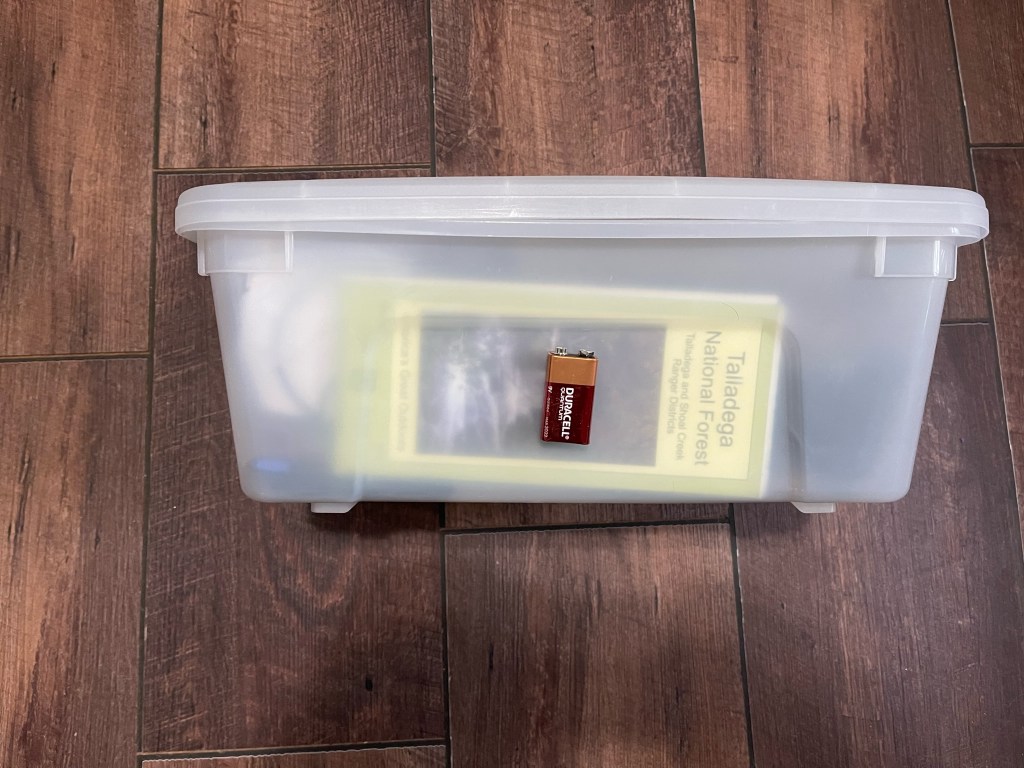
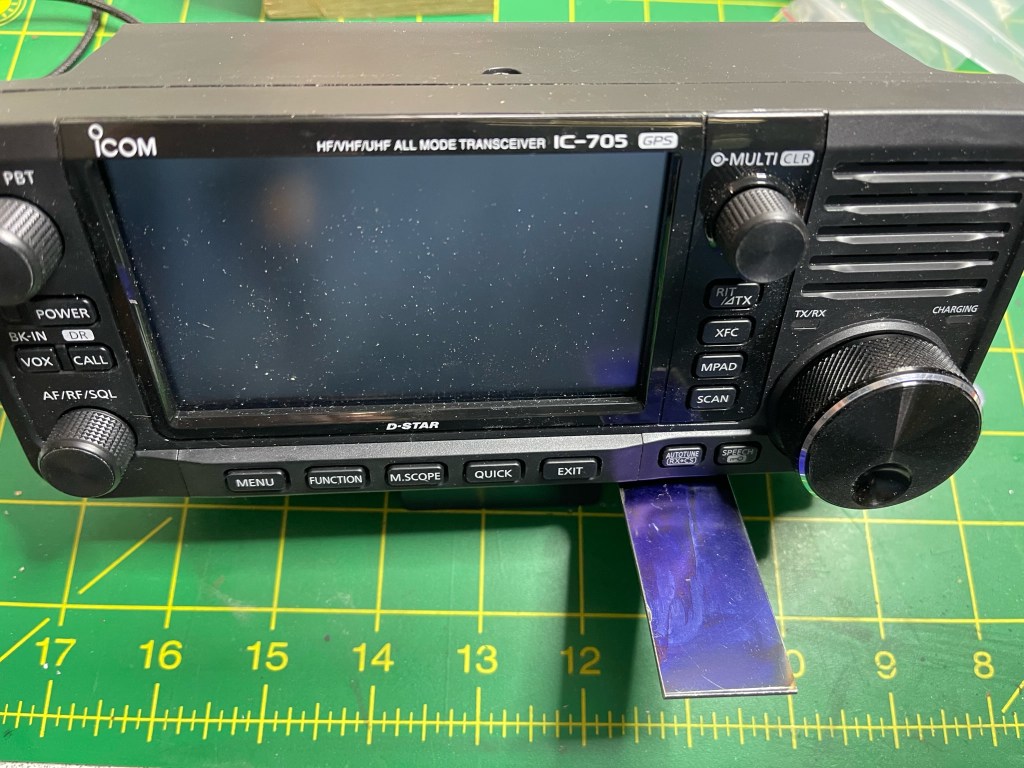
For this trip and the past few, I have been bringing my IC-7300. I am trying to complete my N1CC award and having a few extra ponies under the hood helps. There has been some discussion about packing radios. I put mine in a box with the rest of my stuff. I do have Portable Zero Escort side rails, but that’s about it https://tinyurl.com/45dcupe5. They keep the knobs away from the box sidewalls.

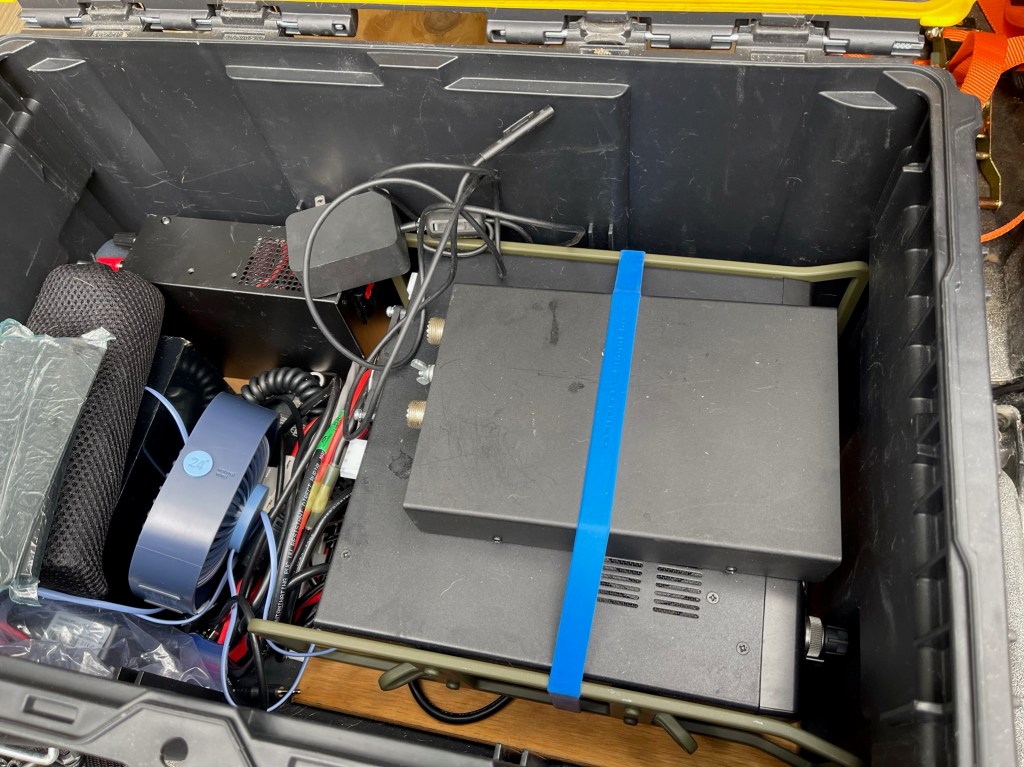
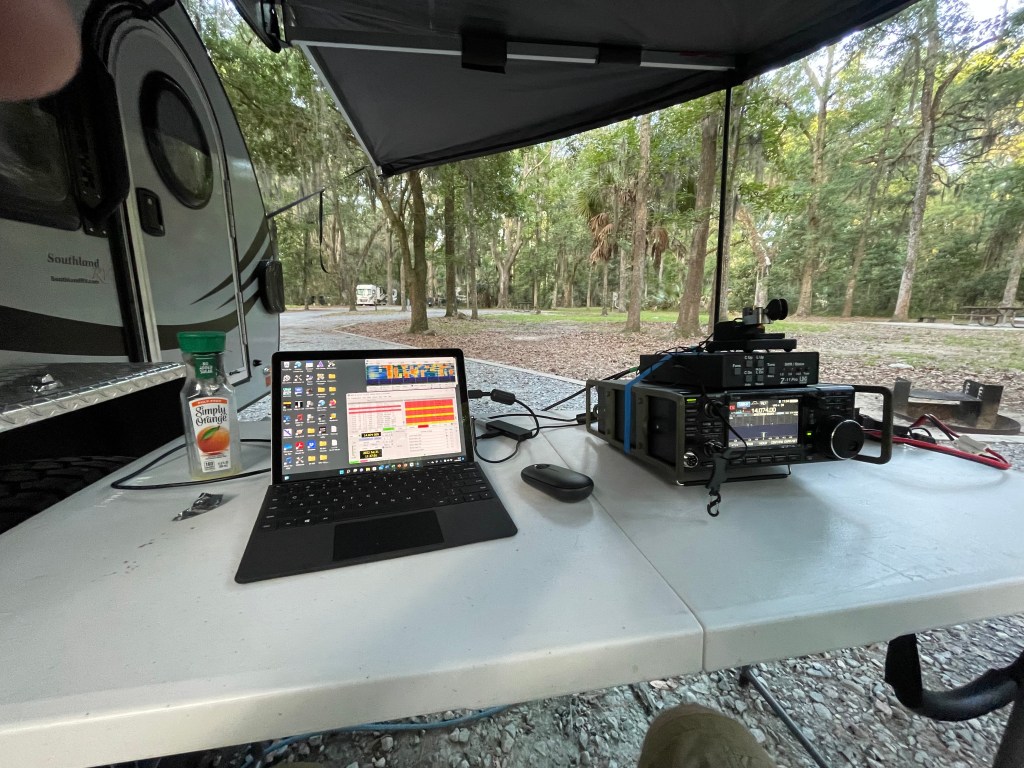
Shack setup is pretty straightforward.

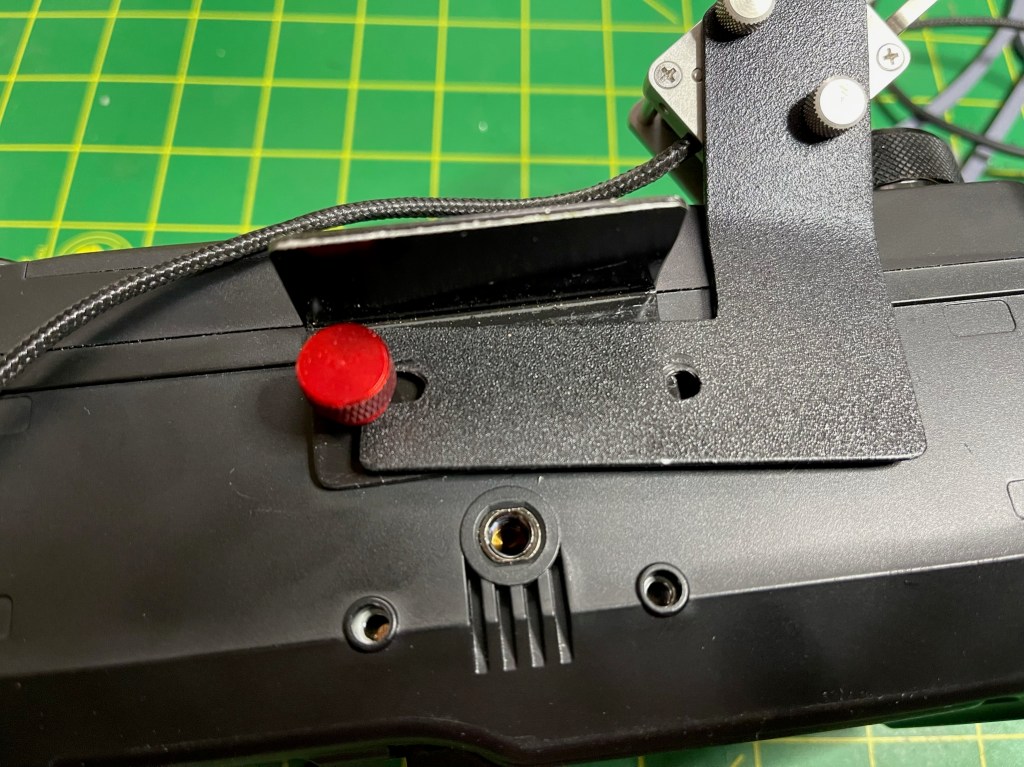
I can be QRV within 30 minutes from the time I pull into the site. The computer is a Microsoft Surface Go2. I use a USB hub to attach everything to it but if to jiggle it even slightly, it drives WSJT software bonkers. I may look to replace it. The tuner is my old LDG Z-11 Pro which I have had for over 15 years. It takes a lickin’… For coax, I run RG-316. I don’t see the need to use anything bigger. After this trip, I am redoing my radio box. After every trip, I do a mental after-action report. This time I decided I am bringing too much stuff.

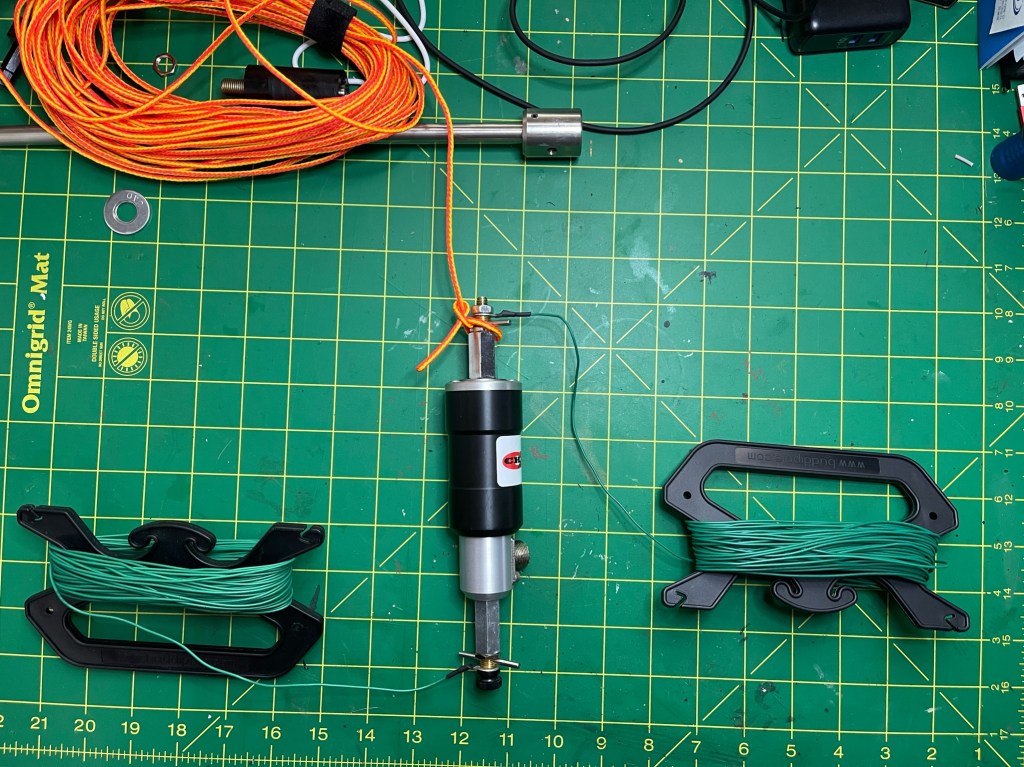
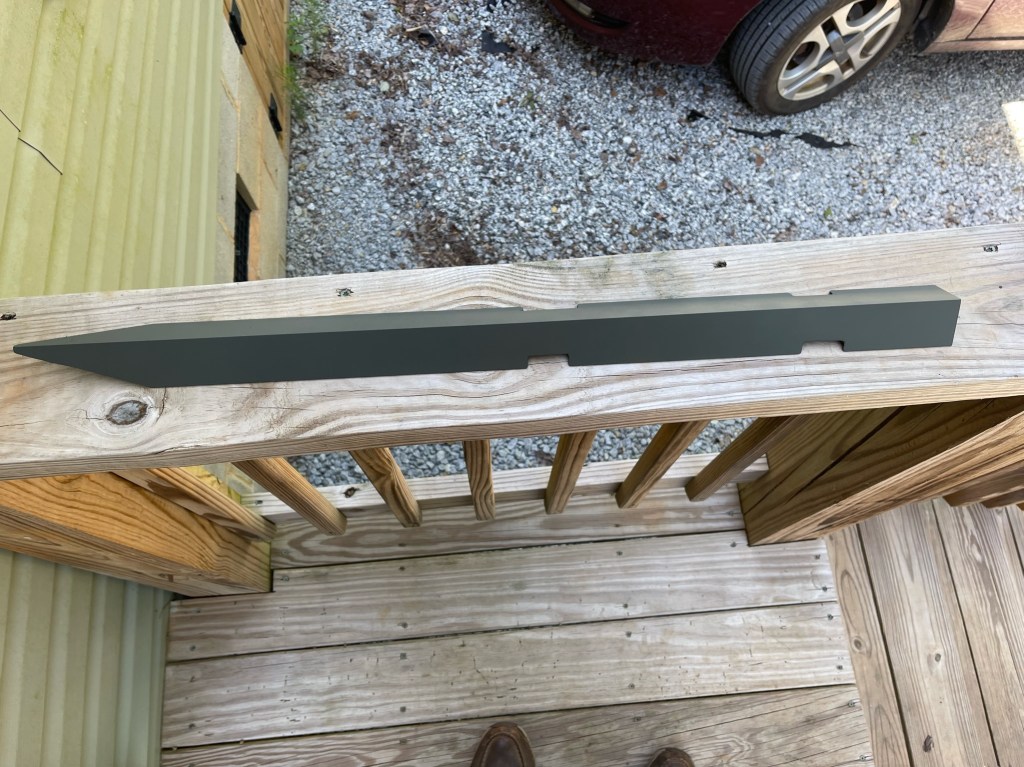
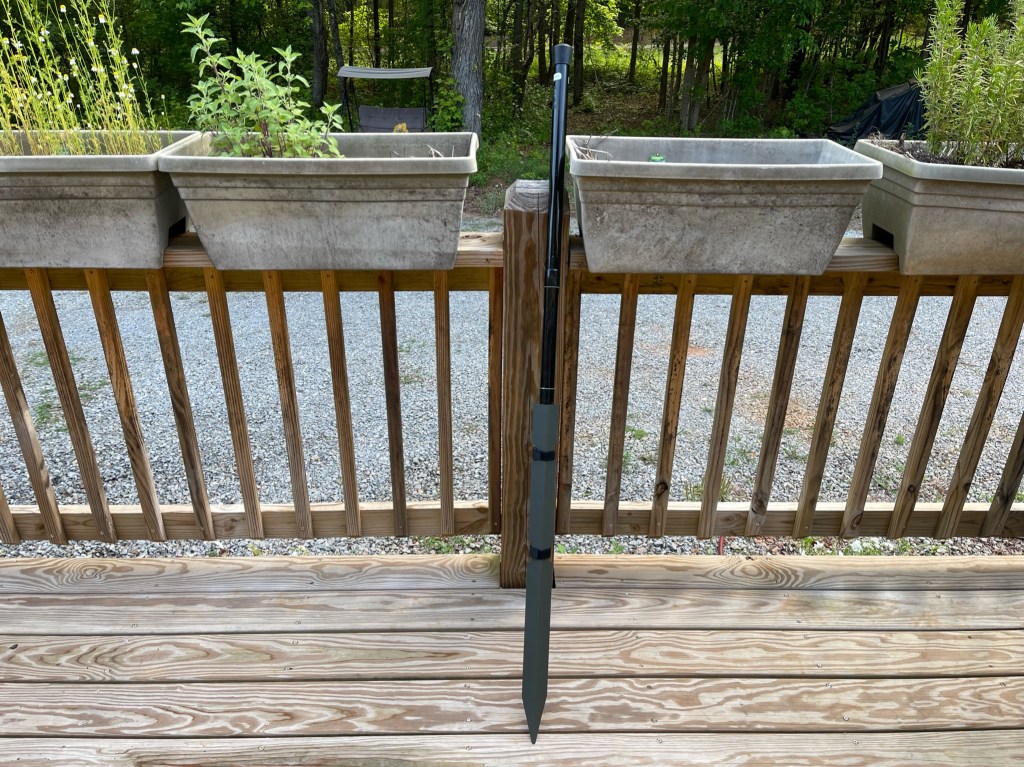
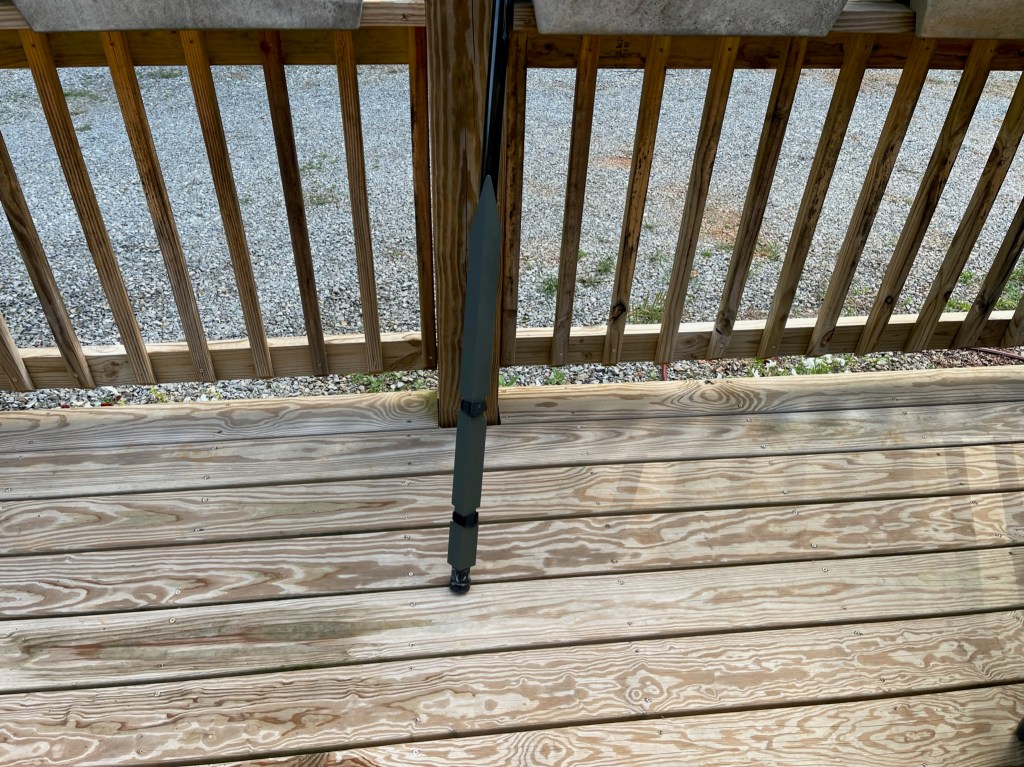
What is new? This time I brought the KK4Z enhanced random wire antenna. This is a 29.5′ random wire antenna with a 17′ counterpoise. Same old, same old. What is new, is I added a 9:1 UnUn rated at 250 watts PEP and a choke balun.

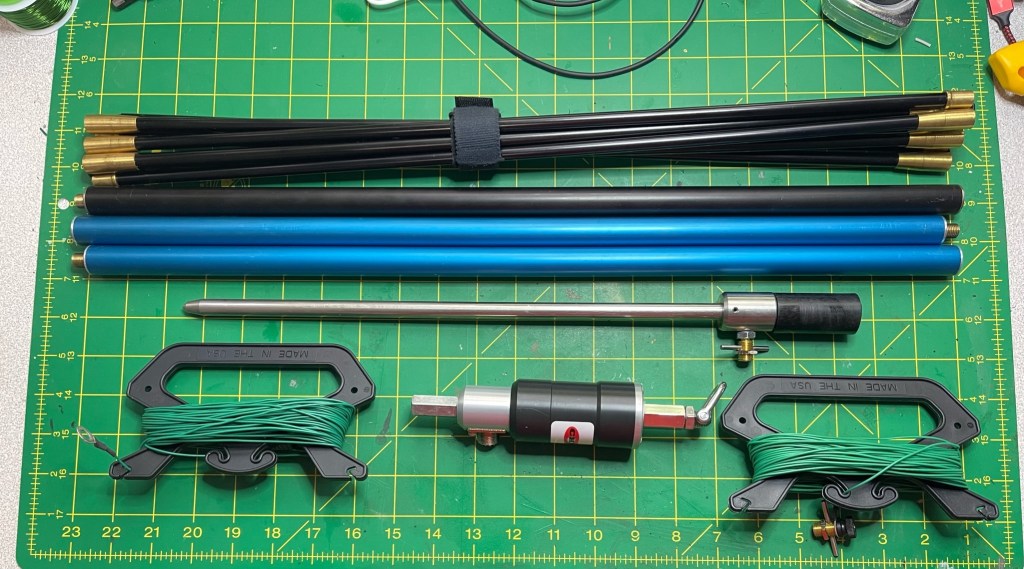
I use my truck hitch and an MFJ-1910 – 33′ pole to get it up in the air. No holes in the ground, no rope in the trees.

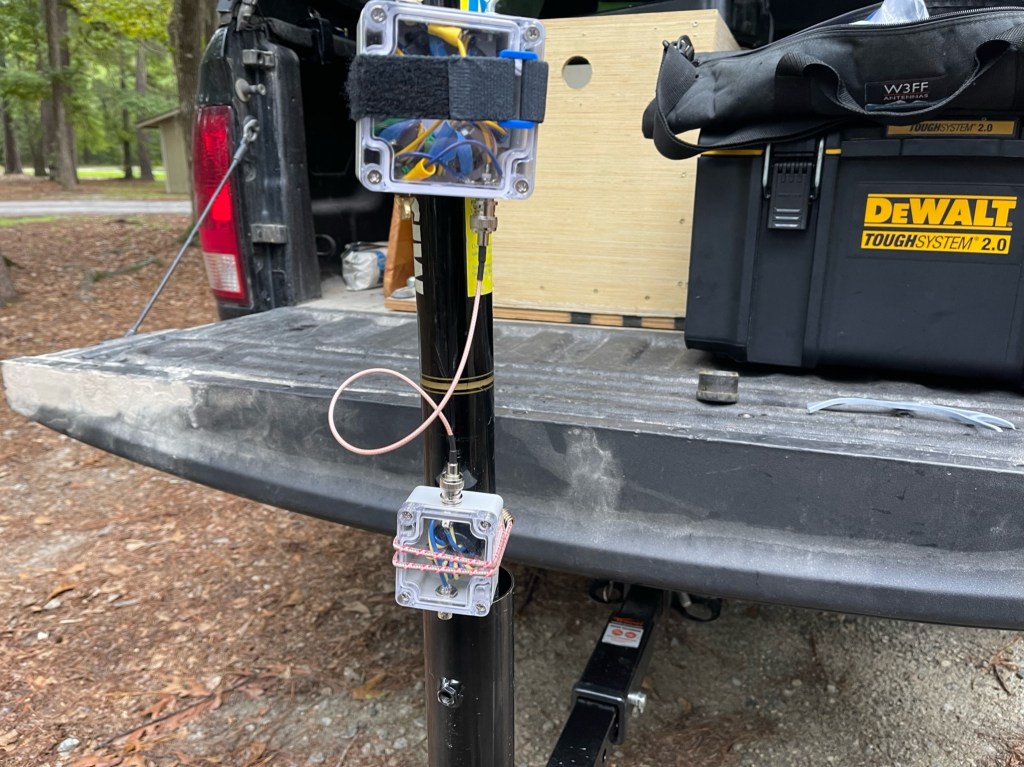
This was a pretty exposed campsite. I had Park Rangers and Camp Hosts drive by all day long. All they would do is wave at me. The other secret is don’t make excessive noise. With FT8 I keep the volume turned way down and with CW I use Skull Candy Ear Buds https://tinyurl.com/2p89mz8u. The benefit of this antenna setup is the amount of power I can use. With my Chameleon transformers, I am lucky to run 35 watts and only 6-80 meters. With my antenna, I can run up to 65 watts without anything getting warm on 6-80 meters. On 160 meters, I have to reduce the power down to 25-35 watts. A larger choke balun may solve that problem. This past weekend I was running 50-65 watt range just to see and I had no problems. This antenna will become part of the Frankentenna system. So I guess I have a new favorite antenna. It gets the job done (see map above) and it keeps the campground staff happy. One of the real benefits is how little space it takes up and its low visual profile. If I am beyond the eyes of those who care, I can easily sling it up into a tree.

I do have a short video about the activation on YouTube.

POTA Activation Skidaway Island State Park K-2198

Skidaway Island State Park is a beautiful park. Located southeast of Savannah, GA, With Spanish Moss, along the typical summer heat and humidity, it is a prime example of coastal Georgia. This trip came about because my wife needed a package delivered to South Carolina; I volunteered as long as I could camp one night an play radio. It’s about a 5 hour drive from NW Georgia to SE Georgia. After delivering the package I arrived at the park somewhere around 1600 hrs Local. It took a couple of minutes to get the camper setup and a little longer for the radio. Because it might be a while before I can make it back here (gas is still over $4 a gallon). I tried to get 10 bands for my N1CC award. I mostly worked FT8.

Setup. Setup was my usual for this type of activation. The radio was my IC-7300 and LDG Z-11 Pro tuner. The computer was a Microsoft Surface Go2.

The antenna was my K4SWL antenna which is a 29.5′ random wire antenna with one 17′ counterpoise. I used my Chameleon EmComm II transformer to even things out. The antenna is hoisted into the air with a MFJ-1910 33′ pushup pole. No plants or animals were harmed during this activation.

Being a former Nightstaker, working in the dark is routine to me. I stayed outside well after sunset until I finally had enough of the heat.

Band conditions were so-so, and I earned my keep making contacts. Working about 20 hours total I ended up with 174 contacts on 10 different bands. I had quite a few FT8 pileups which was fun and let me know that my antenna is working as it should. Here is a QSO map of the activation.

What was new? I recently acquired a Begali Adventure Duo with their metal base. The base is a little on the light side but there are magnets on the bottom. I had a fairly heavy base made for a AME Potra-Paddle. I set the the the begali base on the Porta-Paddle base and Viola! It works like a champ.

I also have the 705 mount coming to use with my IC-705. I really like these paddles. I only used them a little while trying to make contact with K7K. Alas, I didn’t have enough horsepower to make the trip to Alaska. My new paddles will definitely be my choice when camping.

Issues? I only had 2 and neither was catastrophic. The first was with the antenna. It seems when I increase power somewhere above 20 watts, I start getting some RF feedback through the coax on some bands. It was more of a nuisance than anything and I have since added a RF choke to the antenna bag. This antenna is one of my favorites if not my favorite antenna. It always performs well for me. The second issue has to do with the IC-7300. When I am working from inside of the camper, I set the radio down on the mattress. The tilt stand sinks nicely down in the 4″ of memory foam making the radio face plate difficult to see. I set my QRP radios on the lap desk with my computer and paddles. I banged around in my workshop and found a scrap piece of 3/4″ plywood. I cut it to 11″ x 12″ and now my radio floats on top of the mattress. The board also fits in the box I carry the big radio in.

Every time I go out, I learn something new. With gas prices the way they are, I may not be making these long trips for a while. However, there are plenty of great parks closer to home. Thanks to all of the hunters who took the time to work me. Sometimes making that contact can become a little tedious. I appreciate you all and 73’s until next time.

POTA Activation Cheaha State Park Support your Parks Weekend

Cheaha State Park (K-1037) is one of my favorite parks and it is also the closest. It will probably be my first Kilo Award. The summer POTA Support your Parks Weekend fell on July 16 and 17 (Zulu). I got to the Park Friday morning to work a guy on 2 meters who was about 60 miles away. I did this as a part of N1CC award. I needed 2 more bands for this park. I stayed all day Friday and packed it in mid-morning Saturday. The whole activation was done using FT8 with a new app for my iPad.

GEAR
I brought a lot of gear with me mainly to try to accommodate the 2 meter sked and to try to have an antenna or two for 6 meters. Six meters turned out to be a bust this weekend. The radio was the IC-705. Normally my radio gear goes in a box like this along with a few antenna bits and a tablet/iPad.

The antenna was my K4SWL antenna was is a 29.5′ random wire antenna with a 17′ counterpoise. The antenna was matched with the Icom AH-705 tuner which did an excellent job.

The antenna was held up with a MFJ-1910 33′ push-up pole. The pole was attached to the truck with a Flagpole holder and hitch extender so I could flip the tailgate down. The campsite was a group camp and while it had spectacular views it also had little shade. This was a primitive campsite, so I could not bring my camper with me. Since this was a one nighter, I decided to sleep in the truck bed. It would be a little cozy, but doable. In the end I stayed up all night anyhow. The shack looked like this.

I had plenty of batteries with me as this site does not have electricity. I discovered that my Bioenno Power BPP-160 power pack could run things for a long time. I also brought my Bioenno 40 watt foldable solar panel to help keep the power pack charged up. Next time I won’t bring near as many batteries. The fan you see is USB powered.

All in all, the station performed very well. I made 250 contacts all FT8 from all over the world. I even managed to get Alaska and Hawaii during the activation. Ten watts and a wire.

Glitches
One of the things about getting out with your radios, is you actually see how they work in the field and then you can improve your setup. Apart from bringing too much stuff, I only had a couple of glitches. I’ll do the easy on first.

This is the first time I left my push-up in the flag holder for any length of time. I had some mild wind there and it caused the pole to rattle around some. Rubbing against the flag holder, scored the bottom tube a little.

The cure was simple. When I got home, an application of some Gorilla Tape, should take care of things.

The second glitch was the app I used on my iPad. It’s called SDR Control for Icom. It’s a really sweet app with a lot to like about it. Here are a couple of screenshots.

The interface was easy to use. I did not use a keyboard or a mouse with this. I did put the app through he wringer. I used it straight for almost 24 hours. I like using my iPad because I can power it from the same batteries as my radios — no AC adapters. I also liked being able to hold it in my hand to use it. The app does have a few short comings; enough to put it aside and allow the developer to iron out a few bugs. I spoke at length about these on my YouTube channel, so for here, I’ll give a summary:
1) The app randomly disconnects from the radio or completely shuts down. Restart/reconnect often take multiple tries and all data in the FT8 window is lost.
2) During FT8, the app will pause while another station contacts the DX. The app waits until it hears a CQ before it will transmit. The DX will often work several other stations without calling CQ. This allow other stations to “jump the line”.
3) The app will auto-log after both stations give a “73”. However, if another station call you prior to the “73”, the app will jump to the new station and the old station will not get logged. need to set the auto log to maybe RR73.
4) The logbook needs at least one user defined field that can be sticky. In POTA we use the ADIF field my_sig_info, to log which park we are at. RumLog has this feature.

It was a fun activation and I enjoyed pulling an all nighter; something I haven’t done in a long time. I didn’t plan on it but the DX stations kept rolling in. Until next time 73 –Scott

IC-705 Cover

I’ve got a couple of activations coming up so I am trying to get a few things done to bring with me and evaluate. I bought the 705 because it is a small radio. I like that feature. When looking to protect the radio, many have darn near doubled its size so it is no longer a small radio. I tried a couple of padded cases and while they fit fairly well, they still felt too large. I don’t mind tossin a radio in a pack or bag as long as I can protect the important pieces. In the case of the 705 it would be the knobs and touch screen. I decided to make a cover for the front of the radio.

Icom has an STL file for the 705 https://www.icomjapan.com/support/IC-705_STL/ so pulling that into a CAD program, I was able to make a cover. I am not a CAD pro or even a 3D printer pro; however, I was able to scratch something together that is good enough. I roughed out the design and my son printed the cover out for me. It’s not beautiful. it’s not perfect, but it gets the job done. Here is the current prototype.

The inside is mostly hollowed out but the case is supported on the corners of the radio and the speaker area.

For POTA activations the radio resides in a plastic box with a latching lid. Should eb plenty of protection. Because I reduced the bulk and weight, it make the radio eligible for SOTA. I may make another one to adjust some of the dimensions but in reality, it works just fine. I can tweak this and burn a lot of time or I can get out and play radio. Remember “Perfect is the enemy of good”.

I made one other piece, BNC caps, which the STL files are available with a simple Google Search.

I like orange as I can readily see them if I accidentally drop them. Enjoy and hope to work you. Scott

Traveling Light

I like to travel light. Less is better. When I do POTA or SOTA activations I really don’t like to have a lot of stuff. Just what I need with maybe a few essential extras. Over the past couple of activations, I have been doing battle with my Surface Go2. It’s pretty noisy in the RF spectrum range when recharging the battery. It works great as long as I do not have to recharge the battery. When I do have to recharge it, I need more gear because I cannot charge it from the same batteries I use for my radios. That usually means shore power, or an inverter — more stuff. Yes I know I can paper log or I can log on my iPhone using apps like Hamrs or RumLog but with today’s band conditions, it is nice to have FT8 in the toolbox. I decided to try SDR-Control for Icom. This app allows me to control my IC-705 from my iPad and it includes FT8/FT4! The stuff I had to bring with my surface looks like this.

This does not include whatever power source I need to recharge this. My iPad looks like this.

Whatever I use to run my radios, I can also recharge the iPad’s battery. Two of my solar panels have usb ports so I can charge the iPad directly from them while also charging a battery. This is something else I cannot do with the Surface. My truck has usb ports so I can charge from it. I set the app up with my IC-705 and it works as advertised. I have an activation planned this weekend so I will try to give the new setup a good work out.

There is a caveat, and that is the app works with the IC-705 (also the IC-7610 and IC-9700). This is not a problem as the 705 is my goto POTA radio. On the occasion I bring a different radio, I will either forgo FT8 or bring the Surface and work with its limitations. If I am doing something like a SOTA activation, I would either log on paper or my phone in which case I would not bring either the iPad or the Surface.

I may or may not add a keyboard to the iPad. It’s screen keyboard is pretty good. Another thing is I am using a 2018 iPad (6th Gen) so it’s not the most zippy out there but does fine. Most radio apps don’t require a lot of horsepower to run them.

I have another activation planned that does not include shore power at any of the sites. I will be relying on battery/solar to make it through the activation. I’ll dig a little deeper as I put a few activations under my belt with this new set up. 73 Scott

A Little More UnUn fun

This past week I wound a few more toroids using a 77 mix. The toroids are 0.5″ in diameter and wound with 22 awg insulated magnet wire. I wound one with a single core and one with a dual core. My goal was to try to get a little better low band performance. I get a kick out making a few contacts on 60-80-160 meters. The finished UnUns are 9:1.

We’ve been going through a heat wave this week with a heat advisory every day. I got up early and tried a couple different antennas. Using antenna wire from my Frankentenna, I built an end fed with a 65′ antenna and a 65′ counterpoise. I also tried the 65″ antenna with a 17′ counterpoise. The set up looked like this.

For this antenna, the best combination was a 65′ antenna wire, a 17′ counterpoise and the single core 77 mix 9:1 UnUn. I got the following readings from my Rig Expert Prostick with 6′ of RG316. As a control I also tested my Sparkplug transformer.
Band SWR (17′)—–SWR (65′)——Sparkplug 65′
160 – 2.4 ———— 4.2 ————– 5.6
80 – 5.4 ———— 1.1 ————–8.3
60 – 1.7 ———— 2.3 ————– 12
40 – 2.9 ———— 3.5 ————– 1.7
30 – 6.9 ———– 4.5 ————– 16
20 – 3.8 ———– 4.0 ————— 1.5
17 – 5.2 ———– 5.7 ————— 9.7
15 – 4.1 ———– 4.3 ————— 1.1
12 – 6.2 ———– 6.9 ————— 10
10 – 4.5 ———– 4.6 ————— 2.6
6 – 5.9 ———– 5.8 —————-14
Fiddling with the counterpoise length could make things a little better, but overall the SWR’s are low enough to match with a good tuner. I realize that running a short feed line would affect the Sparkplug so in another test I added a counterpoise and it did bring down the SWR on some bands. However, to me the winner is still the single core 77 mix 9:1 UnUn.

Another antenna that I like is a random wire antenna I call the K4SWL antenna https://kk4z.com/2022/06/05/k4swl-antenna-plus/. I call it that because it was Tom K4SWL who I got the basic design form. It’s a 29.5′ antenna with a 17′ counterpoise. I built an UnUn based upon a QRP Guys design but wanted to try to get a little better performance on the lower bands. In this case I used a two core 77 mix 9:1 UnUn and got the following results.
Band – SWR
160 —- 2.0
80 —- 1.7
60 —- 1.5
40 —- 1.5
30 — 1.5
20 — 1.4
17 — 1.3
15 —- 1.3
12 —– 1.2
10 —– 1.2
6 —— 1.2
Realize that this is a small antenna and will not be as efficient as a full half wave dipole (on 160 meters, that is 270′). However, it would be fun to see if you can make a contact on 160 or 80 meters in a park with a small antenna. So get out there and play radio! 73 Scott

Frankentenna

I have been playing with portable antennas for years. When operating portable, the antenna probably has the biggest effect on how well you portable station works. I have quite a few portable antennas. Some are specialty antennas and some are my “go to” antennas. When operating at a park for Parks on the Air (POTA). My Frankentenna is my go to. It has evolved over the years, but now I mostly tweak to get it how I like it. Here is the antenna and its parts:

What makes it a Frankentenna is it uses parts from different companies, mainly from Buddipole and Chameleon. Here is a list of the components and links to their websites:
(1) Buddipole 7 section Lightweight Shock Corded Whip Antenna https://www.buddipole.com/mistshwh.html
(3) Buddipole 22″ accessory antenna arms. I am swapping out the blue arms for black ones to better reduce the visibility of the antenna (out of sight, out of mind) https://www.buddipole.com/exanar.html
(1) Chameleon CHA Spike Mount – https://chameleonantenna.com/shop-here/ols/products/cha-spike-mount
(1) Chameleon CHA Hybrid Micro https://chameleonantenna.com/shop-here/ols/products/cha-hybrid-micro
92) Buddipole Wire Assembly Low Band (66′) https://www.buddipole.com/wireassembly.html

This is the basic kit. With it I can make a vertical antenna, and endfed with a counterpoise, and even a dipole. The kit is pretty lightweight and easily fits into a standard Buddipole bag. While at park campgrounds, I usually run it as a vertical. I keep an arborist throw line and weight in with my station equipment. I have some tweaks and mods I have done. Two that you see here are the phenolic insulator and a mod to the spike.

The spike mod is an improvement on the current ground screw. It was a red plastic knob with about an 8-32 screw thread.

I felt it was too small since most counterpoises have either 1/4″ OR 3/8″ eye on the end. I carefully drilled out the hole and tapped it for 1/4″-20 thread.

This now allows me to use a Buddipole Counterpoise Wire Adapter https://www.buddipole.com/noname2.html which is 1/4-20 on one end and 3/8-24 on the other. It gives a more secure connection between the spike and the counterpoise. These are the same adapters that come with the Buddipole Wire Assembly and you can buy them separately https://www.buddipole.com/noname2.html. finished, it looks like this.

One of the things I didn’t like about the Chameleon Micro was the shackle it comes with. The shackle is used to support the transformer when it is used as an end fed or a dipole since it is too heavy to be supported by the antenna wires. It was always kind of hincky getting the shackle setup right. Now I use the Buddipole Counterpoise Wire Adapters. So much easier and so much lighter.

The other mod is a phenolic (micarta) insulator. This allows me to use the vertical with something other than the Chameleon transformer. An example might be one of my homebrew 9:1 UnUn or a Buddipole coil. The insulator is threaded on one end and has an insert on the other, both 3/8-24.

How does it play? Quite Well. I tested 2 configurations I would most likely use during a POTA activation. The first is a 54′ end fed with a 50’ish counterpoise using the Chameleon Micro. Using my RigExpert Stick Pro I got the following. Format is Band — SWR
160m — 5.7
80m — 3.2
60m — 3.5
40m — 4.1
30m — 3.2
20m — 2.1
17m — 3.7
15m — 1.7
12m — 2.2
10m — 3.6
6m — 2.1
The second setup was using the Micro as a vertical. The antenna is approx 17′ (very close to the Chameleon) and running a 50’ish counterpoise.
160m — 6.7
80m — 3.7
60m — 3.5
40m — 2.4
30m — 1.5
20m — 1.3
17m — 1.3
15m — 1.9
12m — 2.8
10m — 3.1
6m — 1.8
During this last activation, I mainly used the vertical arrangement as that suited the space I had. The antenna performed well. I made 100 contacts here and abroad. To see a map check out my post about my activation at Kolomoki Mounds State Park.

What’s next for this antenna? I have two Black Accessory Arms and a Counterpoise Wire Adapter coming from Buddipole. The arms will make the antenna more stealthy and the extra adapter will reside on the spike. I may try the Buddipole coil to see how it plays and I just got some new toroids to see if they work any better. Overall, I really like this antenna. It’s light and compact and goes up anywhere. The SWR is low enough that almost any tuner, can tune it, even on the low bands.

K4SWL Antenna Plus

Recently, I have had the desire to try my hand at winding toroids. They have always been a mystery to me. Today’s project is winding a toroid for 40-10 meters. My target antenna is one I learned from Thomas, K4SWL. It is a random wire antenna that is 29.5 long with a 17 foot counterpoise. It is a great antenna and works well at park campsites. I either string it up in a tree or I use my 20′ B&M fishing pole https://kk4z.com/2022/05/11/vertical-antenna-support/.

The antenna as pictured above (battery not included), weighs about 3 oz. The antenna while broadbanded can present higher SWR on some frequencies which can reduce transmit power. I decided to try a 9:1 UnUn to see if I can smooth that out. For instructions on how to wind the toroid I used QRP Guys mini unun. I was going to buy their kit, but they were out of stock at the time of this article. Max power is probably about 10 watts.

The form factor I borrowed from OM0ET. His instructions were not that clear but I liked the way it looked. Winding the toroid was probably the most difficult part. I didn’t have 3 different colored magnetic wires, so I had to pay close attention to how they were wound. I little trial and error and this is what I got.

Partially assembled, it looks like this.

Fully assembled it looks like this. I added an optional rope loop to take the strain off of the UnUn.

In use, the antenna is connected to the brass screw. Either a counterpoise or a 20′ or better length of coax connected to your radio can be used. To run a counterpoise which I prefer, you add a BNC Tee connector.

Your coax cable to your radio is connected to the other side of the tee. The counterpoise is made using a crimp style BNC connector. DO NOT use the center pin in the connector or it will short the antenna.

The other end of the counterpoise has an an eye so it can still be used with the old style configuration. I added a little shrink tubing to help with strain relief.

Here is the complete kit.

Weight is under 4 oz. which is less than a 1 oz gain over the old antenna. How does it play? Initial testing with an antenna analyzer showed SWR’s below 3:1. However, this was done quickly with the antenna more horizontal than vertical. It was a hot sunny day and it was time to get inside. This next weekend I have an activation planned and will wring the antenna out, but so far it looks very promising.

Paddle Mount for the IC-705

I kinda like the idea of being able to mount your paddle to your radio when operating portable. You can use the weight of the radio to help prevent the paddles from moving around and it frees your off hand for other tasks. We see examples of this with the Elecraft KX series of radios and there are some adapters for radios such as the Yaesu Ft-817/818.

I really like my IC-705. It is probably my best radio for POTA/potable operation. I think the only time I would leave it home is if weight became a problem or I needed to exercise one of my other radios. Recently, Begali came out with a mount to attach their Adventure paddle to the IC-705. It is a sweet set-up; however, the approx. $400 USD price tag got me looking for other alternatives. I have nothing against Begali, I own three of their paddles, and they are superb instruments. I think I wanted to tinker, and this gave me a good excuse.

For paddles, I have a set of Larry’s (N0SA) SOTA paddles. I love these paddles. When I go on an activation/Portable Operation, I bring these and my Begali Travelers. If I was going to do a SOTA activation, I would just bring Larry’s Paddles. Next was a trip to Tractor Supply Company (TSC) for a sheet of 16 ga. Steel. That set me back $16. I cut it to 3″ by 3 1/2″ using a cutoff wheel on my grinder.

I already have a stand I made out of 1″ x 1″ angle aluminum so I cut this to fit behind it.

The blue on the metal is Dykem Blue which is a layout fluid. In creating this project, I am only using hand tools. Power tools consisted of a grinder with a cut-off wheel. a hand drill, and my trusty Dremel tool. Here is a picture of me giving the mount a rough finish with a file.

My next step was to install the mount on the radio. I left the tail that will hold the paddles a little long to see where I wanted the paddles.

I am right handed so I mounted the paddle to the right of the radio. As a child, I broke my right wrist and lost a little range of movement so for me, I cannot use a paddle straight on. I found an angle of about 40 degrees to be about right. I also bent the mount down a bit to get the paddles close to level.

I turned one of the machine screw holes into a slot. That way I only have to remove one screw to install and remove the mount.

Next is a coat of primer, followed by a coat of flat black. I also added a clear coat to increase the durability of the finish.

Here is the finished product installed on the radio with the paddles.

The screws that hold the paddle to the mount are #4-40 x 1/4″. I am going to change the hex head bolts that hold the tilt stand/paddle mount to the radio with M4 x 10mm knurled head bolts so I can remove/install without tools. The mount itself weighs in at about 1 ounce.

This was a fun little project. The radio could move around on a smooth surface so something like a silicone mat would cure that, but on something like a wood picnic table it should be just fine. Except for the sheet metal this was built using whatever I had around the house. How does it play…

UPDATE

I got the final pieces in the mail. One thing I tried was to mount the paddles on the top of the mount. This also works very well and may even be better in some cases. The only button that the paddles get in the way of is the autotune button. It can still be reached fairly easily.

I also replaced the hex head bolts with knurled head bolts so I can install/uninstall the mount without tools. I got them in red, just in case I drop one. As you can see I only have to completely remove one bolt and loosen the other to remove the paddle mount. This allow the tilt stand to remain with the radio.

The bolts will tighten down with either one or both pieces; however, I only snug them down. That’s the completed project and overall I am pleased with the results. Next field trip is in a couple of weeks. 73 Scott

Vertical Antenna Support

I like to tinker. Always have and probably, always will. This past weekend while I was activating K-2171, I swapped out antennas to see if one was any better than another. My first antenna was my Frankentenna set up as a vertical. Later in my activation, I switched to my random wire vertical. To use this antenna, I had to shoot a line up into a tree. Band conditions were not that good, and truth be told, I am not sure which antenna was better; however, for this activation, I gave a slight edge to the random wire.

For those that have operated within State Parks, rules and regulations sometimes seem to get a little blurry when it come to operating amateur radio within park boundaries. There is a general consensus that Park Rangers do not like things in their trees. I personally have not had this issue, but I was never approached by a ranger. I operate CW with earbuds on, so I do not really attract attention to myself.

Recognizing, that it might be a matter of time before I get “caught” with something up in a tree, I thought I would look for a solution to solve a potential problem. I have a B&M Black Widow 20′ fishing pole that should work just fine for my random wire antenna. A trip to TSC got me a 4 foot piece of 1 1/2″ x 1 1/2″ Aluminum Angle Stock. Tools used were:

Layout was pretty simple. The angle for the pointy end was 20 degrees and the slots for the straps were 3/8″ by 1 1/4″ (approx). The total length of the stake is 28″

I got everything cut out and deburred. I added a coat of zinc chromate primer and a finish coat of flat olive paint.

I have two small Velcro straps that I had lying around that work perfectly,

Then by turning the stake around, it stores nicely on the fishing pole. Together the outfit weighs a touch over 1 1/2 pounds. This is easy to carry and by moving the stake more to the center, it would be better balanced for walking.

This gives you options. You should be able to use this anywhere you can drive a tent stake into the ground. With this setup, you can use many different antennas besides a vertical. I am going to try it with my 40m OCF dipole (I may have to mount it a little down from the tip).

When I do an activation, I like to carry a minimum amount of gear. Sometimes, I feel my Frankentenna is too big even though it fits in a small Buddipole bag. It is fun trying to operate with a small amount of gear. For my next activation, I will bring the pole with everything else fitting in an 8 liter Bucket Boss bag. Instead of the Bucket Boss Bag, I could use a small backpack. In fact, I am thinking about doing a couple of SOTA activations this year. I hope to hear you out there! de Scott KK4Z