It all started innocently enough. A nice fall weekend at Cheaha State Park to camp and operate my radios. While there I was planning on finishing up my POTA Kilo Award for this park.
Things started happening right at the time I got to the park. My reservation got messed up and I had to to take another campsite. This campsite was further from the comfort station bu at a higher elevation. Even at the higher elevation, cell service was very spotty which added to the wild weekend.
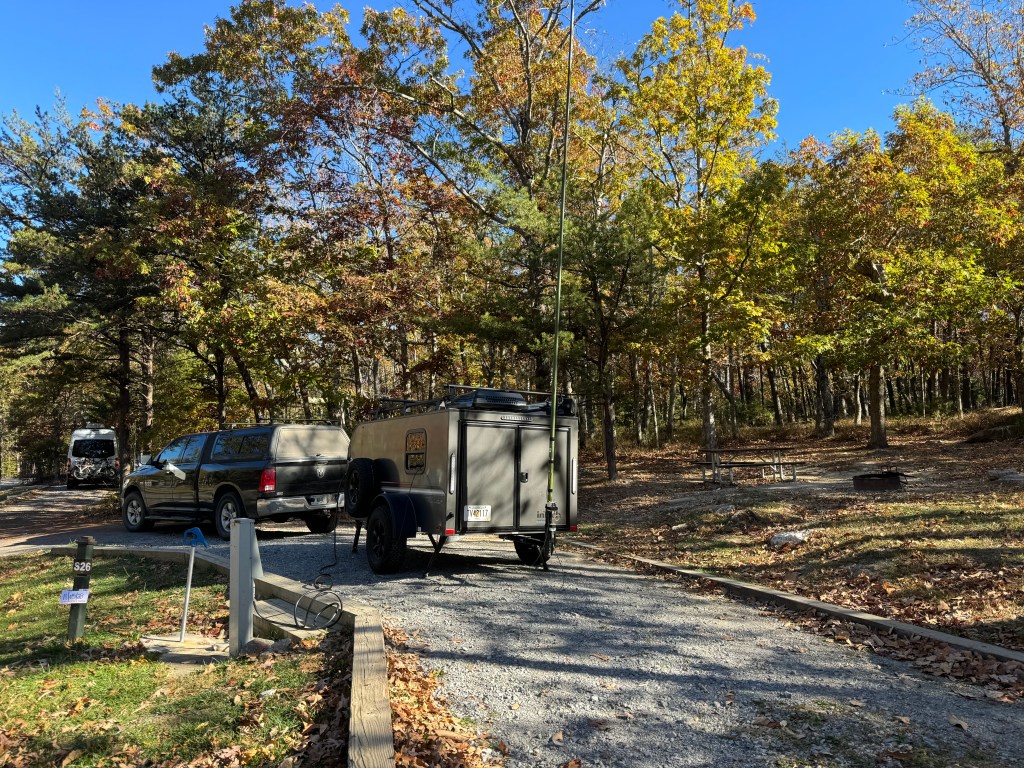
Getting setup, I put up my 28.5′ random wire antenna with a 17’counterpoise. I used a homemade 9:1 UnUn with a 1:1 current balun to feed my IC-7300 (Peter II). In between was my trusty LDG Z-11 Pro. I ran FT8 at 35 watts.
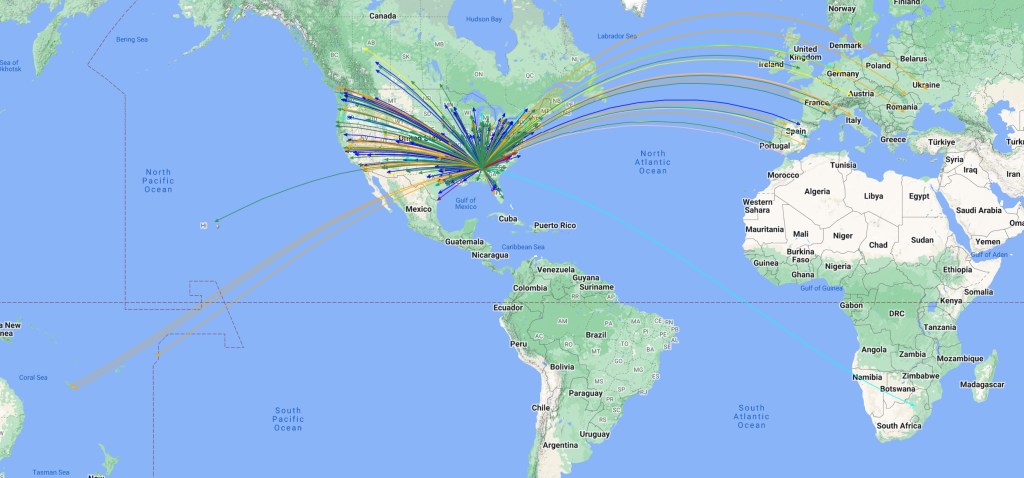
As soon as I started operating, things began to get squirrelly. I normally start on 20 meters in the afternoon and then drop down the bands as night falls often going back to 20 in the late evening. That didn’t happen. I only stayed on 20 for a little while before jumping down to 40, for most of the rest of the evening. This was not going to be a typical campout/POTA Activation. The next day I spent time on 20 but the MUF appeared to be much higher as I crept up the bands all the way to 10 meters. Typically, during an activation, 20 meters is my money band but this time 40 meters was the winner. Of the 465 contacts I made, 197 were on 40m meters and 157 were on 20 meters. I worked 46 states (except AK,CT,ND, and NH) and 15 dx entities. I had some interesting DX. I worked Germany, Portugal, Spain and Canada on 10 meters; Spain, Italy, and France on 12 meters; Samoa, New Caledonia, Ukraine, and Romania on 30 meters; and Hawaii on 40 meters. See the QSO Map.
On my home, when I got back to full service, I started receiving emails from the prior day from the SWPC with a bunch of Geomagnetic Storm Alerts. That explained the wild times on the bands. It was fun trying to figure out were to go to catch the propagation. I did manage to complete 3 Kilo awards before I left the park. The moral of the story is bad solar conditions can bring some surprising DX results. 73 de Scott
It all started innocently enough. This was my monthly camping trip where I take a weekend and go play radio somewhere. It gives me a chance for some FunComm and in a roundabout way EmComm. This month it was Black Rock Mountain State Park. The highest state park in Georgia. I really like this park and try to come here a couple of times a year. It works really well in the summer months as it is usually cooler here than in other parks. There is also a SOTA summit within the park (W4G/NG-027). I thought I would try both a POTA and a SOTA activation with the bonus that any SOTA contacts can be counted for POTA.
Radios for this weekend were going to be my new to me Elecraft K3/10 and my Penntek TR-35 with an Elecraft T1 tuner for SOTA. It was going to be a nice QRP weekend. Everything was going well until I arrived at my campsite. I got the trailer set up and when I reached for the cooler to start lunch, the cooler wasn’t working. Sigh, I had to troubleshoot the cooler before I could do anything else. I found out it blew a fuse and I didn’t have any spares. Luckily, the stereo circuit uses the same size fuse so I swapped the bad fuse for a good one and all is well. Note to self: Buy spare fuses.
After lunch, I set the K3 up and got ready to activate the park. I had no transmit power on the K3. Not on SSB and not on CW zip, nada, none. I spent the next couple of hours trying to troubleshoot the radio. No luck. Prior to the trip, I did replace some of the filters and added the KAT3 autotuner. I am pretty sure I tested the radio after the work I did. The funny thing is when I hit the auto-tune button, I get 5 watts out to tune the antenna. For CW, when I try to send, the TX led lights, but no output. I monkeyed with it on Friday and Saturday but to no avail. May have to send it in for repair. But wait! there’s more.
Prior to turning in for the night, I managed to sit on my eyeglasses breaking both arms. while my distant vision is pretty good, I need glasses for close-up work. Luckily, I made a few contacts on the TR-35 before the incident. I only made a couple of contacts on Friday due to trying to fix the K3, and made about half a dozen more before turning in and breaking my eyeglasses.
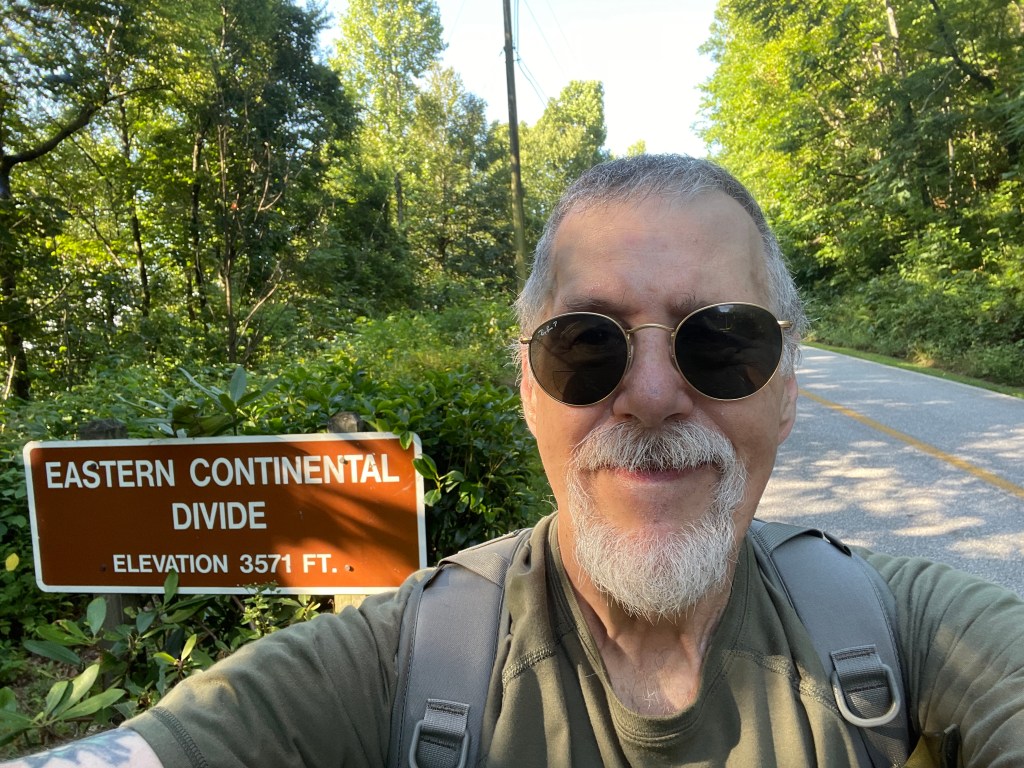
Saturday morning, I planned to hike from my campsite to the summit; however, I needed glasses so I drove to the trailhead which is on the way to town where I can get some readers. I have a pair of sunglasses that have cheaters in them, but they aren’t for extended use. I did use them to make the SOTA activation before heading into town.
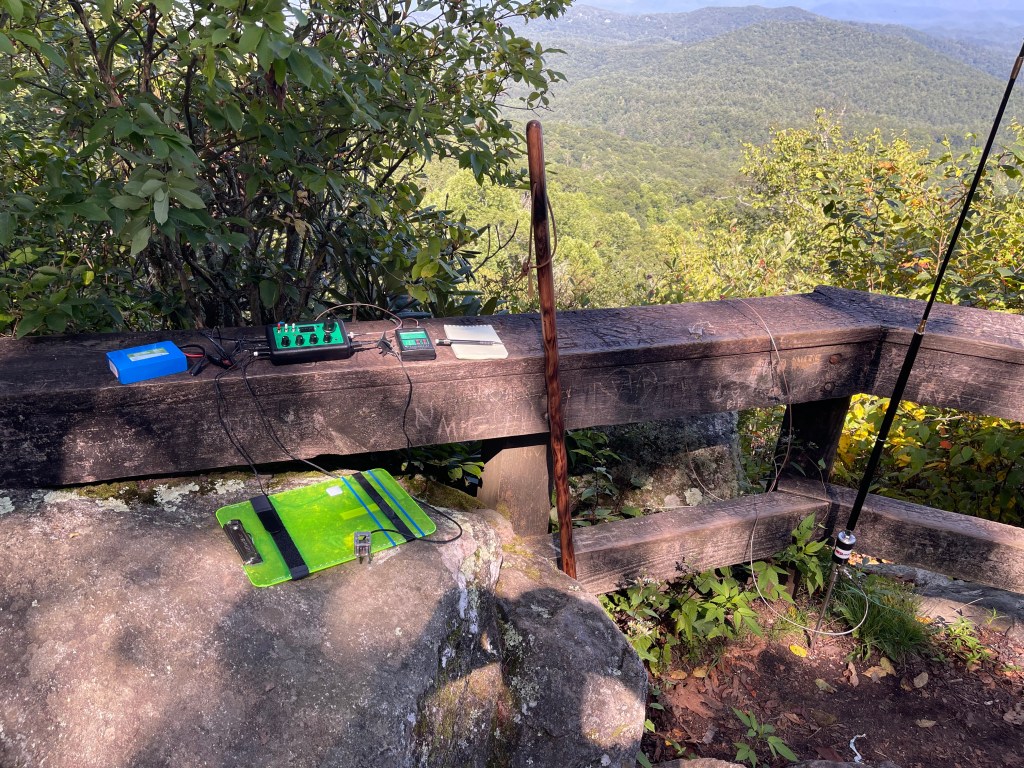
The hike from the trailhead to the Tennessee Rock Lookout was about half a mile or so. It was mostly uphill and what I would term a moderate climb.
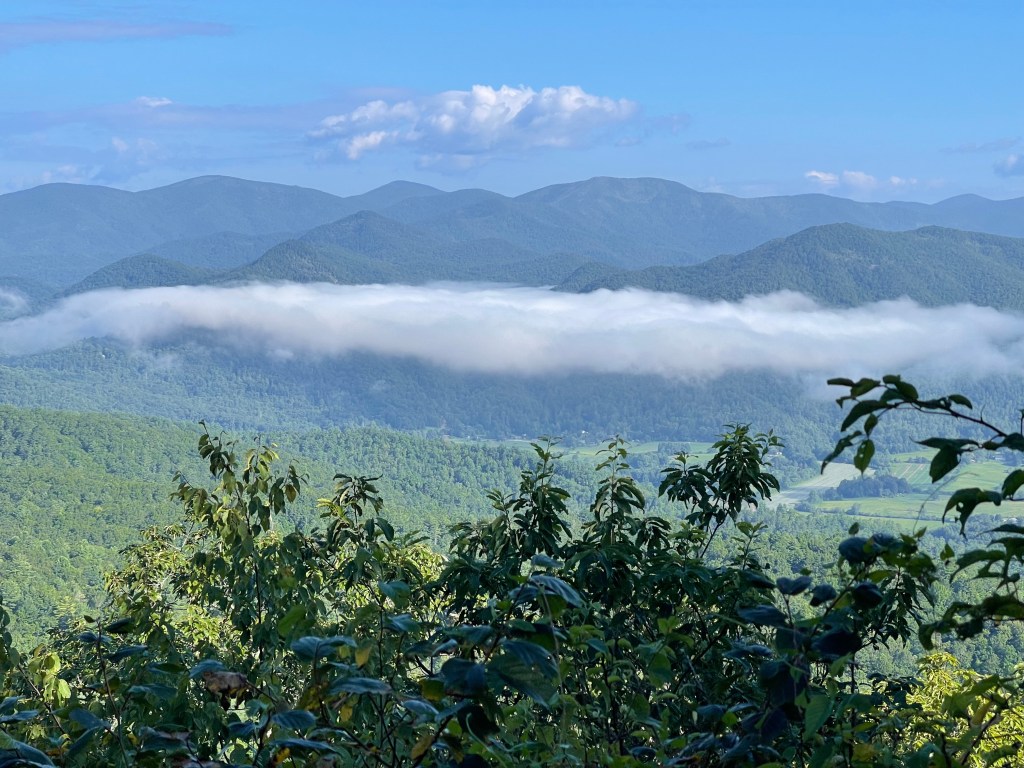
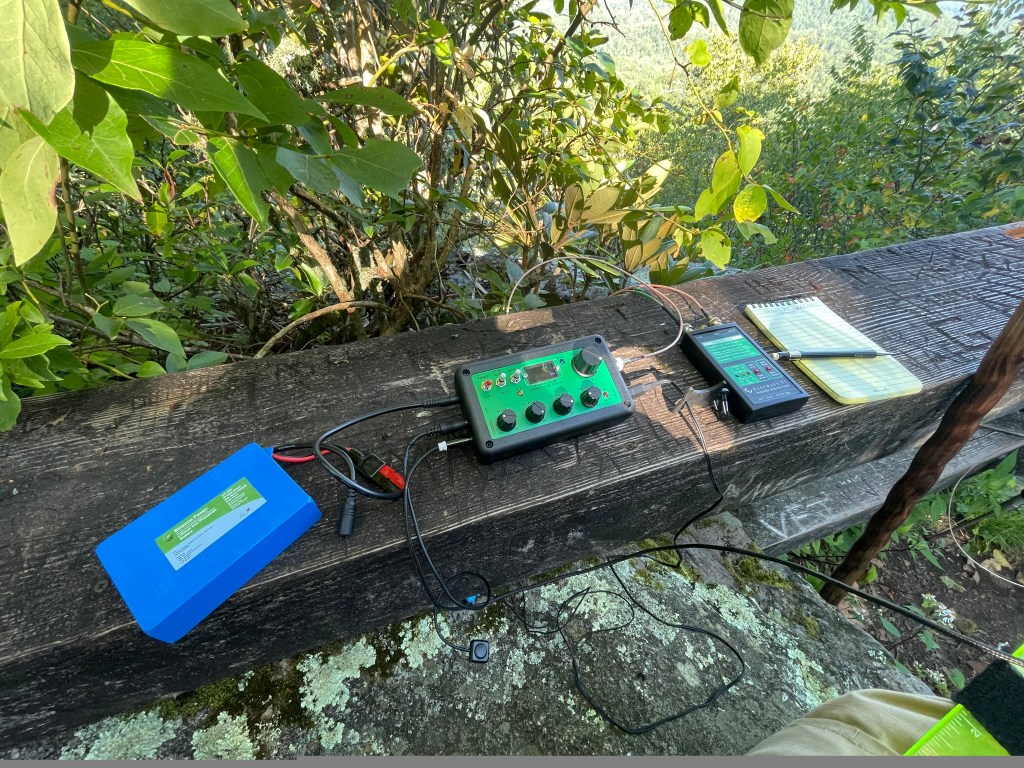
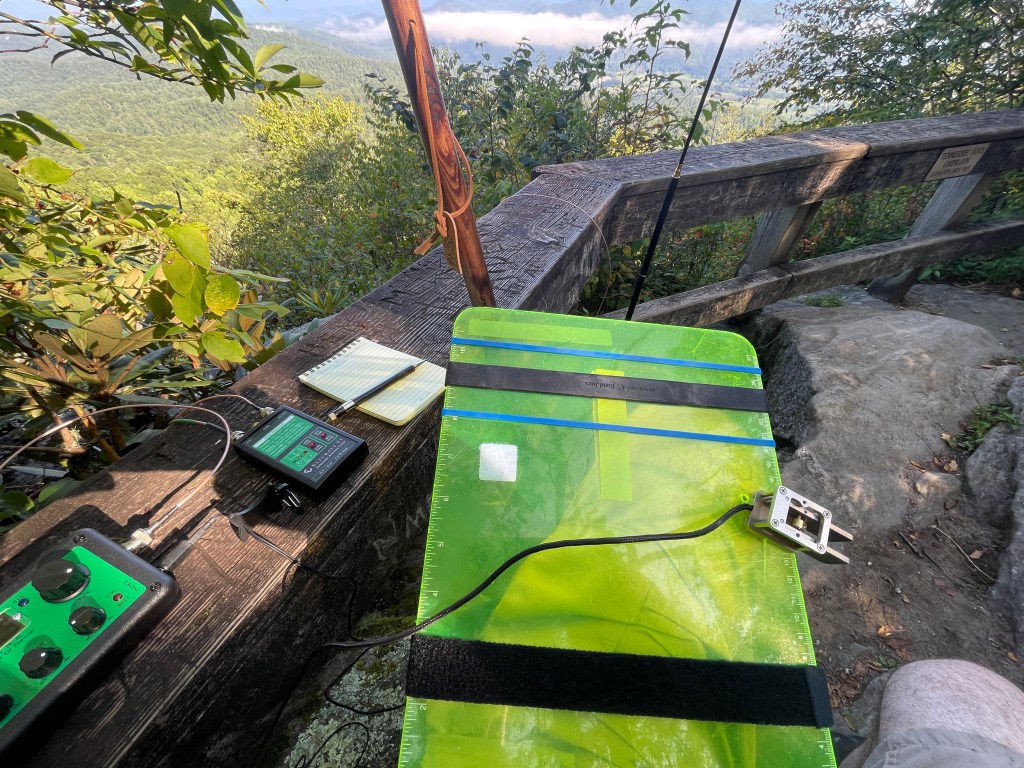
I set up a vertical antenna from my Frankentenna collection and the fence rail at the site provided a place for my radio, tuner, and battery. I used my flight deck for my N0SA paddles and iPhone. I am trying to get better at logging directly into Hamrs on my phone. Each time I do it I get better. Band conditions were not that good and it was a bit of a struggle to get contacts. Before I left the overlook I had 7 in the log enough for a SOTA activation and seal the deal for the POTA activation. It was a wonderful view of the valley from the overlook. It makes the huffing and puffing uphill worth it.
After coming down off the mountain, I drove into town and picked up a set of readers for my eyes and spare fuses for the camper. When I got back to base camp, I had lunch and tried to work on the K3 some more and yes, it looks like it is still going in for repair. The TR-35 did well for a little no-frills QRP radio. It only has 4 bands 40, 30, 20, and 17, so it’s not the best when the band conditions are up, down, and sideways. It is a great radio for SOTA though. Lightweight, 5 watts, and a decent narrow CW filter. I was glad to have it with me.
I made a total of 16 contacts. I would have liked to have made more, but given my “special” set of circumstances, I was able to complete an activation for SOTA and POTA. Below is a QSO Map courtesy of qsomaps.org and a YouTube Video of the activation. Note: The video did not escape the run of bad luck I had, audio is low.
Stuff happens and even though things didn’t work out the way I had planned, I was still able to make a SOTA and POTA activation. Plus I was able to check into my EmComm net on 40 meters. Every time I go to the field, I learn something new or I discover a weakness in my planning. For FunComm it’s not so bad, but for EmComm, where others may be depending on you, failure should not be an option. Practice makes perfect, or at least better. Till next time. 73 — Scott
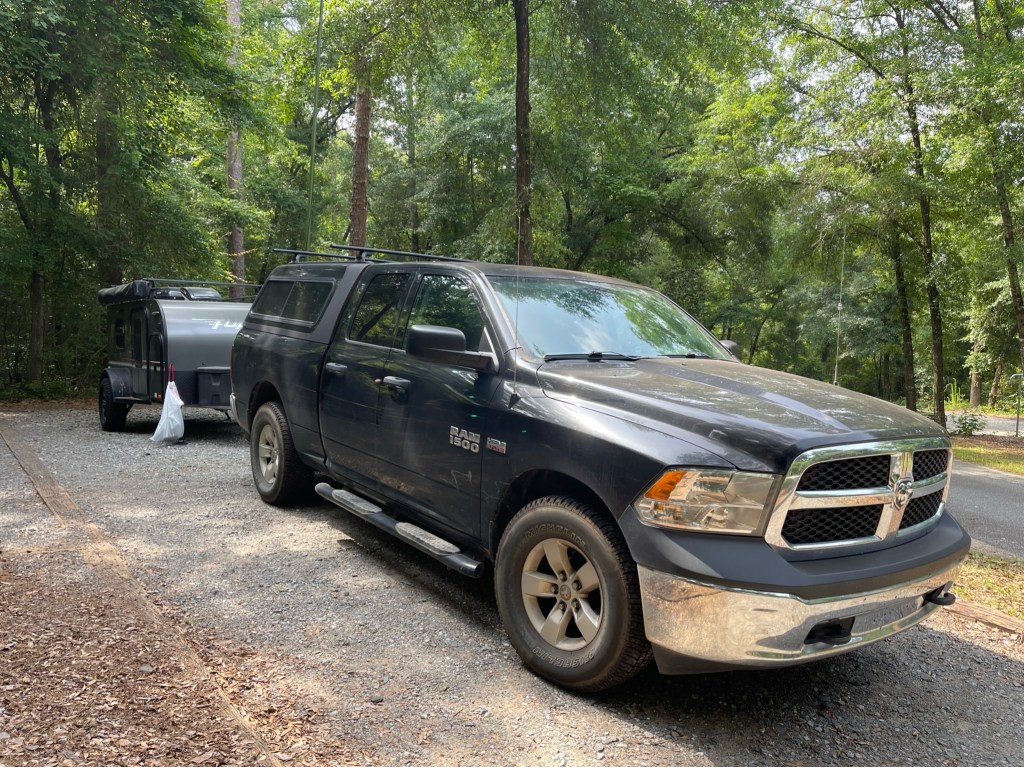
This past week I got to spend a few extra days at a park. My Church Youth Group was camping at this park and I offered to set up an amateur radio station to showcase what it can do.
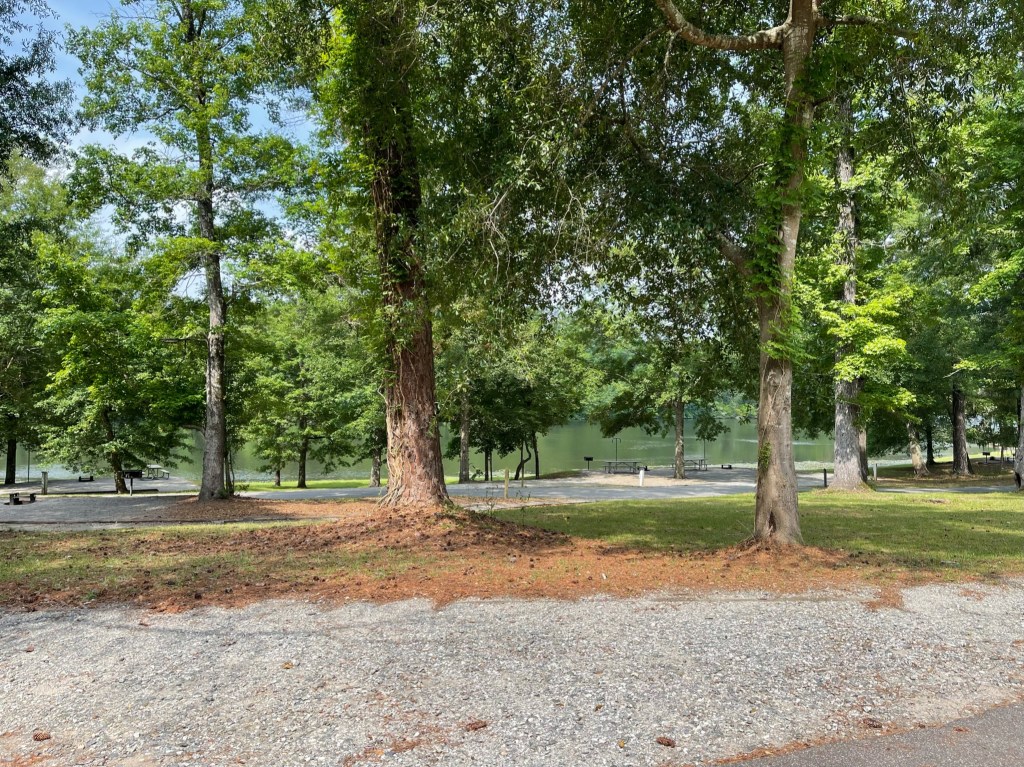
The park is one of my favorites. It has a small campground and it is always peaceful and quiet.
There are a couple of and lakes fishing is one of the activities available here. You can also rent kayaks for a bit of a paddle. My campsite this go around was nestled back in the trees, and while there was a campsite right next door, the campers were quiet.
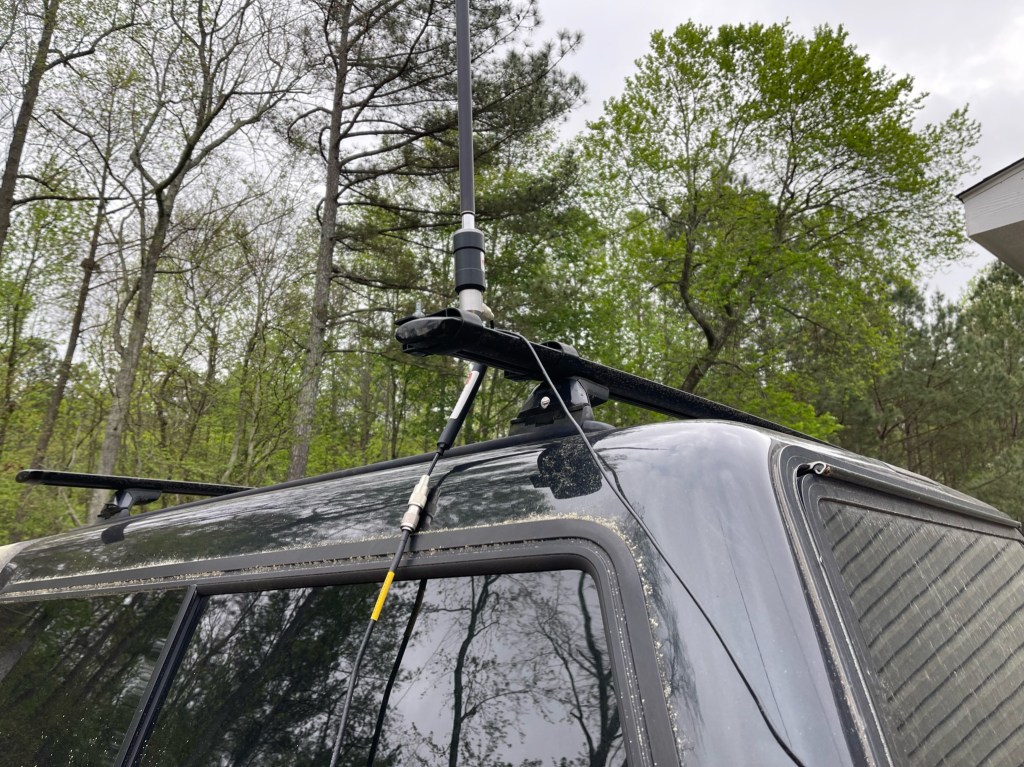
The antenna I used was my 28.5′ random wire antenna up a 31′ Jackite push-up pole. I got the green one and as you can see above, it almost disappears against the foliage.
Like last time, I had to mount the antenna to the truck due to trees over the camper.
Two new additions to the camper were screens and a radio desk. The screens were a kit designed for the camper. Installation was simple. You attached metal disks in the appropriate places and the screens attach by magnets. I mainly used the screens on the back door. It gave me a more open feeling and with the roof fan or A/C, I was able to keep the camper quite cool even in 85-degree heat. By keeping the side door closed, I had a nice breeze at the back. The desk was covered in a previous post but this was the first real workout it got. Here is a picture of the setup I used this weekend.
This would be a typical setup. There is room for a key (paddles) and everything is within easy reach. On the top shelf is a switching power supply, a Yaesu FT-710, LDG RC-100, and a Garmin InReach Messenger. This was another good workout for the FT-710. band conditions were good on Tues and only fair on Wednesday. My mode of choice was FT8. I was within 330 contacts of a Kilo and knew I could get it done. I ran the FT-710 pretty steady at 45 watts for almost 12 hours. The radio did not get warm and no hiccups were noticed. The screen is easy to read and most of the controls are in the right place. I find that in the field, the 710’s main menu, is a little too busy. Sometimes I have trouble finding the option I wish to change. Overall, the FT-710 is a likable radio. I am going to do some CW POTA Activations with the radio in the near future. I still feel that the FT-710 is very comparable to the IC-7300 and whichever brand you are married to, get that radio. If you are a new op or have no brand loyalty, I would still recommend the IC-7300 over the FT-710, because I feel the ergonomics are better. I still plan on keeping both radios.
Garmin InReach Messanger. This trip was the first time I took the InReach Messenger to the field. Cell service at Kolomoki is very spotty. A nice feature of Messenger is it uses an app on my iPhone. The app is very similar to other SMS apps. Once I got there, I was able to send a quick text home along with my location, downloaded the current weather, and spot myself on POTA. Messenger is so much faster than my old InReach (the first clunky big one). It is now a regular part of my kit and will be a boon to EmComm and FunComm.
FunComm. I have used this term a few times lately and probably need to explain it a little. Among other things radio, I am deeply involved in EmComm or emergency communications. I practice EmComm at home and in the field. Most of the time, the gear you see me take to the field, is the same gear I would take to an emergency. Enter Fun Comm, FunComm is using your EmComm gear for fun doing something like POTA. Each time I go out, I learn more about my gear and its capabilities. Everything is used, tested, repaired, or replaced. I know my gear. I have been to real-world emergencies, and I have had operators come up to me and tell me if I can help them fix their radio, they could be of help. Don’t be that guy. I have had my share of oops and blunders, but I take each experience and build upon it. Now, once a month me and my gear are tested, in a fun way of course. And if something fails, I lose a few contacts, and no harm is done.
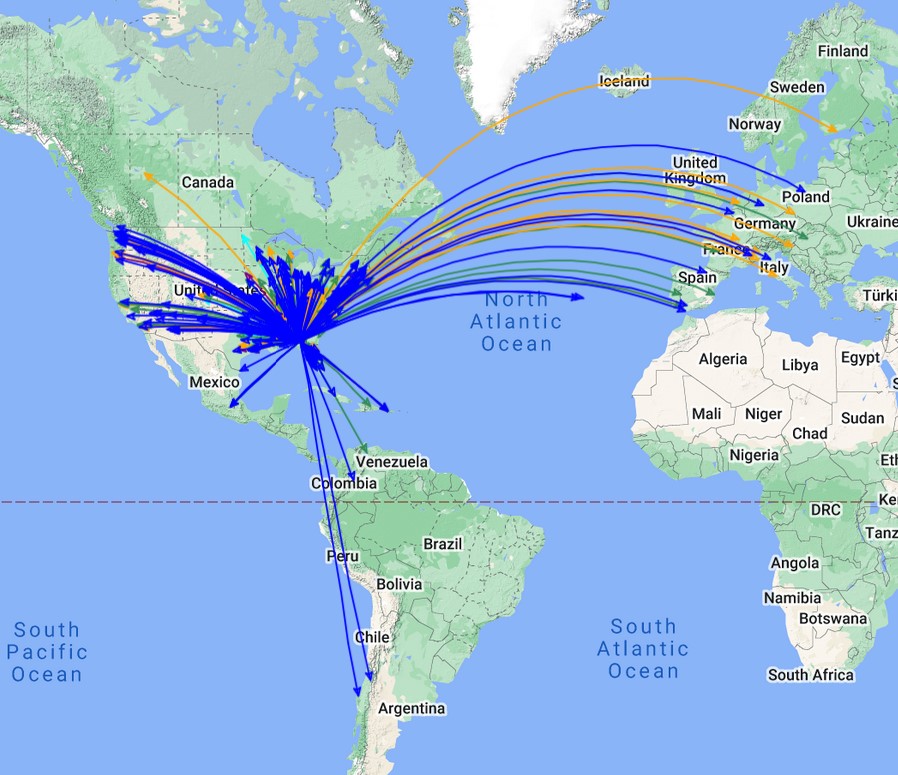
How did I do? Not bad really. I made over 400 contacts using FT-8 from 41 States and 20 Countries. Here is a QSO Map.
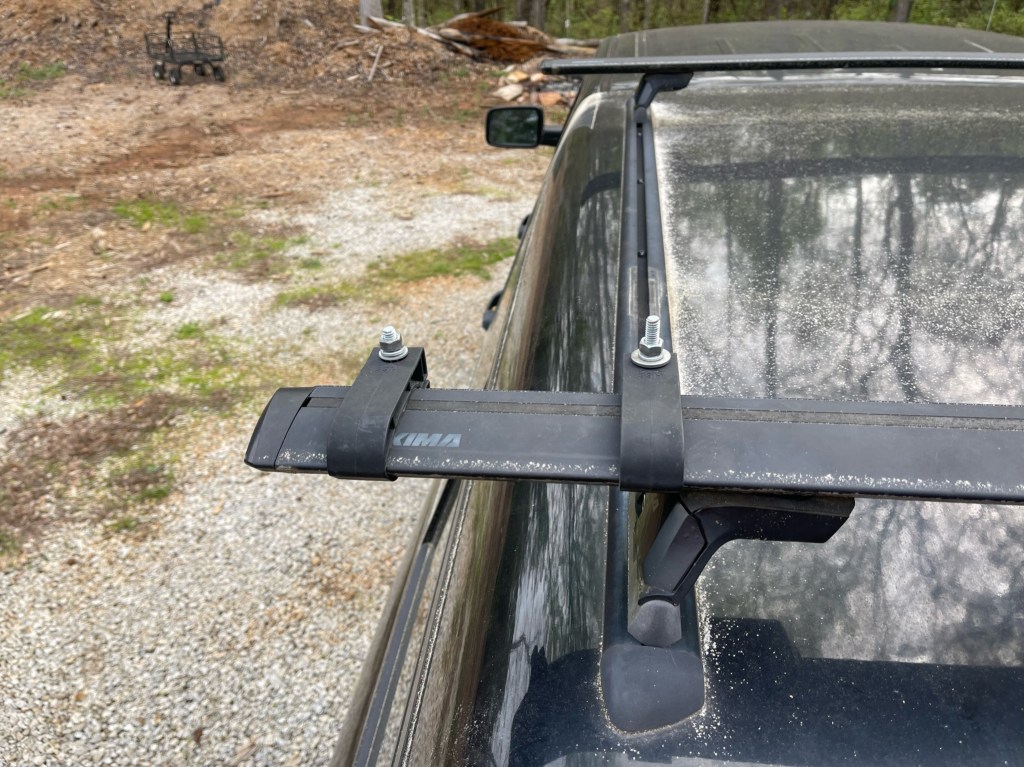
This is part two in my quest to make day activations more park (and park ranger) friendly. With day activations, you tend to be more out in the open and more readily observable. My idea was to reduce my visual signature. Part one was creating a desk for my radio so I could operate it from the cab. With this post, I am adding another modification to my Frankentenna. This antenna is set up to perform multiple roles in different configurations. The whole thing fits inside a regular Buddipole bag and stays with the truck. For this installation, I added a mount to my camper top’s cargo bars and made a ground wire attached to the truck bed. I had most of the parts on hand and spent about $10 for a piece of steel stock.
I start off with a pair of bar clamps I had from another project.
Taking the bar stock, I drilled two 5/16 holes in the end and one 3/8 hole in the center. I then cut it to length, deburred the edges and then gave it a coat of zinc chromate primer followed by a coat of Rustoleum Flat Black.
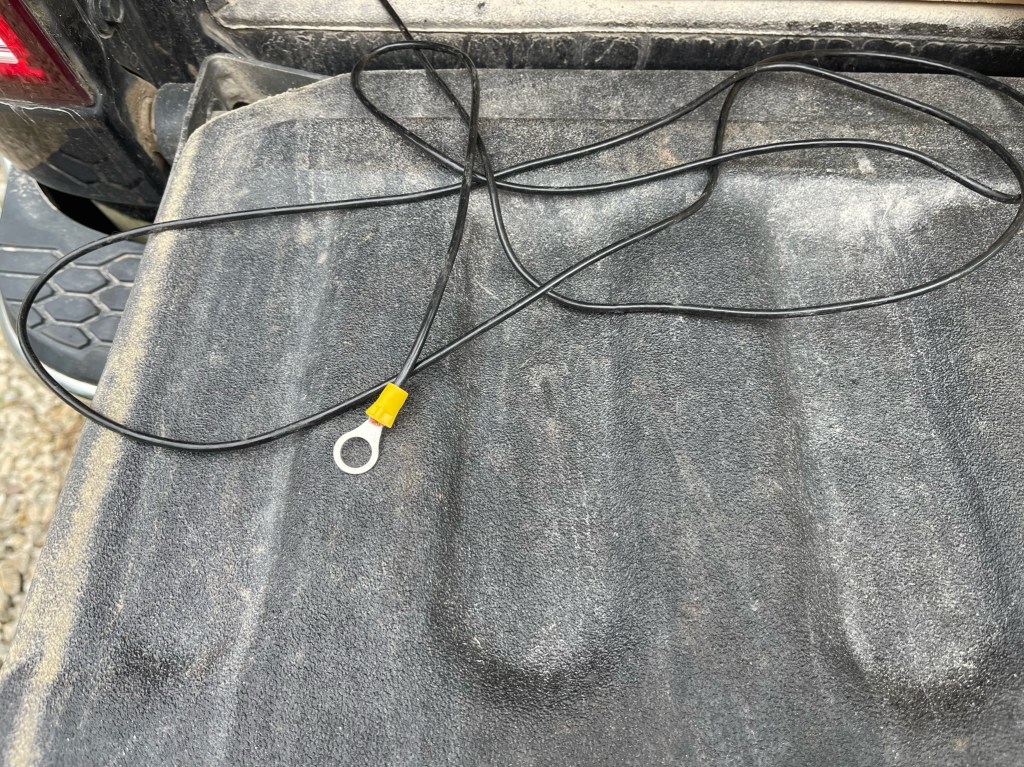
The ground wire was made from some surplus Flexweave I had. I took a grinder and ground a bare spot near the back of the truck bed, secure the wire with a sheet metal screw, and then painted it flat black.
The stuff they use on the bedliner was thick and took some doing to get even a little bare spot! Here are the parts I pulled out of the Frankentenna bag.
To install, I put a bolt through the bracket I made, then added the ground wire, then the Chameleon Micro, then the whip antenna (Buddipole). From there I add the choke and a length of RG-8X.
I can put this up and take it down while standing on the tailgate. No wires in the trees, no holes in the ground, and nothing to trip over. As you can see the visual impact is minimal.
How does it play? I think quite well. Checking the SWR, for 30 meters and above I am below 3.0:1. Forty meters is 3.4:1, 60 meters is 4.9:1 and 80 meters is 5.7:1. All are very usable with a good tuner. In fact, 160 meters is 8.8:1 but that’s a little sketchy.
Overall, I am pleased with the installation and I feel the performance will be similar to the other Frankentenna configurations using the whip. Now, finding the time to get out. Thanks to all who visit my blog, I appreciate you taking the time to read through my stuff. 73’s for now — Scott
Thank you, Thank you, Thank you. This blog, KK4Z.com recently surpassed 10,000 views. I never imagined that happening. I appreciate your support as it encourages me to continue on. KK4Z.com will remain without fees or subscriptions with the ideal of enhancing the amateur radio community by sharing my experiences and projects to spur you on to your own adventures wherever and whenever they may be.
Recently, I purchased an LDG RT-100/RC-100 (hence RT-100) for use with my Yaesu FTDX10 in the field. As I have said previously, The FTDX10 now resides on the desk at the home QTH. It is better suited there. My main field radio is my trusted Icom IC-7300 so why not adapt this tuner to it.
The RT-100 is an auto tuner and doesn’t require a special tuning circuit. Icoms are set up in such a way that when using a tuner such as the LDG Z11 Pro or the Icom AH-4, the radio automatically detects the tuner and switches off the internal tuner. It also supplies power at the tuner port through pins 3 and 4. With the RT-100, there isn’t a way to make this switch since it only requires power to operate. What I wanted was to use the power from the tuner port on the back of the IC-7300 to power the tuner and turn off the internal tuner. I had to “trick” the IC-7300 into thinking there was a tuner there in order to get it to supply power to the RT-100 through the tuner port.
I only needed pins 2, 3, and 4. Pin 4 is the ground, pin 3 is power and pin 2 is what tells the radio an external tuner is present. It requires a resister in series and I used a 47K ohm 1/2 watt resistor. I did not incorporate the switch and I did not utilize pin 1. Here is a parts list: Molex Connector https://tinyurl.com/mw24chcc 47K Ohm Resistor https://tinyurl.com/43ax8kc9 2.5mm Power Cable https://tinyurl.com/2p8d466j
Starting with the basic parts.
It’s just a matter of soldering the parts to the pins.
And putting the pins in the right holes.
The pointy end of the connector is facing up.
I added a little heat shrink and electrician’s tape and viola!
When assembling, make sure you put the pins in the right holes and in the right direction. The pins will go in either way as I found out.
How does it work? It works well. The Icom power at the tuner port is rated at 1 amp and the tuner draws about 500 milliamps. This saves me from having to make an extra power connection. The RT-100 is a tune as you go type tuner so the tune button on the radio does not work. The way I tune when not using a digital mode (software has its own tune function), is to switch the mode to AM and then hit the transmit button or PTT button if a microphone is attached. This transmits a carrier at about half the wattage of your current power level. When the tuner finishes, stop the transmit, switch the mode back, and you are ready.
My next adventure will be the first weekend in April during the GA Parks on the Air Contest. I will not be contesting, but I will be operating portable at a park using FT8 and CW. I may try some FT4 to. Hope to hear you out there – 73 – Scott
I try to get out camping about once a month. It’s good for the soul. While out I am often activating the park. Also fun and relaxing. I book my campsites 3-4 months in advance to ensure I have a place to go. Campgrounds in the southeast fill up fast. This trip was up into Tennessee to the Cumberland Mountain State Park. It was a lovely 4-hour trip with only 44 miles being on an Interstate Highway. The park is located in the Cumberland Plateau Region of Tennessee and my drive included driving through Sequatchie Valley. The valley is rather narrow and you can see the walls of the valley on both sides. I couldn’t ask for better weather. Highs in the 70’s and lows in the ’50s. After a hot summer, it’s was a welcome relief.
The campsite was cozy. This park had a higher density than I normally like, but there was lots of foliage and greenery around to set my karma right.
Band conditions were not that good and I operated FT8 on this trip. I am working on my N1CC award which is working 10 different bands from 10 different parks. Because the park was so far away (200 miles) with gas prices what they are, I wanted a one-and-done which is why I stuck to FT8. My setup was what I have been using on the past couple of trips.
The radio was my IC-7300 and the tuner was an old LDG Z-11 Pro. Since I had shore power, I used a Powerwerx Switching power supply. The computer is a Lenovo Thinkpad T14 which I bought refurbished from Lenovo. It’s a really nice computer. The mouse is a Logitech Pebble which is Bluetooth. For FT8 I also use a GPS dongle to keep the clocks on my computer and radio synced. On FT8 the further you drift from the actual time, the probability to connect to another station goes down. Even at home I sync my computer every day that I use FT8. I also keep a flash drive plugged into the computer. I use ACLog and I have it set up that it makes a backup copy to the flash drive every time the program shuts down.
The antenna is my homebrew random wire. It’s a 29-foot wire setup as a vertical using an MFJ-1910 pushup pole attached to my truck’s trailer hitch. I use one 17-foot counterpoise with a homemade 9:1 UnUn and a 1:1 current balun for a choke. I highly recommend a choke on any portable operation. Keeping RF at the antenna prevents all sorts of things on the radio. I really like this antenna. It has become my go-to antenna. I have probably made over 1,000 contacts with it from all over the world. Since there are no holes in the ground or wires in the trees, the park staff remains happy. On this trip, my campsite was next to the campground host. I can’t say enough about the antenna, it just works, it goes up and down in a couple of minutes, and didn’t cost that much to make. You do need a good tuner though. With this antenna I managed to get my 10 bands. 6-meters was dead the whole weekend so I had to to the other end — 160 meters. On digital modes, my antenna can tolerate about 65 watts max before toroids get saturated. On 160, it’s more like 35 watts. 160 was looking a little sketchy, however, I managed 2 contacts, here is one. I have used this antenna from 6-160 meters.
The IC-7300 has become one of my favorite field radios. Compact, lightweight, and full of features. It has never let me down. I bought mine back in 2017. The only protection I use on it is a set of Portable Zero rails. When I transport it, it rides in a Dewalt Tough System box with no additional padding. Every time I pull it out and plug it in, it works. I have had other brands of radios, but I always seem to head back to Icom at least for HF.
I operated from Friday afternoon until Saturday night. I made 350 QSO’s from 43 States and 18 countries. I worked them from 10 meters to 160 meters. It was a blast. I now have 8 parks with 10 different bands. I have one with 9 and one with 7. I should be able to wrap those up in the next couple of weeks. Then I think I’ll go back to low power (less than 10 watts) and get my CW mojo back in order. See you out there — Scott
For the past 7 months, I have been walking to improve my health. Recently, I bought a bike to change up the routine a little. I think it would be fun to ride while I am camping and the times when I am not at the highest point in the park, I could ride my bike there. When I bought the bike I had them put on a rack. This left a very nice mounting tab for the antennas.
I had some angle aluminum from a prior project so that is where I started. I cut the aluminum to match the width of the rack and then started shaping it. I only had hand tools and there was a lot of filing involved.
The hole on the left is for a SO-239 mount and the one on the right is for a 3/8-24 bolt. The SO-239 is attached to some thin coax probably RG-174 and terminated in a female SMA connector. Perfect for an HT. To get the wide radius I cut in the metal with a Dremel tool.
This is where the hand filing came in. After the filing came sanding the old finish off and applying coats of primer, flat black paint, and a clear coat. Installed on the bike it looks like this with a Diamond NR-770HA dual band antenna.
Out by me, the repeaters are VHF, I tuned it for that band. I ended up with this.
With an HT on the other end, I was able to hit repeaters 10 miles away while under my carport. I called it good.
I also wanted to work HF using my bike as a stand. I won’t ride with the HF antenna installed but rather set it up when I stop. I mounted a 3/8-24 coupler to the antenna mount and wanted to use my Buddipole 12′ fiberglass antenna. I tried several different combinations and the one that worked best was using my Chameleon Micro Hybrid transformer with one counterpoise.
SWR on 6 meters through 40 was acceptable and can easily be handled by a tuner.
I didn’t try HF on the bike but I have used the configuration before. It’s part of my Frankentenna system. The only thing left I have to add is a handi-talkie mount which I will probably order today.
There you have it. A fun little project that will add to the adventure of ham radio. I hope this may spur some of you to try a few projects of your own. Most of these projects I do are with hand tools. I do have a cheap drill press that only seems to be a little better than a hand drill. Get out there and do it. 73 — Scott
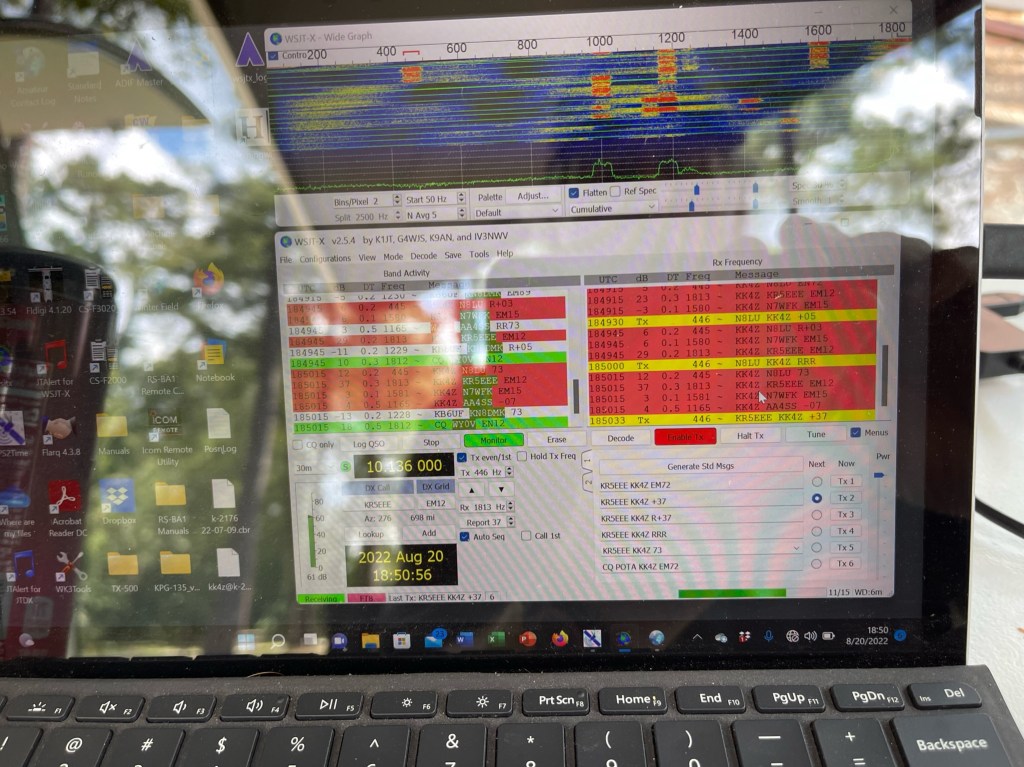
Wow! What a weekend. 438 QSO’s successfully uploaded to POTA. What a blast it was. I had a great time, got little sleep, and tried some new gear. Thanks to all who worked me and thank you for your patience as I worked through some of the pileups. Mode this weekend was FT8. I was going to try some CW but FT8 was running non-stop. Much of the time my WSJT software looked like this.
I was QRV from Friday 1800 hrs Zulu until Sunday 0500 hrs Zulu. Band conditions were good. I didn’t see as much DX as I have in the past, but I still managed to work quite a few. This time I got about 98% of my contacts by activating, that is calling CQ. I did hunt a few, mainly P2P and a few call signs that interested me. So, you don’t have to hunt to get the Q’s. The secret is picking a frequency and holding it. There were times I held a frequency for hours.
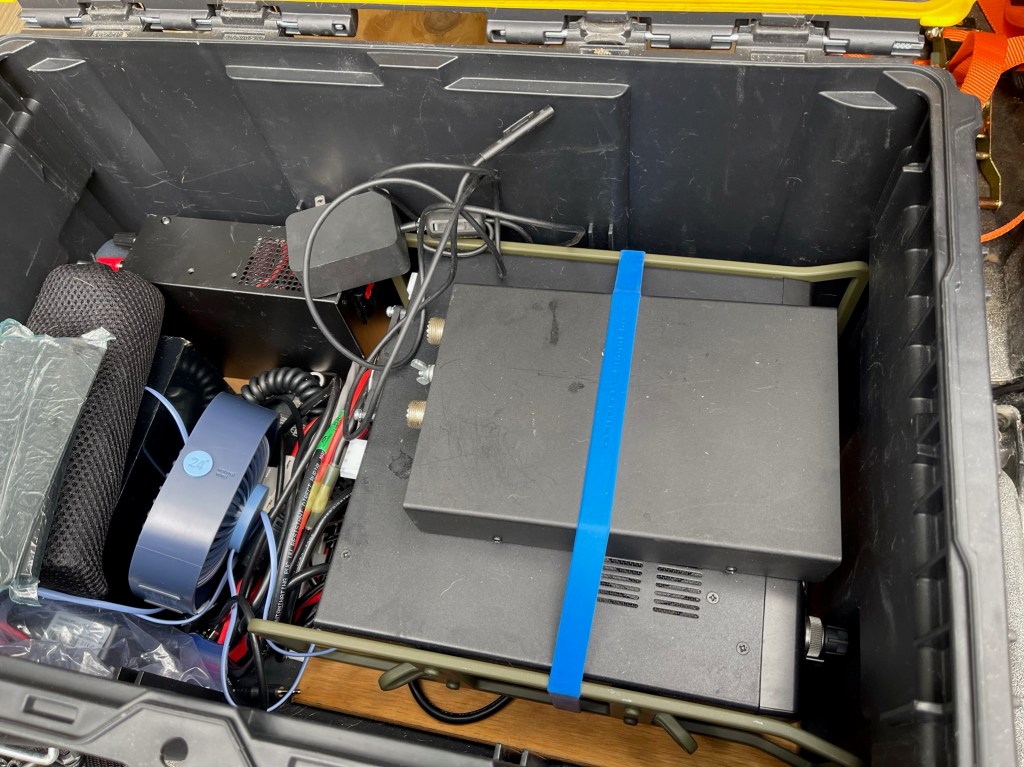
GEAR For this trip and the past few, I have been bringing my IC-7300. I am trying to complete my N1CC award and having a few extra ponies under the hood helps. There has been some discussion about packing radios. I put mine in a box with the rest of my stuff. I do have Portable Zero Escort side rails, but that’s about it https://tinyurl.com/45dcupe5. They keep the knobs away from the box sidewalls.
Shack setup is pretty straightforward.
I can be QRV within 30 minutes from the time I pull into the site. The computer is a Microsoft Surface Go2. I use a USB hub to attach everything to it but if to jiggle it even slightly, it drives WSJT software bonkers. I may look to replace it. The tuner is my old LDG Z-11 Pro which I have had for over 15 years. It takes a lickin’… For coax, I run RG-316. I don’t see the need to use anything bigger. After this trip, I am redoing my radio box. After every trip, I do a mental after-action report. This time I decided I am bringing too much stuff.
What is new? This time I brought the KK4Z enhanced random wire antenna. This is a 29.5′ random wire antenna with a 17′ counterpoise. Same old, same old. What is new, is I added a 9:1 UnUn rated at 250 watts PEP and a choke balun.
I use my truck hitch and an MFJ-1910 – 33′ pole to get it up in the air. No holes in the ground, no rope in the trees.
This was a pretty exposed campsite. I had Park Rangers and Camp Hosts drive by all day long. All they would do is wave at me. The other secret is don’t make excessive noise. With FT8 I keep the volume turned way down and with CW I use Skull Candy Ear Buds https://tinyurl.com/2p89mz8u. The benefit of this antenna setup is the amount of power I can use. With my Chameleon transformers, I am lucky to run 35 watts and only 6-80 meters. With my antenna, I can run up to 65 watts without anything getting warm on 6-80 meters. On 160 meters, I have to reduce the power down to 25-35 watts. A larger choke balun may solve that problem. This past weekend I was running 50-65 watt range just to see and I had no problems. This antenna will become part of the Frankentenna system. So I guess I have a new favorite antenna. It gets the job done (see map above) and it keeps the campground staff happy. One of the real benefits is how little space it takes up and its low visual profile. If I am beyond the eyes of those who care, I can easily sling it up into a tree.
I do have a short video about the activation on YouTube.
I like to use random wire antennas. My favorite is a 29.5′ antenna with a 17′ counterpoise. I usually use a 5:1 (Chameleon) or a 9:1 (homemade UnUn with it. I have noticed with either combination, some stray RF finds its way back to the radio and me. To combat this, I have a Chameleon Choke balun which is nice but it is rather clunky and uses RG-8X coax. There are times when I am operating QRP, I use RG-316. So I decided to see if I could make a Choke balun using RG-316.
For a toroid, I found a FT114-31 from KF7P Metalwerks. These are rather small.
The toroid I believe cost about 3 bucks plus shipping. I had a 3′ RG-316 jumper with BNC connectors on each end. With a little bit of fiddling, I got 6 turns through the toroid without having to cut a connector. The next step was to straighten out the turns and set them in hot glue. I also applied a ty-wrap at turns 1 and 6.
Hot glue is never an easy medium; this time I managed to keep it off of me. Even though it is messy looking the turns are secure. Toroids are generally brittle and can easily break. I am not always gentle with my gear so I decided to first wrap the toroid in coax seal or “elephant snot”. This will seal out the weather and provide a little bit of a cushion. After putting it on I molded it to the toroid.
Because this stuff is very sticky, I then wrapped it in Scotch 88 electrical tape.
The whole thing weighs in at 3 ounces and should handle somewhere up to 70 watts. It ain’t pretty, but I have less than 10 bucks rolled into it. I will be taking it out this weekend to a park to try it out. I to hear you out there. 73’s Scott
UPDATE 08/16/2022
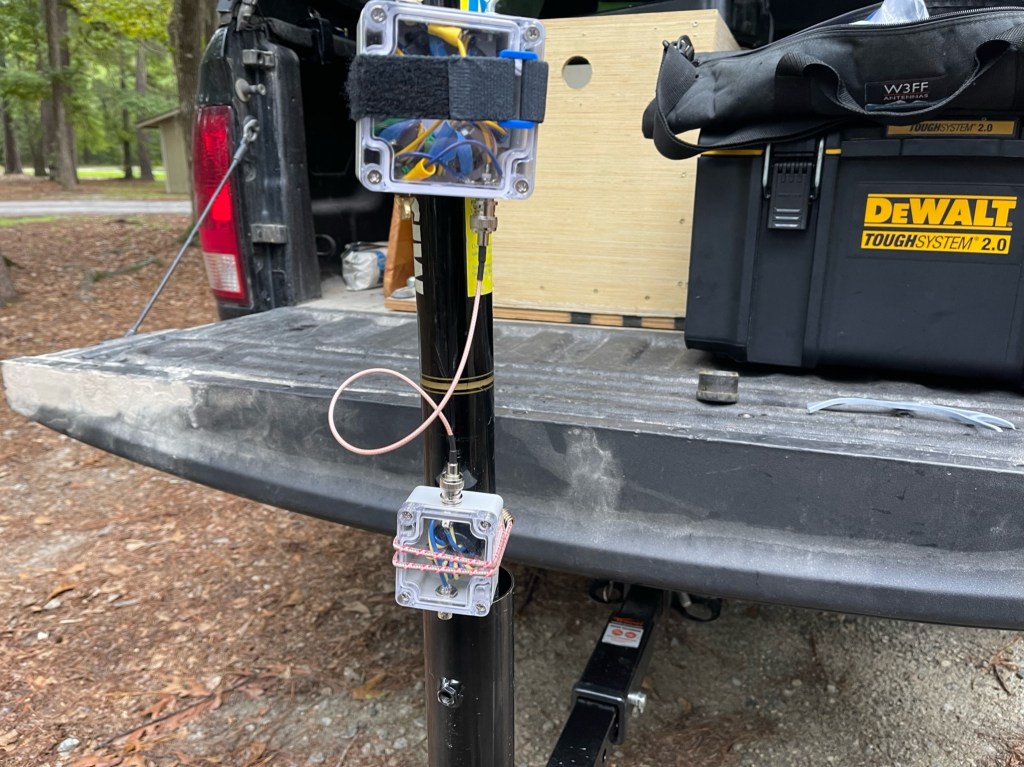
Today I managed to get into town and buy some wire for my choke project. While there, I bought some heat shrink tubing for my first project. The heat shrink cost more than the little box I had for my second choke. Here is the revised choke with the new heat shrink along with the new choke.
The new choke is made with 16 ga wire, I could’ve and probably should’ve used 18 ga. The toroid is a FT114-31 and it is wrapped 6 turns. the toroid is secured to the bottom of the box with hot glue. Here is a picture before I put the lid on.
Here is the final product.
The box weighs about half an once more than the coax choke. Of the two, I prefer the box, mainly because the toroid is wrapped with primary wire and not coax. It’s a little easier to wrap and looks neater. More than likely, both will perform about the same. For my next outing, I will have an antenna totally made by me. 73 de Scott
Cheaha State Park (K-1037) is one of my favorite parks and it is also the closest. It will probably be my first Kilo Award. The summer POTA Support your Parks Weekend fell on July 16 and 17 (Zulu). I got to the Park Friday morning to work a guy on 2 meters who was about 60 miles away. I did this as a part of N1CC award. I needed 2 more bands for this park. I stayed all day Friday and packed it in mid-morning Saturday. The whole activation was done using FT8 with a new app for my iPad.
GEAR I brought a lot of gear with me mainly to try to accommodate the 2 meter sked and to try to have an antenna or two for 6 meters. Six meters turned out to be a bust this weekend. The radio was the IC-705. Normally my radio gear goes in a box like this along with a few antenna bits and a tablet/iPad.
The antenna was my K4SWL antenna was is a 29.5′ random wire antenna with a 17′ counterpoise. The antenna was matched with the Icom AH-705 tuner which did an excellent job.
The antenna was held up with a MFJ-1910 33′ push-up pole. The pole was attached to the truck with a Flagpole holder and hitch extender so I could flip the tailgate down. The campsite was a group camp and while it had spectacular views it also had little shade. This was a primitive campsite, so I could not bring my camper with me. Since this was a one nighter, I decided to sleep in the truck bed. It would be a little cozy, but doable. In the end I stayed up all night anyhow. The shack looked like this.
I had plenty of batteries with me as this site does not have electricity. I discovered that my Bioenno Power BPP-160 power pack could run things for a long time. I also brought my Bioenno 40 watt foldable solar panel to help keep the power pack charged up. Next time I won’t bring near as many batteries. The fan you see is USB powered.
All in all, the station performed very well. I made 250 contacts all FT8 from all over the world. I even managed to get Alaska and Hawaii during the activation. Ten watts and a wire.
Glitches One of the things about getting out with your radios, is you actually see how they work in the field and then you can improve your setup. Apart from bringing too much stuff, I only had a couple of glitches. I’ll do the easy on first.
This is the first time I left my push-up in the flag holder for any length of time. I had some mild wind there and it caused the pole to rattle around some. Rubbing against the flag holder, scored the bottom tube a little.
The cure was simple. When I got home, an application of some Gorilla Tape, should take care of things.
The second glitch was the app I used on my iPad. It’s called SDR Control for Icom. It’s a really sweet app with a lot to like about it. Here are a couple of screenshots.
The interface was easy to use. I did not use a keyboard or a mouse with this. I did put the app through he wringer. I used it straight for almost 24 hours. I like using my iPad because I can power it from the same batteries as my radios — no AC adapters. I also liked being able to hold it in my hand to use it. The app does have a few short comings; enough to put it aside and allow the developer to iron out a few bugs. I spoke at length about these on my YouTube channel, so for here, I’ll give a summary: 1) The app randomly disconnects from the radio or completely shuts down. Restart/reconnect often take multiple tries and all data in the FT8 window is lost. 2) During FT8, the app will pause while another station contacts the DX. The app waits until it hears a CQ before it will transmit. The DX will often work several other stations without calling CQ. This allow other stations to “jump the line”. 3) The app will auto-log after both stations give a “73”. However, if another station call you prior to the “73”, the app will jump to the new station and the old station will not get logged. need to set the auto log to maybe RR73. 4) The logbook needs at least one user defined field that can be sticky. In POTA we use the ADIF field my_sig_info, to log which park we are at. RumLog has this feature.
It was a fun activation and I enjoyed pulling an all nighter; something I haven’t done in a long time. I didn’t plan on it but the DX stations kept rolling in. Until next time 73 –Scott