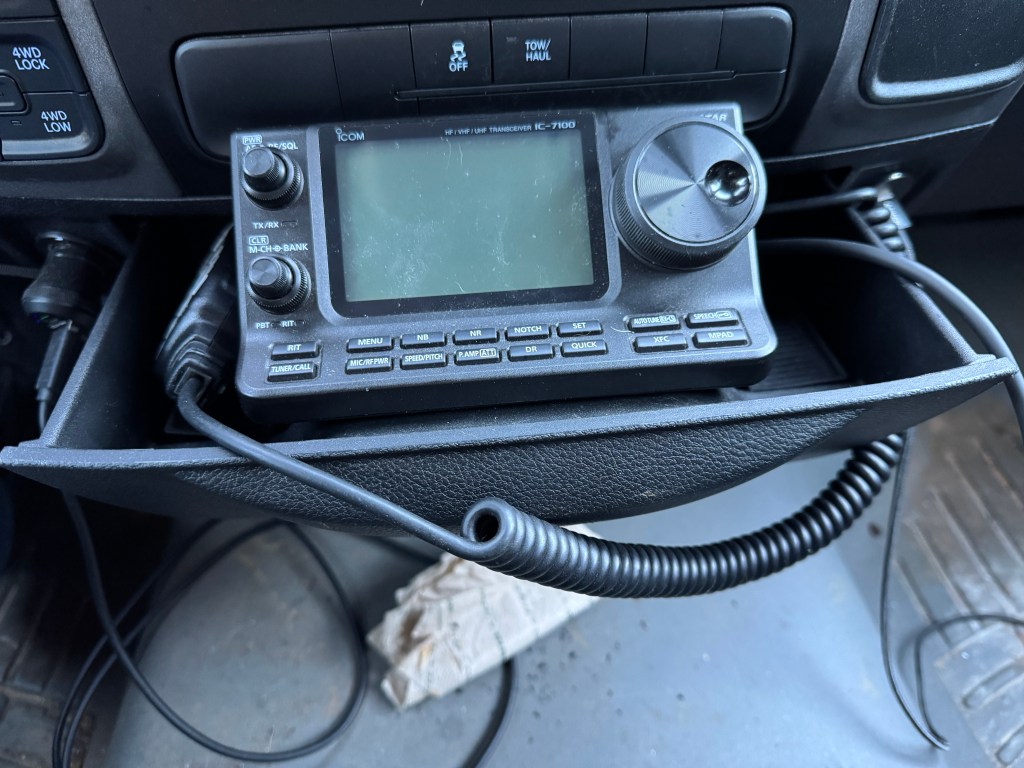
Last year I installed an IC-7100 in my truck. You can see the installation details here IC-7100 Install. The installation went pretty smoothly and I have used the radio on VHF and HF. The only fault I could find with the installation was how I mounted the control head. I used one of those Lido cup holder mounts. No matter how hard I tightened everything down, they still worked loose leaving the control head to wobble around.
Yesterday, I decided to fix this. It was simple. Using a 3 1/2” 1/4-20 bolt, some nylon bushings, washers lock washers and rubber grommets, I mounted the control head to the pull out drawer In my center dash.
I drilled one 5/16” hole in the bottom of the drawer. I put a lock washer and a washer on the bolt and pushed it through the bottom of the drawer. I then added 2-3 washers, a 1” nylon bushing (1/4” ID) a 1/4” rubber grommet, and another nylon bushing. The bushings, and washers acted like shims to keep the control head level and allow me to tighten the bolt without damaging the control head. The rubber grommet added a little extra “squeeze” so the lock washer would engage the bottom of the drawer.
It took me about an hour including driving to Tractor Supply for the hardware. It cost me about $6.
The control head is now firmly mounted to the truck and there is even a space for the microphone. The only thing I have left to do is reroute the control cable under the mat. This installation is more secure and looks nicer. I even get a cup holder back! 73-de Scott
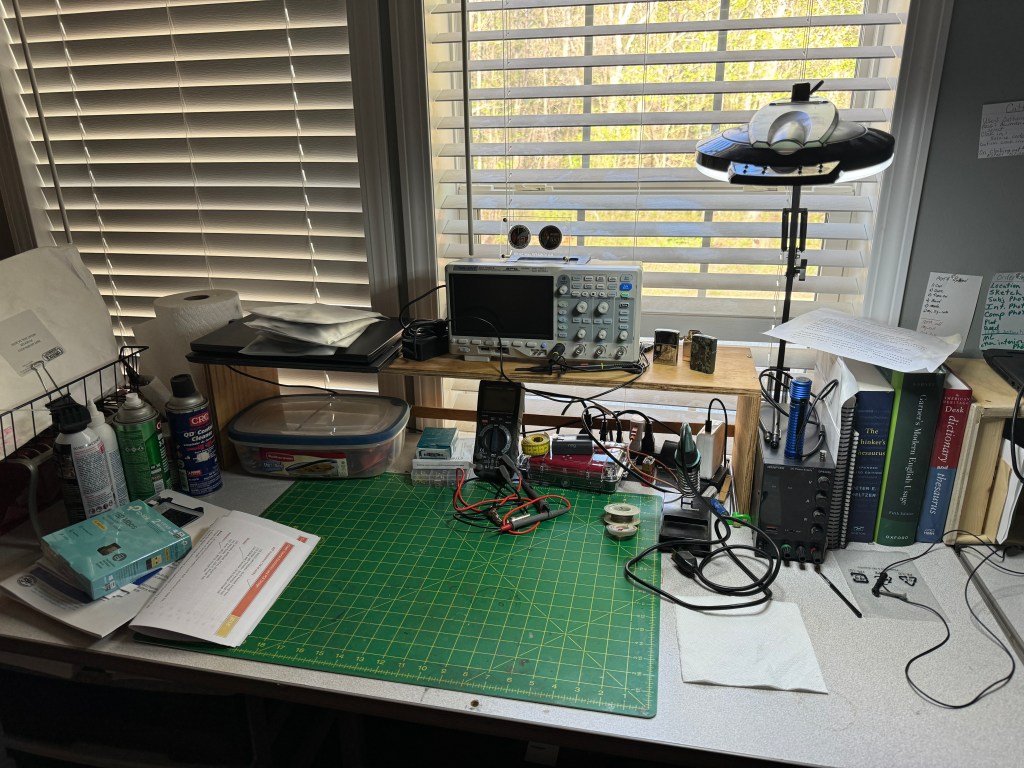
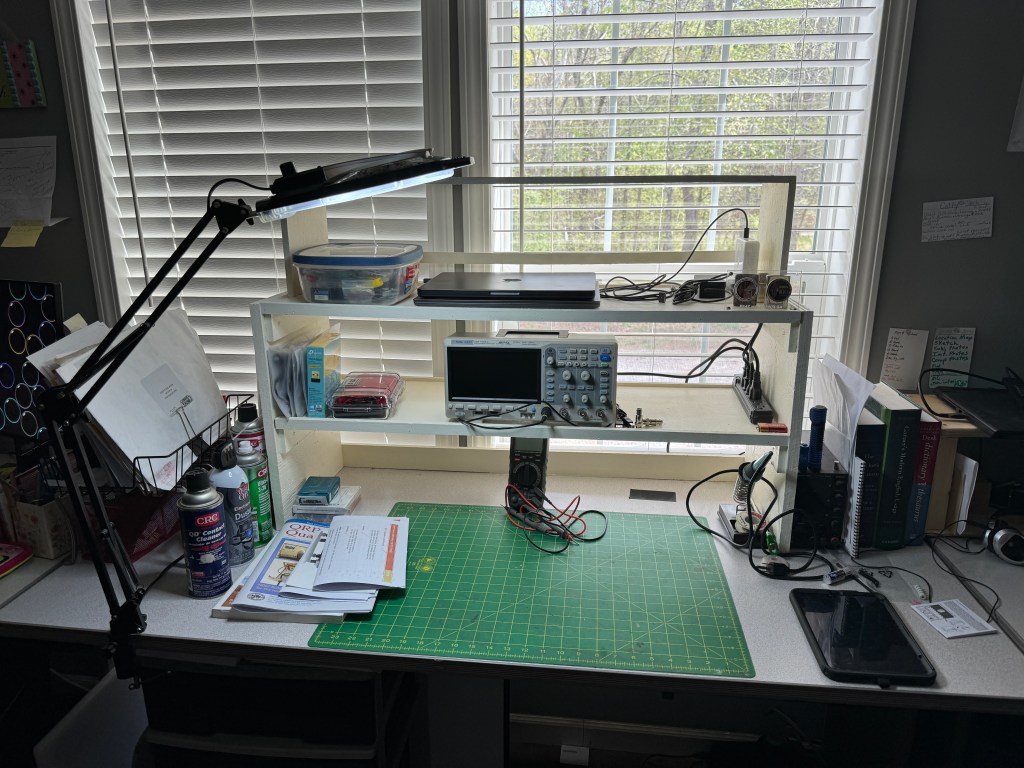
Change is inevitable. In this case my workbench. As I branch out into other fields of study my requirements for a workspace change. As I said earlier, I want to take the time and learn more about electronics. I’m not sure what I am going to do with it once I learn it — but that’s a story yet to tell. I recently added an o’scope to my quiver of test equipment. As I progress, there will be more to add. Looking at my current workbench (above) it was getting crowded and adding more equipment will quickly bring it to overflowing. Time to put on the thinking cap.
My first consideration was how to create more desk area. Horizontally, I am at my max so vertical was the only diredtion left. I decided I was going to build some shelving. I made a rough sketch and then took a trip out to my sheds. Using a mish-mash of plywood I was able to salvage enough from my scraps to build the shelves. The sides are 3/4″ CD plywood and the shelves themselves are 1/2″ premium grade. The shelves are 3′ wide and 12″ deep. vertical spacing is 8″ – enough for most test equipment. Some of the dimensions are a little off due to some warping of the plywood, but in general, the shelves are level and the whole unit does not wobble. Each shelf has a 1/4″ lip and the bottom of the shelf has a 2″ piece of plywwood across the back to prevent things from rolling where they shouldn’t. The shelf was glued, screwed and nailed using stuff I had on hand. The only thing I had to buy was some paint as all the stuff I had was dried out (I did look). I had to move my light to the other side of the bench so it would reach the work area. Fancy tools for this project included a table saw and a finish pneumatic nailer. The table saw is a godsend as it can quickly dimension lumber.
In the picture below, you can see that I now have more space with room to expand my test equipment. I believe next up will be an Arbitrary Waverform Generator with a Frequency Counter.
The third shelf was the original shelf shown at the beginning of the post. It was painted and repurposed. I will probably store my laptops up there.
Because the shelves are open in the back, they still let a lot of light in. I haven’t gotten my parts from DigiKey yet so the building/experimenting part is on hold. However, I am pressing forward with the written/video portions of my class.
Thanks for stopping by and checking out my (mis)adventures. When time permits I try to get on the air for a little CW fun. First quarter 2024 has been real busy, hopefully it will smooth out. Unitl next time 73-Scott
Plato’s Republic he said that *our need will be the real creator* or the proverb as we know it today *necessity is the mother of invention*. Recently, my friend Thomas K4SWL acquired a Yaesu FT-891. During his YouTube video, he expounded on how much fun he had with it. It did indeed look like fun. During this time I was pondering about doing more day activations instead of overnights. With the cost of everything still climbing, the need to conserve becomes apparent. I thought an FT-891 might really be a great radio for these day activations. Then reality set in.
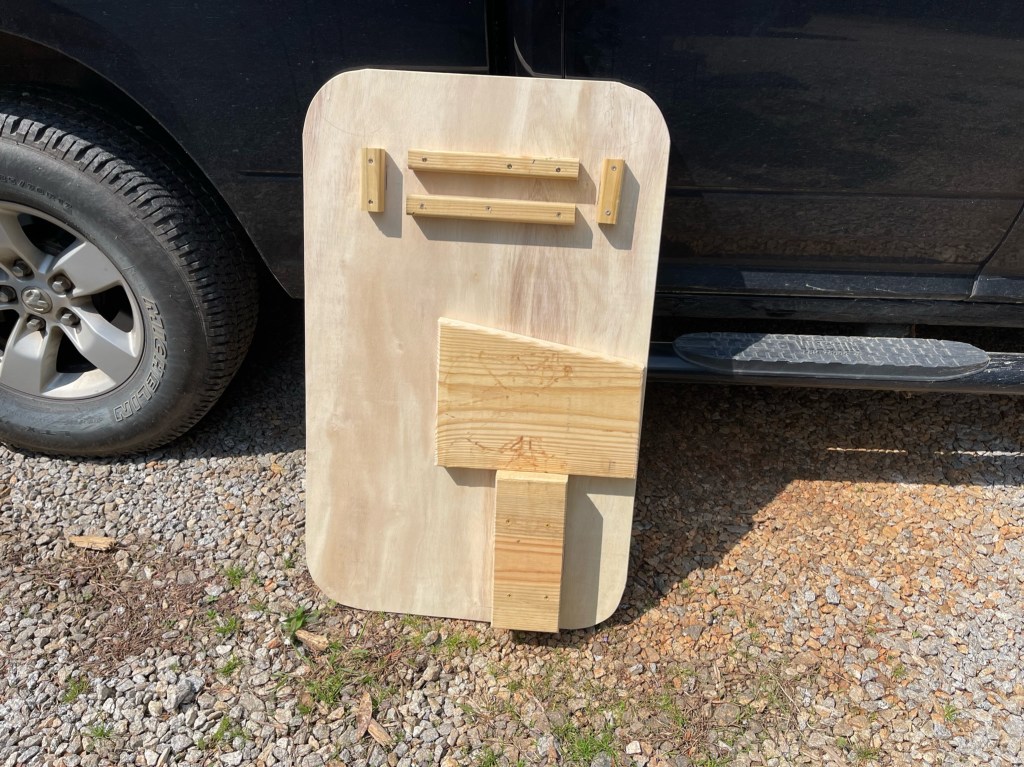
I already have a number of projects I am working on and misc things like maybe having to replace my old 33′ push-up pole, it was not in the stars nor was there a twinkle in my wife’s eye when I mentioned it. In reality, the IC-7300 is a great radio and does everything I need to do especially in the field. I don’t need another radio, I have 3 100 watt radios and 3 QRP radios. I still wanted an easy setup for these one-day activations. I want to drive to a park, set up in a few minutes, operate, tear-down in a couple of minutes, and head for home or another park. I also wanted to make my day activations park ranger friendly. To me that means trying to be inconspicuous. I have two projects planned. The first is a desk for my truck. I am making a desk to sit over the center console and front passenger seat big enough to hold my IC-7300, a laptop and a CW paddle. My plan is to secure the desk to the truck and the radio to the desk. I also wanted to make this as cheaply as possible. I used stuff I had on the property such as a half sheet of plywood and some construction lumber. The only things I had to buy were some screws and eye-bolts, about 14 dollars worth.
The plywood was cut to 24 x 38.5 inches. The length covers the center console and front seat while still allowing me to get to the heat/AC controls. I gave the corners a generous radius and I broke the edges with a router. On the underside, I used a 2 x 12 to make a spacer for the center console where the cup holder is and a leg for the other side over the passenger seat. The spacer is glued and screwed to the desktop but the leg is not attached. This is to make it easier to store. I made a socket for the leg using 2 x 2’s. It’s probably easier to look at a picture than me to try to explain. I added eye rings to the rear of the desk and use a bungee cord to secure the desk to the passenger seat. The only other thing I did, sprayed the top with polyurethane. Note. I am not a carpenter or cabinet maker. I use rough hand tools to get the job done and I am often making do with what’s on hand or what’s the cheapest way to do it.
Putting the desk in the truck, everything feels good. I brought out my IC-7300 and laptop and placed them on the desktop. There appears to be plenty of room for both plus a set of paddles. I will use the desk a few times before I decide where the radio will end up and then figure out how to secure it. I am pleased with the result. While I thought having an FT-891 would be fun, in reality, the IC-7300 is better suited to my operating style.
The desk was comfortable to use and the truck can be driven when it is installed. Without the laptop, there is plenty of space for a notepad or an iPad. Now, if I could just find the time to get out and operate. 73 — Scott